

Before you can learn how to baste a quilt, you first have to make a 'quilt sandwich'—that perfect stack of your backing, batting, and quilt top. Basting is what temporarily holds those three layers together, and it’s your secret weapon against the dreaded puckers and shifting that can happen during quilting. The most common ways to do this involve using curved safety pins, spray adhesive, or large hand stitches to make sure everything stays put.
Why Perfect Basting Is Your Quilt's Best Friend
Let's be honest: basting is the unsung hero of the quilting process. It’s the foundational step that makes sure all those hours you poured into piecing your quilt top don't end in frustration. When you baste well, you get a stable, unified project that's a dream to quilt. But if you rush it, you’ll be fighting with puckers, pleats, and shifting fabric with every single stitch.
Think of it as the temporary glue holding your masterpiece together. Its only job is to keep the quilt top, batting, and backing moving as one, whether you’re quilting by hand, on your home machine, or sending it off to a longarmer. My goal here is to get you past the theory and into the practical skills you need for a flawless finish, every time.
Setting The Stage For Success
Before you even grab a pin or a can of spray, you need to understand the core principle of a great baste: even tension. A perfectly basted quilt sandwich is smooth and flat, but not stretched taut. You’re aiming to get rid of any slack that could bunch up and turn into a tuck or pleat under the needle.
We're going to dive into the three most trusted methods that quilters rely on day in and day out, and I'll break down the specific situations where each one really shines.
- Pin Basting: A tried-and-true classic. It's reliable, easy to adjust, and a favorite for both beginners and quilters who have been at this for decades.
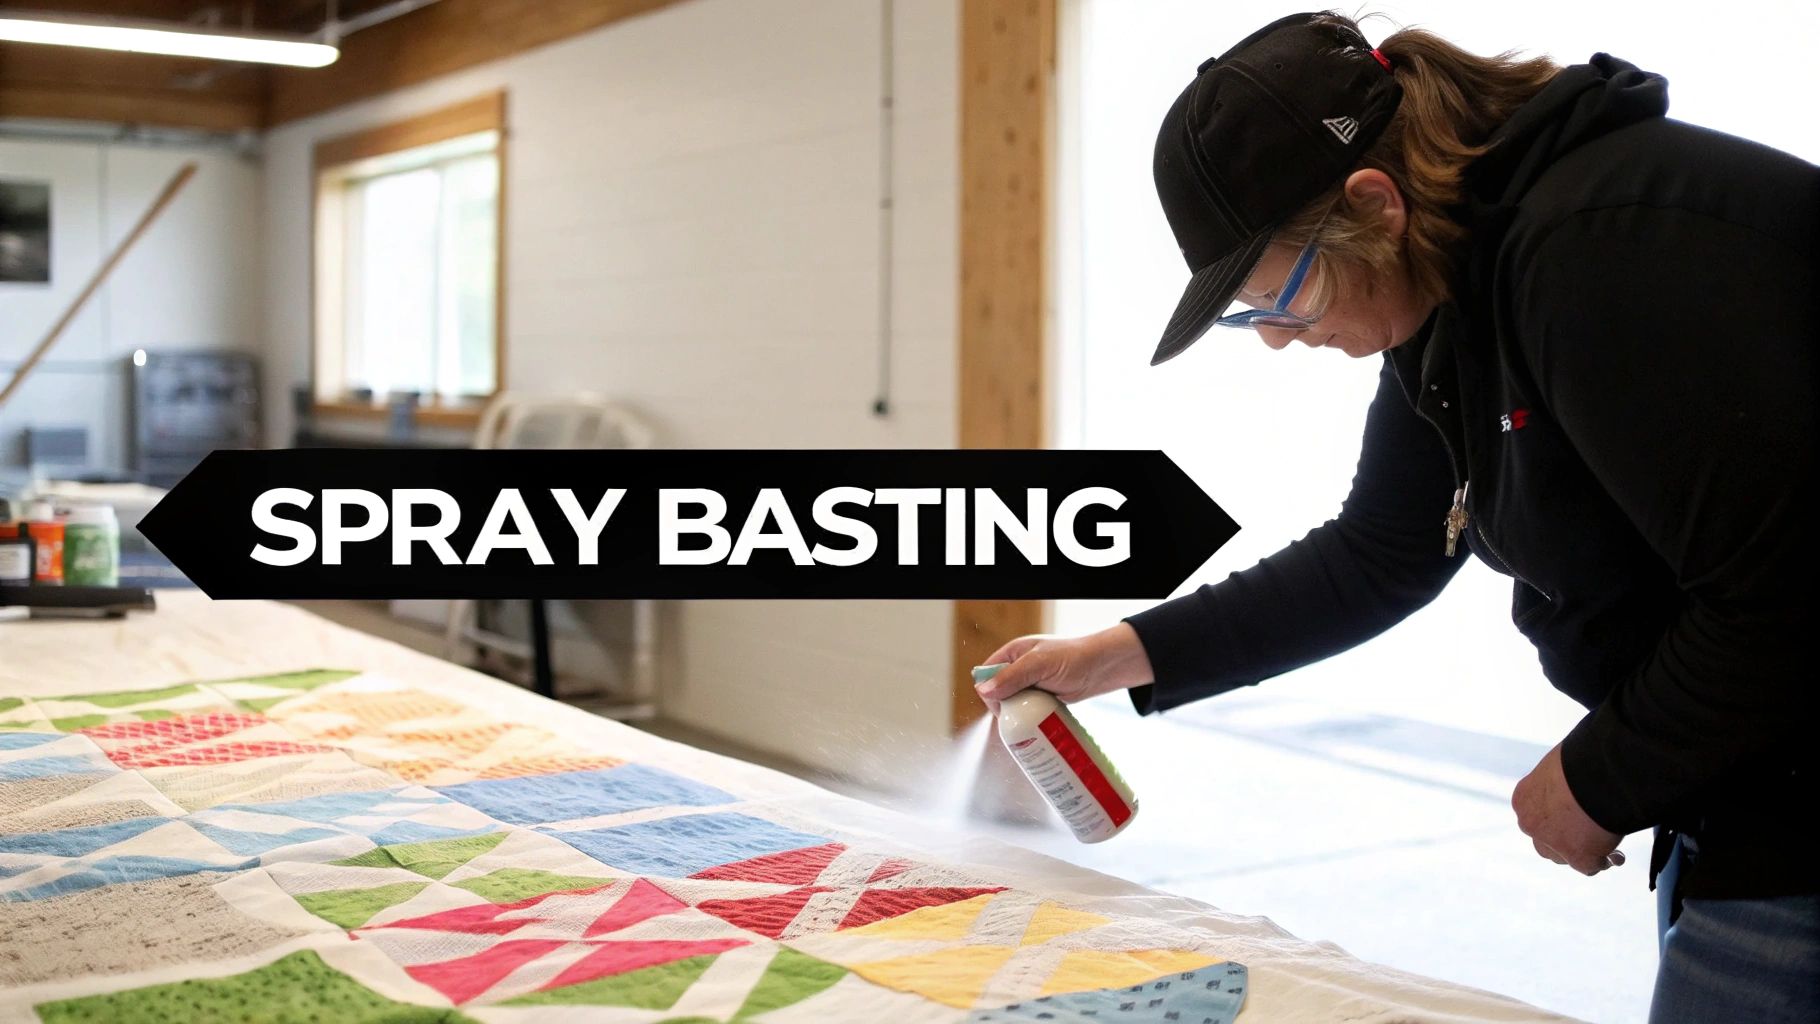
- Spray Basting: This is your go-to for speed. If you want a quick, pin-free process, especially for small to medium quilts, this is a fantastic option.
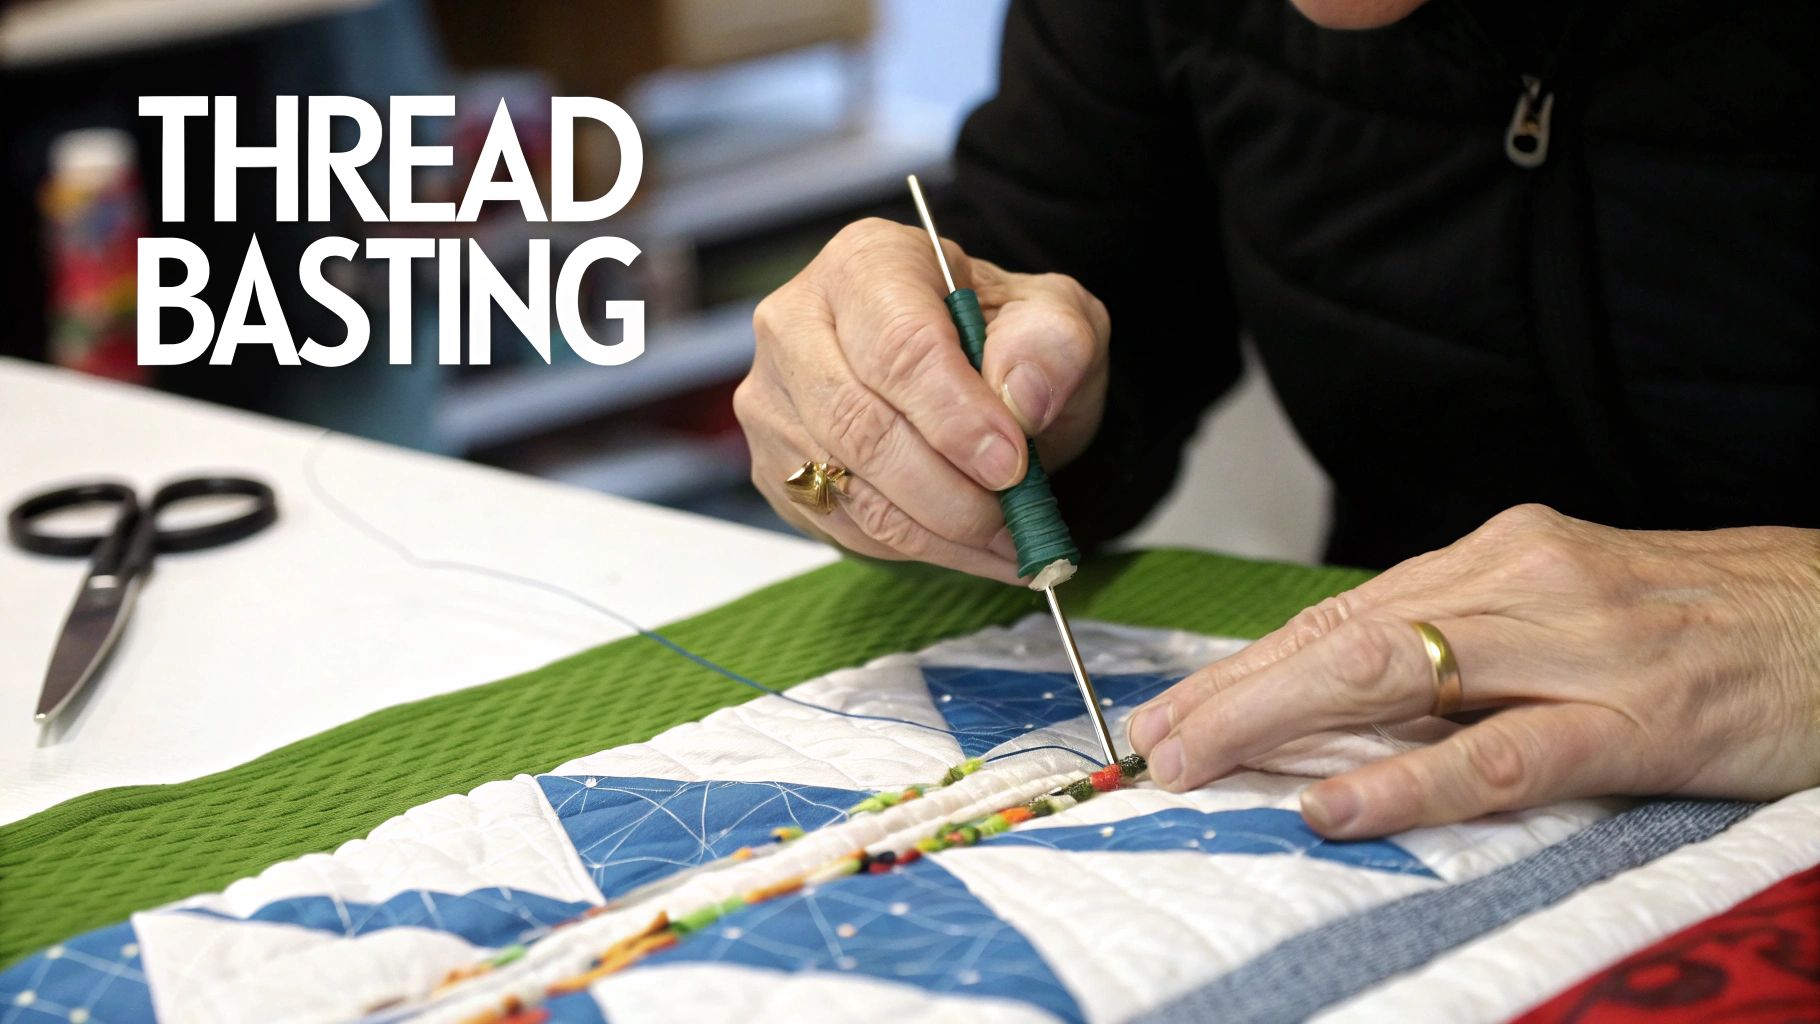
- Thread Basting: The gold standard for heirloom projects and detailed hand quilting. It offers the most control and security, ensuring nothing moves an inch.
Basting is the crucial conversation between your quilt's layers. Get it right, and they'll work together beautifully. Get it wrong, and they'll be arguing all the way to the binding.
Quilt Basting Methods At A Glance
Choosing the right technique often comes down to the size of your quilt, how you plan to quilt it, and whether you value speed over precision. Each method has its own personality, with real pros and cons to consider. This table gives you a quick rundown to help you decide which approach is the best fit for the quilt you're working on right now.
| Basting Method | Best For | Pros | Cons |
|---|---|---|---|
| Pin Basting | All quilt sizes, especially for machine quilting | Reusable, adjustable, strong hold, no chemicals | Time-consuming, can be hard on hands, must remove pins while quilting |
| Spray Basting | Small to throw-sized quilts, speed | Very fast, creates a smooth surface with no obstructions | Can be messy, requires ventilation, adhesive cost adds up |
| Thread Basting | Hand quilting, intricate machine quilting designs | Ultimate security, no pins to navigate, traditional | Very time-intensive, requires removal of stitches later |
Think of this as your roadmap for turning that beautiful quilt top into a finished project you can be truly proud of. Let's get started.
Getting Your Layers Ready for the Perfect Quilt Sandwich
Let's be honest, the secret to a beautifully flat quilt isn't some magic trick—it's all in the prep work. This is the foundation of a good basting job. If you skip this, you're setting yourself up for puckers, shifting, and a whole lot of frustration down the road. Think of it like building a house: you wouldn't pour a foundation on uneven ground. The same principle applies here.
Your quilt top, the piece you've poured hours into, is where it all starts. Give it a good, thorough press. You really want to pay attention to those seams and make sure they're lying completely flat. Whether you press them open to cut down on bulk or press to one side for a bit more strength, the most important thing is to be consistent across the entire top.
Once the top is pressed, do the same for your backing fabric. Every last wrinkle needs to go.
Nailing the Quilt Backing
This is where the real work begins, and frankly, it's what separates a good basting job from a great one. The goal is to create just the right amount of tension in your backing fabric to keep everything locked in place.
First things first, your backing and batting absolutely must be larger than your quilt top. I always aim for at least 4 to 6 inches of extra fabric on all four sides. This little bit of overhang is your safety net; it gives you room to grip and secure the layers, preventing the edges of your quilt top from creeping off the batting while you work.
If there's one thing to remember, it's this: a drum-tight backing is your best defense against shifting and wrinkles. When it's taut, you create a perfectly smooth canvas that makes it nearly impossible for puckers to form on the back of your quilt.
So, how do you get it that tight? Find a big, clean floor space or push a couple of tables together. Lay your backing fabric down, wrong side facing up. I swear by painter's tape for this—the blue kind usually won't damage floors. Start by taping one edge of the fabric down. Then, move to the opposite side, gently pulling the fabric taut. You want it smooth and firm, but not stretched out of shape. Tape that side down, and then repeat the process for the other two sides. Always work from the center out to smooth away any ripples as you go.
Adding the Batting and Quilt Top
With your backing perfectly secured, it's time to bring in the batting. Carefully unroll or unfold it over the backing. Use your hands to smooth it out completely, making sure there are no creases or folds hiding in there.
If your batting has been sitting folded for a while, you might need to help it relax. You can just let it sit out for a few hours, or for a quicker fix, toss it in the dryer on a no-heat, air-fluff cycle for about 10 minutes. That usually does the trick. If you're still deciding on the right material for your project, it’s worth taking a moment to explore the different types of quilt batting out there.
Now for the final layer. Place your beautifully pressed quilt top right in the center of the batting, with the pretty side facing up. Start from the very middle and use long, sweeping motions with your hands to smooth the top down, working your way out to every edge.
You should now have three perfectly flat, wrinkle-free layers, all ready for you to start basting. Trust me, taking the time to do this careful prep work makes the rest of the process so much faster and more successful.
Pin Basting: The Tried-and-True Method for a Secure Quilt
When you need a dependable, no-fuss way to hold your quilt together, pin basting is the undisputed champion. It’s the method I—and countless other quilters—come back to time and time again. Why? It's straightforward, completely adjustable, and creates a rock-solid quilt sandwich that won't budge, even when you're wrestling it through your sewing machine.
This technique really became a quilter's go-to in the 20th century, offering a much faster alternative to traditional hand basting. It's so efficient that you can usually get a queen-sized quilt basted in under an hour. In fact, it's still the most popular choice out there; one survey found that about 45% of quilters in the US rely on it for their projects. You can dive deeper into various basting techniques and see how they stack up on Quilting Daily.
The Essential Pin Basting Toolkit
Before you clear a space on the floor, let's talk gear. Having the right tools on hand can transform this job from a chore into a smooth, satisfying process. You don't need a lot, but the few things you do need really matter.
- Curved Safety Pins: These are non-negotiable. That little curve is pure genius—it lets you scoop through all three layers of your quilt sandwich without bunching or distorting the fabric. Trust me, trying to do this with straight pins is a recipe for frustration and tiny puckers.
- A Pin Closing Tool: Your fingertips will thank you for this one. A simple gadget like a Kwik Klip is a true finger-saver when you're closing hundreds of tiny pins.
- Painter's Tape: This is your best friend for anchoring your quilt backing. It has just the right amount of stick to hold your fabric taut without leaving any gunky residue behind on your floor or your quilt.
With these three simple items, you're all set for a successful pin-basting session.

This simple flow shows how each step—pressing the top, smoothing the batting, and taping the backing—is a critical foundation for the next. Get these right, and the pinning part is a breeze.
The "Center-Out" Pinning Strategy
Once your quilt sandwich is perfectly layered and smooth, it’s time to pin. The golden rule here is simple: always work from the center of the quilt outwards. This is non-negotiable. This methodical approach pushes any potential slack or wrinkles toward the edges, where they can escape, instead of trapping them in the middle of your quilt.
Start by placing your very first pin right in the dead center of your quilt top. From there, you'll work your way out in a radiating pattern, almost like ripples spreading in a pond.
As you place each pin, use one hand to keep the fabric smooth and flat while your other hand does the pinning. This two-handed technique is the secret to preventing tiny, accidental tucks from forming as you secure the layers. It really makes a difference.
For spacing, a good rule of thumb is to place a pin every 4-5 inches—about the width of your fist. If you space them too far apart, you’re inviting the layers to shift and bubble up while you quilt. When in doubt, add more pins. You can never have too many.
How to Dodge Common Pin Basting Pitfalls
Even seasoned quilters can run into a few common issues. Knowing what to watch out for can save you the headache of starting over.
The biggest mistake I see is pulling the quilt top too taut while pinning. It’s so tempting to stretch it to get it perfectly smooth, but this creates tension that will almost certainly result in puckers once you start quilting. Your quilt top should lie naturally flat, not be stretched like a drum.
Another easy misstep is not getting the pin through all three layers. Before closing any pin, feel underneath to make sure the point has poked through the backing fabric. After you think you’re done, take a minute to flip the entire quilt over for a final inspection. If you spot a wrinkle on the back, it’s far better to remove a few pins and fix it now than to discover it after you’ve already started quilting.
Spray Basting for a Quick, Pin-Free Finish
If the thought of opening and closing hundreds of tiny safety pins makes your fingers ache, let me introduce you to the technique that will change your quilting life: spray basting. This modern approach uses a temporary spray adhesive to hold your quilt sandwich together, creating a beautifully smooth surface in a fraction of the time it takes to pin. Honestly, it’s my go-to method for anything throw-sized because it’s fast, effective, and leaves nothing to get in my way as I quilt.
When you do it right, the result is flawless—no gummy residue, no stiff spots. The secret is twofold: use the right product and get some fresh air. You absolutely need a temporary adhesive made specifically for fabric, one that washes out completely. And I can't stress this enough: always work with a window open and a fan going. It’s non-negotiable for safety.
Tackle It Section by Section
Unlike pin basting, where you smooth out the whole quilt top at once, spray basting works best when you do it in sections. This little bit of control is what prevents wrinkles and guarantees a great bond across the entire quilt. The process is simple: you’re just going to work with one half of the quilt at a time.
Once you have your quilt sandwich layered (just like you would for pinning), gently fold back one half of your quilt top. You’ll see the batting underneath. Now, do the same thing with the batting, folding it back over the quilt top to reveal your taped-down backing fabric. This gives you a clean, clear surface to start spraying.
How to Apply the Adhesive for a Perfect Bond
Alright, here’s the magic. Grab your can of spray and hold it about 10-12 inches away from the fabric. You're going for a light, even mist across the exposed backing. Think like you’re spray painting—you want consistent coverage, not heavy, wet splotches. Soaking the fabric is the enemy here; it can lead to stiff, hard-to-quilt patches later on.
A common mistake is overspraying. It creates a gummy, stiff quilt sandwich that’s a nightmare to needle. Just remember: a light, even mist is all you need for a secure hold that will wash out beautifully.
After you’ve misted the backing, carefully roll the batting back into place. I like to start from the center fold and smooth outwards with my hands, pushing out any trapped air bubbles. Pat it down firmly to make sure it sticks. Next, apply that same light mist to the batting you just smoothed down, and then roll your quilt top back over it, again smoothing from the center out.
Now that one half is done, just repeat the whole process on the other side. Fold back the remaining un-basted quilt top and batting, spray each layer lightly, and smooth them down.
Here are a few tips I've learned along the way:
- Ventilation is everything. Seriously, open a window or work outside to avoid inhaling fumes.
- Protect your space. Overspray is real. Put down an old sheet or a drop cloth to protect your floors or table.
- Work in sections. This keeps the adhesive from drying before you can smooth the layers together.
- Always smooth from the center out. This is your best defense against wrinkles and bubbles.
This method also works like a charm if you’ve pieced your batting together to get the right size. If you're joining batting pieces, using a product like fusible batting tape first will create a seamless foundation before you even start spraying.
Once you’ve smoothed down that final section, your quilt is officially ready for the needle. The adhesive creates a bond strong enough for both machine and hand quilting, giving you a perfectly flat surface with zero pins to navigate around.
Using Traditional Thread Basting for Ultimate Control
When you've poured your heart into a special quilt—an heirloom piece or one destined for intricate, show-stopping quilting—the last thing you want is for those layers to shift. This is where traditional thread basting truly shines. It’s the original, time-honored technique that gives you absolute control and guarantees your quilt sandwich stays perfectly put.
Yes, it takes more time than other methods. I won't sugarcoat that. But the flawless results are worth every minute, especially for those quilts that mean the most. This method swaps out pins and sprays for a simple, classic duo: a long needle and thread.
For centuries, this was the way quilters secured their layers. Even with all the modern options available, it's a technique that has stuck around for good reason. A 2020 survey revealed that about 35% of quilters still reach for a needle and thread for certain projects, proving its enduring value. You can dive deeper into the history of this process over at QuiltingBoard.com.
Gathering Your Simple Thread Basting Tools
One of the best things about thread basting is its simplicity. You don’t need a lot of fancy gadgets, but having the right tools makes the process so much more enjoyable.
-
A Long Basting Needle: This is no time for your tiny appliqué needle. You'll want a long, sturdy needle, often labeled a "darning" or "basting" needle. It needs to be strong enough to glide through all three layers without bending, and its length lets you load up several stitches at once, which is a real time-saver.
-
Contrasting Basting Thread: The whole point here is to see this thread clearly so you can easily remove it later. Don't use your good piecing thread! Grab something soft, maybe even a bit weak, that will snap easily when you pull it out. Bright, contrasting colors are your best friend—think neon green on a navy quilt. Many quilters keep a dedicated spool of cheap, garish thread just for this. You can explore a variety of specialty and all-purpose threads to find a good, inexpensive option.
The Stitching Strategy for Maximum Security
Just like the other methods, you'll start with your quilt sandwich perfectly smoothed out. The magic happens in the stitching. Your goal is to create a large web of running stitches that holds everything together without fail.
Begin right in the center of your quilt. Don't bother with a knot; instead, leave a long tail of about 4-5 inches on top. This little trick makes finding and removing the thread a breeze later on.
Now, take big running stitches—around 1 to 2 inches long—and work your way from the center out to one of the edges. These don't have to be pretty! Their only job is to secure the layers. Once you reach the edge, snip the thread, leaving another long tail.
The most effective way I've found to do this is to create a large starburst pattern. By stitching lines from the center out to all the edges and corners, you're systematically pushing any slack or wrinkles toward the outside, keeping the middle of your quilt perfectly flat.
Once your main radiating lines are in, you can add more rows in a grid pattern for extra security, which I highly recommend for larger quilts. Aim to have your basting lines about 4-6 inches apart across the entire quilt top.
Hand quilters particularly love this method. Why? No pins! You get a completely clear surface to work on, allowing for a smooth, uninterrupted rhythm without constantly stopping to remove hardware. It's a quiet, meditative process that connects you to generations of quilters and sets the stage for a truly beautiful finish.
Got Questions About Basting? Let's Get Them Answered
https://www.youtube.com/embed/Hw0NFtt8q2k
Even when you follow the steps perfectly, quilt basting can throw a few curveballs your way. It happens to all of us. Let's tackle some of the most common questions and tricky spots that pop up, so you can get back to your project with total confidence.
How Far Apart Should My Basting Be?
Whether you're reaching for your safety pins or a needle and thread, getting the spacing right is what keeps your quilt layers from shifting around.
The best rule of thumb I've learned over the years is to keep your pins or stitches no more than a fist's width apart. For most of us, that's a sweet spot of about 4 to 5 inches.
This spacing is tight enough to prevent any one area from having enough slack to bubble up or cause a dreaded tuck while you're quilting. If you're wrestling with extra slippery fabrics like sateen or rayon, or you're planning some really dense quilting, you might even want to snug them up a bit closer for that extra peace of mind.
When in doubt, add more pins. I’d much rather have a slightly over-basted quilt than discover a giant pucker on the back when I'm halfway done quilting. You really can't overdo it.
Help! How Do I Fix Wrinkles on My Quilt Back?
Ah, the classic quilting headache: finding a stubborn wrinkle on your backing after you’ve basted everything down. It’s frustrating, but completely fixable. This problem almost always comes down to the backing not being pulled quite taut enough when you first taped it down.
The only real solution is to face it head-on. Carefully un-baste the section around the wrinkle—this might mean removing a few pins, snipping some threads, or gently peeling back a spray-basted area.
Once it's loose, smooth the backing fabric again until it’s perfectly flat and tight. You may need to re-tape it to the floor. Then, just re-baste that section, always working from the center outwards to push any remaining slack to the edges.
Can I Combine Different Basting Methods?
Absolutely! In fact, using a hybrid approach is a pretty clever strategy many seasoned quilters rely on. It lets you play to the strengths of each method and tailor your basting to what your specific project needs.
Here are a couple of my favorite combinations:
- Spray and Pin: This is a great time-saver. Use a light spray baste for the main body of the quilt to quickly get the center secured. Then, add a solid row of safety pins around the outer 6-8 inches. This gives you extra stability right where the quilt gets handled the most.
- Pin and Thread: For really large quilts, this provides maximum security. Pin baste the entire quilt first, and then add a few long lines of hand basting stitches across the middle—both vertically and horizontally—to really lock everything down before you bring it to your machine.
Is My Batting Too Wrinkled to Use?
Don't let a crinkled mess of batting straight from the package intimidate you. Most batting, especially cotton and cotton blends, will relax and smooth out beautifully with just a little help.
Just toss it in the dryer on a low-heat or air-fluff setting for 10-15 minutes. That little tumble will work out the vast majority of those wrinkles and folds. A quick note: for batting that contains a scrim—that fine internal grid that adds stability—be careful not to over-handle or stretch it. If you're interested in the nerdy details, you can learn more about what scrim is and why it matters for your projects. This simple step is all it takes to make sure your quilt sandwich starts off perfectly smooth.
At Quilt Batting, we provide the high-quality foundation your beautiful quilt tops deserve. From Hobbs to Pellon, find the perfect batting by the roll to bring your next masterpiece to life. Explore our collection at https://quiltbatting.shop.