

Let's think of fusible interfacing as a secret weapon for your fabric. It's a layer of textile with a heat-activated adhesive on one side. When you press it with an iron, it bonds to your quilting cotton, giving it a bit of "backbone" and making it a dream to handle and sew.
For a quilter, this translates to crisper seams, perfectly sharp points, and beautifully smooth curves, all with a whole lot less fuss.
What Is Fusible Interfacing and Why Quilters Use It
Have you ever tried to build something precise with materials that are flimsy and stretchy? It's a constant fight to keep things from distorting and going wonky. That's exactly what it can feel like working with quilting fabric, especially once you cut it into small pieces or along a tricky bias edge.
This is precisely where fusible interfacing for quilting becomes a total game-changer. It transforms those potentially frustrating tasks into moments of pure quilting success. It acts as a stabilizer, adding just enough body to your fabric to stop it from stretching or shifting while you cut, piece, and sew. That little bit of extra stability is the secret sauce behind those professional-looking results that can feel so out of reach with fabric alone.
Solving Common Quilting Frustrations
We've all been there—that sinking feeling when you see stretched-out bias edges or points that just refuse to match up. Fusible interfacing tackles these problems head-on by reinforcing the fabric before it even has a chance to misbehave.
The process couldn't be simpler: you just fuse the interfacing to the wrong side of your fabric. Suddenly, that soft, pliable cotton starts behaving with predictable precision.
This temporary support structure is a lifesaver in two key quilting areas:
- Precision Piecing: When you're working on a pattern with tons of small pieces or complex angles, interfacing ensures every single component holds its shape perfectly. This means your seams will nest together flawlessly and your points will meet exactly where they're supposed to.
- Appliqué Work: For those intricate appliqué designs, fusible interfacing is your best friend. It stops the background fabric from puckering and keeps the edges of your appliqué shapes clean and crisp as you stitch them down.
By giving fabric a temporary memory of the shape it's supposed to hold, fusible interfacing lets you focus on your creativity instead of wrestling with the material itself. It’s the hidden scaffold that makes the final masterpiece possible.
In the end, the goal isn't to make your fabric stiff as a board; it's to give you control. The right lightweight fusible interfacing provides this control without adding noticeable bulk or messing with the lovely drape of your finished quilt. It’s the tool that bridges the gap between your creative vision and the physical limits of your fabric, helping you turn those homemade projects into heirloom-quality works of art.
How To Choose The Right Fusible Interfacing For Your Quilt
Walking into the interfacing aisle can feel a bit overwhelming, can't it? With all those rolls staring back at you, it's easy to wonder where to even start. But picking the right one isn't a mystery—it's about matching the interfacing to your fabric and what you want to achieve with your quilt.
The goal is to give your fabric just the right amount of support without turning your soft, cuddly quilt into a stiff board. You want to enhance, not overpower. The choice really boils down to two key things: what the interfacing is made of and how heavy it is.
Decoding Interfacing Types
In the world of interfacing, you'll mainly run into three types: woven, non-woven, and knit. Each one acts a little differently, making them perfect for specific quilting jobs.
-
Woven Interfacing: Think of this as a close cousin to your quilting cotton. It has a grainline just like fabric, so it moves and drapes in a very natural, familiar way. This makes it perfect for projects like t-shirt quilts, where you need to tame stretchy fabric without making it feel like cardboard.
-
Non-Woven Interfacing: This is the go-to for most quilters, and for good reason. It has no grainline, which means you can cut it in any direction you please—a fantastic way to use every last scrap! It gives you consistent stability from every angle, making it a lifesaver for tricky appliqué or precision piecing. For a truly versatile option, check out our popular Pellon lightweight non-woven interfacing.
-
Knit Interfacing: This one has a bit of stretch built right in. While you might not use it for traditional piecing, it’s a secret weapon for art quilts or any project where you’re working with knits or other stretchy materials. It reinforces the fabric but still lets it move and flex naturally.
To help you visualize the options, this table breaks down the most common types and where they really shine in quilting.
Fusible Interfacing Types and Their Best Quilting Uses
| Interfacing Type | Weight | Key Characteristic | Best For Quilting Projects Like... |
|---|---|---|---|
| Woven | Lightweight to Midweight | Has a grainline, feels like fabric | T-shirt quilts, stabilizing loosely woven fabrics, bag making |
| Non-Woven | Featherweight to Midweight | No grainline, economical, stable in all directions | Appliqué, embroidery foundations, stabilizing delicate fabrics |
| Knit | Lightweight | Built-in stretch (usually one-way or two-way) | Reinforcing knits in memory quilts, art quilts with stretchy materials |
| Sheer/Featherweight | Featherweight | Almost transparent, adds minimal bulk | Stabilizing very delicate or sheer fabrics like silk or lawn |
Choosing from this list becomes much easier once you know what your fabric needs.
Matching Weight To Your Project
Just as important as the type is the interfacing's weight. This is what will directly affect the final drape and feel of your quilt. The rule of thumb is simple: use the lightest weight you can get away with that still gives you the stability you need.
Manufacturers use grams per square meter (gsm) to measure this. For example, a featherweight interfacing might be around 30–80 gsm, which is perfect for adding just a whisper of support for delicate piecing. Something in the 80–160 gsm range is a light-to-medium option that provides a bit more structure, almost like a very thin layer of batting.
As this image shows, the right interfacing gives you a solid foundation, which leads to better stability and much sharper precision when you sew.
Pro Tip: Always, always test your interfacing on a scrap of your project fabric first! This is the only way to know for sure how it will feel and behave once it's fused. It’s a five-minute step that can save you hours of frustration.
Once you get a feel for these differences, you'll be able to walk up to that interfacing aisle with confidence, ready to pick the perfect partner for your quilt.
Mastering the Perfect Fuse: Your Step-by-Step Guide
Getting that perfectly smooth, bubble-free bond is where the real magic of fusible interfacing happens. It’s not about speed; it's about being patient and methodical. The right technique is what stands between you and frustrating shifting, puckering, or a weak bond. It’s how you give your fabric the stable foundation it needs for precision piecing.
Picture the adhesive on your interfacing as tiny dots of glue. They need to melt evenly and sink right into the fabric's fibers. Rushing this is the number one reason quilters get frustrated. But if you follow a few key steps, you’ll nail it every single time.
Laying the Groundwork: Fabric and Interfacing Prep
Before you even think about plugging in your iron, you need to set yourself up for success. Always, always pre-wash and press your quilting cotton. This gets rid of any factory sizing and takes care of any potential shrinkage, ensuring your fabric and interfacing will act as one cohesive unit down the line.
With your fabric prepped, lay it wrong side up on your ironing board. Place your piece of fusible interfacing on top, making sure the adhesive side—the one that feels bumpy or textured—is facing down against the fabric. If you're using fusible interfacing to join batting pieces, you'd apply the same idea with a specialized product like fusible seam batting tape to get that strong, seamless bond.
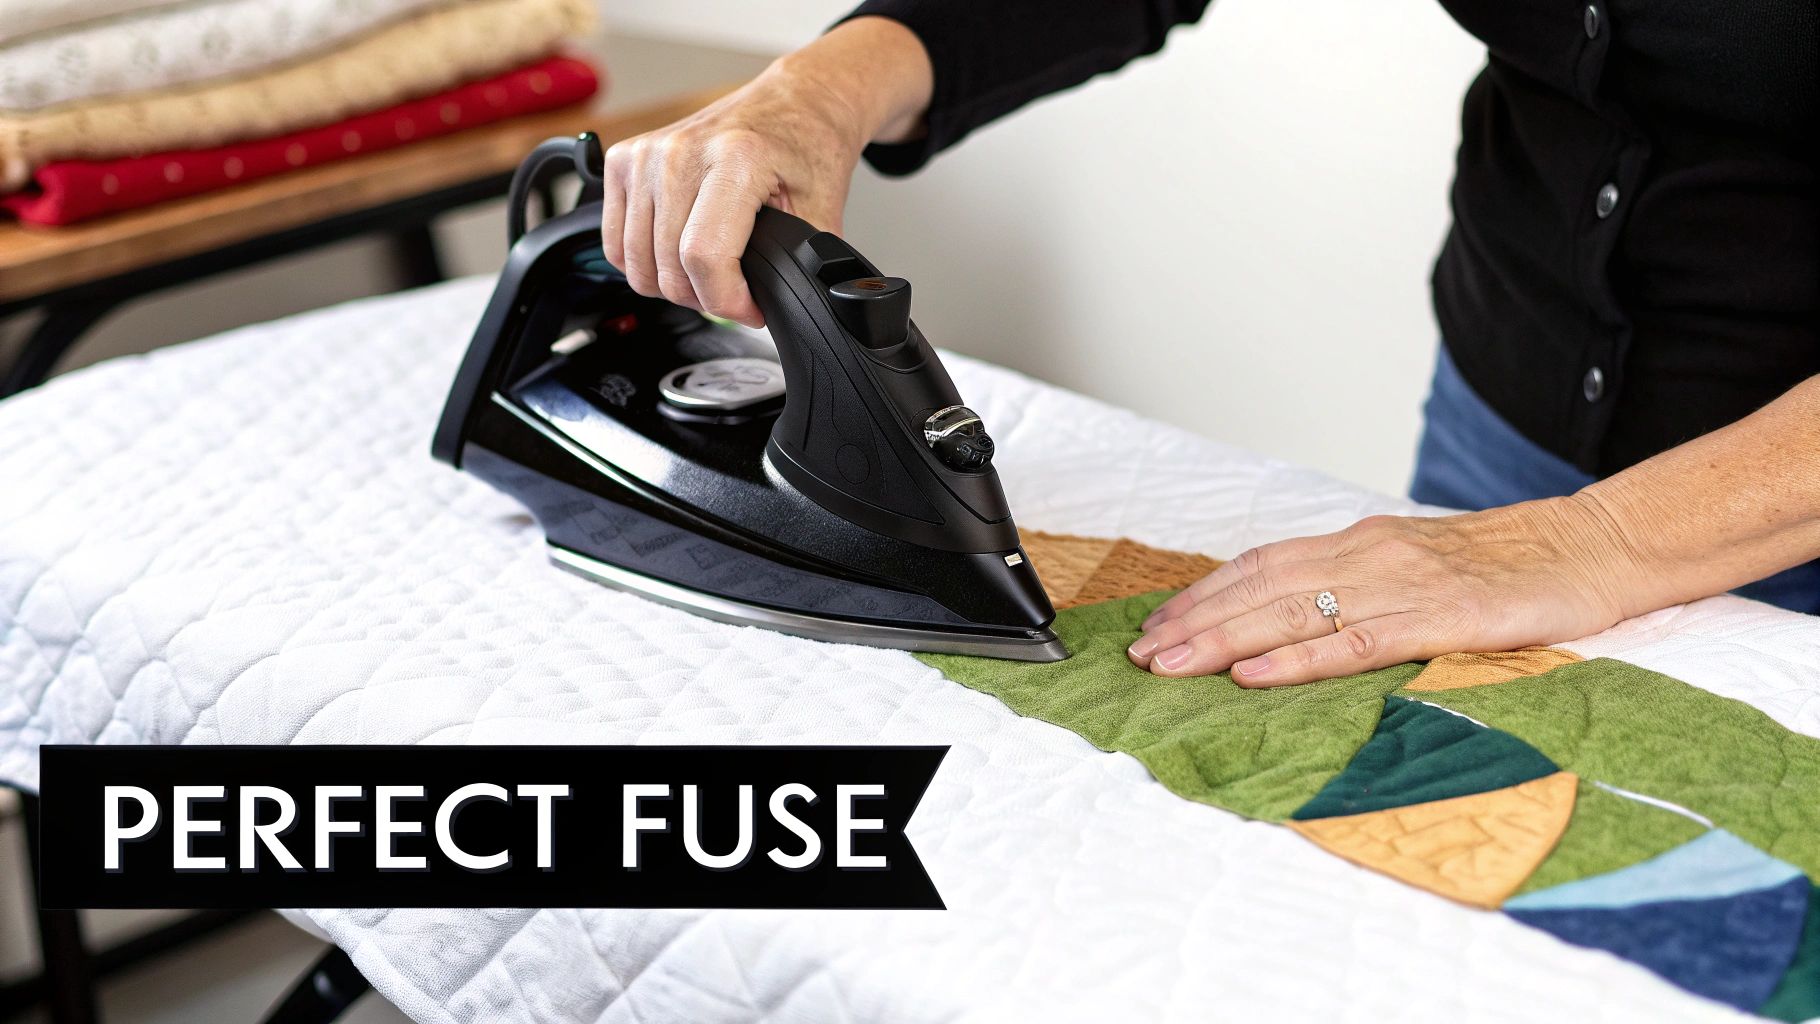
The "Press and Hold," Not "Iron and Slide"
This is where everything comes together, and it’s the most crucial part of the whole process. Fight that instinct to glide your iron back and forth like you’re pressing a shirt. Sliding the iron is a recipe for disaster—it pushes the fabric around and creates wrinkles before the adhesive can even think about melting.
Instead, commit this foolproof method to memory:
- Set Your Iron: Check the interfacing manufacturer's instructions and set your iron to the recommended temperature. This is usually a medium to medium-high heat, and you’ll want to turn the steam off unless the instructions specifically say otherwise.
- Use a Press Cloth: Grab a thin, dry press cloth (a scrap of muslin or plain cotton works great) and lay it over the interfacing. This simple step protects your iron from sticky residue and helps distribute the heat evenly for a better fuse.
- Press and Hold: Gently set the iron down on one section. Now, just hold it there. No wiggling, no sliding. Apply light, even pressure and count to 10-15 seconds.
- Lift and Overlap: Lift the iron straight up—don't drag it!—and move it to the next spot, overlapping the section you just pressed by about half an inch. Repeat the "press and hold" until you’ve covered the entire piece.
The whole point here is to melt the adhesive completely, not just warm it up. Holding the iron still gives the heat time to work its way through all the layers, creating that strong, lasting bond we're after.
The Final, Crucial Step: Let It Cool
You've pressed the entire piece, and it looks great. Now for the easiest—and most often skipped—step: walk away. Move the fused fabric to a flat surface and let it cool down completely for several minutes. Don't fold it, don't move it, just let it be.
This cooling-off period is when the adhesive really sets up and solidifies its bond with the fabric. If you handle it while it's still warm, you can easily weaken the fuse, leading to those dreaded bubbles or separation later on. By letting it set fully, you’re guaranteeing a durable, professional finish for your quilt project.
How Interfacing and Batting Work Together
A finished quilt isn't just a pretty top. It’s a complete system where every single layer—the top, the batting, and the backing—has to play nice. When you introduce fusible interfacing for quilting into the mix, you're adding a new player to the team, and that changes the entire dynamic.
Think of it this way: interfacing gives your quilt top some backbone. This newfound stability completely changes how you should think about your batting. Suddenly, you have a whole lot more say in the quilt's final drape, loft, and feel.
How Interfacing Changes Your Batting Choice
When your quilt top is already stabilized with interfacing, it has a built-in structure. This is a game-changer because it means you might not need a super dense or high-loft batting to get that crisp, defined look you're after. The interfacing is already doing the heavy lifting, which frees up the batting to do what it does best: provide softness and warmth.
For instance, you might typically grab a thicker batting to make sure a complex pattern doesn't look floppy or flat. But with an interfaced top, you could easily switch to a lower-loft batting—like a thin cotton or an 80/20 blend. You’ll still get gorgeous stitch definition, but without any of the extra bulk or stiffness you don't want.
The real secret is to view interfacing and batting as partners. Once the interfacing provides the structure, you can choose your batting based on the softness and drape you want, instead of relying on it to hold everything together.
This partnership opens up so many creative doors. You can nail that sleek, modern aesthetic with a thin batting, or you can let the incredible loft of a wool batting create a dramatic, textured look against the crisp, interfaced fabric. Your options really expand once your quilt top is stabilized.
Pairing Interfacing with Different Batting Fibers
Finding the right combination is everything if you want a quilt sandwich that feels just right. The good news is that an interfaced quilt top gets along with pretty much all types of quilt batting, but it’s smart to know how they’ll behave together.
Here’s a quick rundown of some popular pairings:
- Cotton Batting: This is the classic choice for a reason. It gives you that traditional, flatter look and that wonderful crinkle after the first wash. When you pair it with an interfaced top, you get a quilt with fantastic structure that’s still soft and breathable.
- Cotton-Poly Blends (80/20): These give you a little more loft than 100% cotton but still drape beautifully. They’re a versatile workhorse, and the interfacing really makes those quilting stitches pop.
- Wool Batting: If you want incredible loft, warmth, and texture, wool is your go-to. Using it with a stabilized top creates a quilt that’s both sharp and luxuriously puffy—a truly stunning combination.
A Quick Word on Fusible Batting
So, what about using a fusible on top of a fusible? When you're thinking about pairing fusible batting with an interfaced top, the two things you need to watch out for are heat and stiffness. You're aiming for a soft, cuddly quilt, not a stiff board.
To keep things from getting rigid, press the fusible batting in place using the lowest heat setting that will still get the job done (always check the manufacturer's guide). Work in small sections, and don't forget to use a press cloth to keep the heat gentle and even. The goal here is just to tack the layers together for quilting, not to create a rock-solid bond across the whole thing.
Troubleshooting Common Fusible Interfacing Issues

Even when you follow the instructions to the letter, fusible interfacing can sometimes have a mind of its own. But don't worry—most issues are surprisingly simple to fix and even easier to prevent the next time around. The key is learning to read what the fabric is telling you.
Think of it like a conversation between your iron, your fabric, and the interfacing. A bubble here or a stiff spot there is just a sign that one of them needed something a little different. Let's translate those signals into easy fixes.
Fixing Bubbles and Blisters
There's nothing more frustrating than pulling back your iron to find a landscape of bubbles and blisters. This almost always comes down to a problem with heat, pressure, or time—the adhesive simply didn't get a chance to form a solid, even bond.
If you spot a bubble, here's what to do:
- Lay a press cloth over the bubbly section.
- Press and hold your iron firmly over the spot for a good 10-15 seconds. No wiggling!
- Still there? A quick shot of steam can sometimes reactivate the adhesive, but be careful. Test it on a scrap first, as not all interfacings play well with steam.
- The most important step: let it cool completely before you even think about moving it.
Bubbles usually mean the iron was too cool or you moved it too soon. It’s a classic mistake, and even experienced quilters run into it. Fusible interfacing really took off in the mid-20th century, offering a huge time-saver compared to hand-stitching reinforcements. It's all part of the learning curve!
When Your Quilt Feels Too Stiff
Did your fabric suddenly feel like cardboard after you applied the interfacing? That's a classic sign of a mismatch between your fabric and the interfacing weight. Fusing a medium-weight product to a lightweight quilting cotton, for instance, is a recipe for a stiff, unyielding block.
Unfortunately, this isn't something you can fix after the fact. Prevention is truly the only cure here. Always, always, always test your chosen fusible interfacing for quilting on a scrap of your project fabric before you commit.
If you can't live with the stiffness, you'll likely have to remake that section with a lighter interfacing. Just remember the golden rule: your interfacing should always be the same weight as, or slightly lighter than, your fabric. Getting this pairing right is a fundamental skill, just like mastering your quilt basting technique is for assembling your final quilt sandwich.
Caring for Quilts Made with Fusible Interfacing
You’ve poured so much of yourself into creating a beautiful quilt, and the way you care for it will determine whether it becomes a treasured heirloom. When your quilt includes fusible interfacing, there’s really just one thing you need to keep in mind: heat.
The very heat that activated the adhesive and gave your fabric structure can also undo that bond. Think of high heat as the kryptonite for your finished quilt—it can reactivate the glue, causing it to bubble, pull away from the fabric, or get distorted.
Best Practices for Washing and Drying
To keep your interfaced quilt looking as gorgeous as the day you finished it, a gentle touch is the way to go. A little extra care on laundry day makes all the difference.
-
Washing: Stick to a gentle cycle with cool or cold water. A mild, color-safe detergent is perfect; you don’t need harsh chemicals that might mess with the adhesive.
-
Drying: Hands down, air-drying is the safest bet. You can lay the quilt flat on a clean sheet or some towels, or hang it on a line out of direct sun. If you absolutely have to use a machine, choose the lowest heat setting you have—or better yet, an air-fluff cycle with no heat at all.
Long-Term Storage and Care
Storing your quilt properly is just as crucial as washing it correctly. Try to avoid folding it along the exact same lines every time you put it away, as this can press permanent creases into both the fabric and the interfacing inside.
Here's a pro tip: To keep those stubborn creases from setting in, refold your quilt differently every few months. For long-term storage, rolling your quilt around a clean pool noodle or a sturdy cardboard tube works wonders.
This simple routine is all it takes to protect your hard work. It's amazing to think how many projects rely on these materials; the global quilting market, valued at over $4.5 billion, depends heavily on notions like fusible interfacing for quilting. If you're curious about the industry side of things, you can read the full industry analysis on businessresearchinsights.com.
Got Questions About Fusible Interfacing? Let's Clear Things Up.
Even when you've got the basics down, a few questions always seem to surface right when you're about to start a project. Having quick, clear answers makes all the difference, so let's tackle the questions I hear most often from fellow quilters.
Should I Pre-Wash Fusible Interfacing?
That's an easy one: never, ever pre-wash your fusible interfacing. Washing it will either weaken or completely wash away those little heat-activated adhesive dots, which makes the whole thing useless.
Go ahead and pre-wash your quilting fabrics to get any shrinkage out of the way, but your interfacing should always be used straight from the package or bolt.
Can I Use Steam When I'm Fusing It?
This is a fantastic question, and the answer is a classic "it depends." Most modern interfacings actually work better with a good blast of steam—it helps create a really strong, permanent bond. That said, some older or specialty types call for a totally dry iron.
My golden rule? Always, always check the manufacturer's instructions. That little piece of paper they include is your best friend. It will save you from the headache of bubbling or a weak fuse. If you've lost the instructions, just test a small scrap first.
Is Interfacing the Same Thing as Fusible Web?
Nope, they're two completely different animals, and mixing them up can definitely cause some project drama. It’s really important to know which one to reach for.
-
Fusible Interfacing: Think of this as fabric with a mission. It's a layer of woven or non-woven material with glue on just one side. Its whole purpose is to give your main fabric more body, structure, and stability.
-
Fusible Web: This is pretty much just a sheet of glue with no fabric of its own. It's designed to stick two pieces of fabric together, which is why it's the go-to for appliqué.
A simple way to remember it: interfacing adds a backbone, while fusible web is like a super-strong fabric glue.
At Quilt Batting, our goal is to provide the high-quality materials you need to bring your creative vision to life. Ready to get started? Explore our handpicked selection of premium quilting supplies today and find your perfect match at https://quiltbatting.shop.