

So, you’ve poured hours—maybe even weeks—into piecing the perfect quilt top. Now comes the moment of truth: choosing the right batting. It can feel a little intimidating, but getting the size right is actually pretty straightforward once you learn the one rule that experienced quilters live by.
Your batting should always be at least 6-8 inches longer and wider than your finished quilt top. This extra fabric, what we call "overage," isn't waste; it's your insurance policy for a beautiful, professional finish. It gives you the wiggle room you need for the quilting process and accounts for any surprises, like shrinkage.
Getting Your Quilt Batting Size Right Every Time
Let's face it, that moment you lay your finished quilt top on a fresh roll of batting can feel a bit make-or-break. The right size leads to a smooth, pucker-free quilt you can be proud of. The wrong size? Well, that path leads to frustration and backtracking. But here’s the good news: mastering batting sizes isn’t about memorizing a huge chart. It’s about understanding one simple principle.
I like to think of the batting as the matting around a piece of artwork before it goes into a frame. You’d never cut the matting to the exact size of the art, right? You need that overlap to secure it properly and create a clean, even border. It's the exact same logic with quilting. Those extra inches around the edge of your quilt top are what allow everything to come together perfectly in the final steps.
Why That Extra Batting Is a Non-Negotiable
This "overage" serves a few critical purposes that every seasoned quilter depends on. Trying to skip this step is a classic beginner's mistake, and it can put all your hard work at risk.
-
It Gives You Room to Quilt: As you stitch through the quilt sandwich, the layers naturally pull in and shift a bit. This is true whether you’re working on your home machine or a massive longarm. That extra batting ensures your quilting stitches can extend all the way to the edge of your pieced top without the layers separating at the last second.
-
It's Essential for Longarm Quilting: If you send your quilts out to a longarmer, this is a big one. They need extra material on all four sides to properly attach the quilt to the leaders on their machine frame. In fact, most longarm pros will ask for a minimum of 4 inches of extra batting and backing fabric on every single side.
-
It Builds in a Shrinkage Allowance: Most batting, especially natural fibers like cotton, bamboo, or wool, will shrink a little bit during that first wash and dry. It’s what gives a quilt that wonderful, crinkly, well-loved texture. Starting with a slightly larger piece of batting ensures your finished quilt stays the size and shape you intended.
-
It Guarantees a Perfect Finish: After the quilting is done, the edges of your project will be wavy and uneven. That's totally normal! The excess batting and backing give you the material you need to trim everything down and create a perfectly straight, square edge before you add your binding.
With the quilting world absolutely booming—participation in the US alone grew a staggering 25% between 2020 and 2023—more and more people are looking for this kind of foundational advice. This growth is reflected in the global quilt batting market, which hit an estimated $2 billion USD in 2024. You can read more about the growing quilt batting market at WiseGuyReports if you're curious!
The Golden Rule of Batting: Always, always, always start with batting that is at least 3-4 inches larger than your quilt top on all four sides. This means adding a total of 6-8 inches to both the length and the width of your quilt top measurement.
The Complete Quilt Batting Size Chart
Welcome to your new secret weapon for quilt planning. Whether you're making a tiny crib quilt or tackling a massive California King, this is the resource you'll want to have handy. Think of this as your project blueprint, built to take the guesswork out of buying your materials so you can start your project with total confidence.
I’ve laid out all the numbers you need, starting with the basic mattress measurements and moving to the finished quilt size you'll be aiming for. Most importantly, I've included the recommended batting size, which has that crucial extra bit of material built right in. That overage is your best friend when it comes to quilting and squaring up, ensuring you never run out of room at the last minute.
Comprehensive Batting and Quilt Size Dimensions
Here’s a detailed breakdown that takes you from the bare mattress all the way to the perfect batting size.
| Quilt Type | Standard Mattress Size (Inches) | Typical Finished Quilt Size (Inches) | Recommended Batting Size (Inches) |
|---|---|---|---|
| Crib | 27" x 52" | 36" x 54" | 45" x 60" |
| Lap / Throw | Varies (approx. 50" x 65") | 58" x 73" | 66" x 81" |
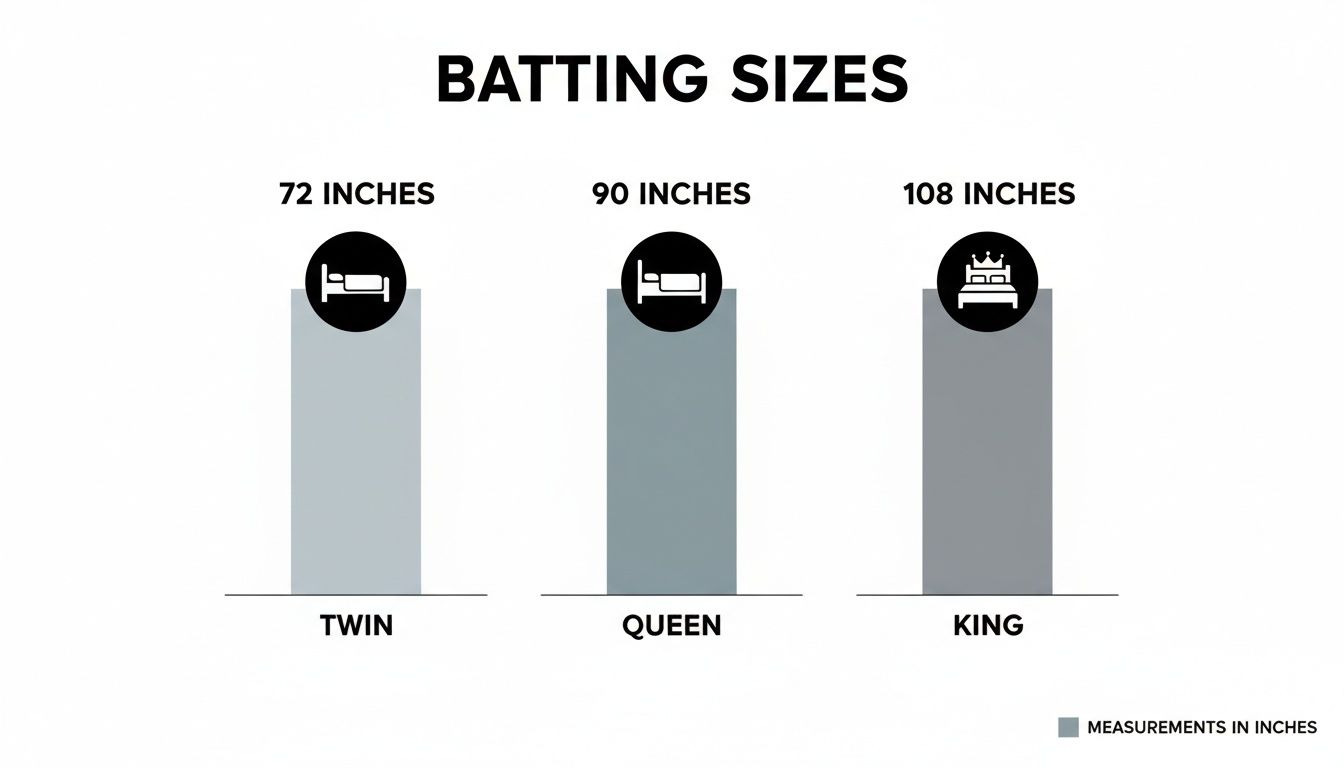
| Twin | 39" x 75" | 70" x 90" | 78" x 98" |
| Twin XL | 39" x 80" | 70" x 95" | 78" x 103" |
| Full / Double | 54" x 75" | 84" x 90" | 92" x 98" |
| Queen | 60" x 80" | 90" x 95" | 98" x 103" |
| King | 76" x 80" | 108" x 95" | 116" x 103" |
| California King | 72" x 84" | 102" x 100" | 110" x 108" |
Keep this table handy—it’s a reliable guide for virtually any project you can dream up.
This chart really drives home how much bigger the batting needs to be as you move up in bed sizes.
What really stands out is how a few extra inches of mattress width translates into a much wider piece of batting to get that beautiful, flowing drape over the sides of the bed.
Understanding the Chart Numbers
So, what do all these numbers actually mean? The gap between the "Mattress Size" and the "Finished Quilt Size" is what we call the drape. That’s the lovely part of the quilt that hangs over the sides and foot of the bed. I've factored in a generous drape here for a classic, luxurious finish.
The final column, "Recommended Batting Size," adds about 8-10 inches to your finished quilt dimensions. This isn’t a mistake—it’s your quilting safety net.
Remember, these numbers are fantastic starting points. You might prefer a longer drape or a shorter one, and that’s perfectly fine! Just remember to keep that crucial 8-10 inch overage for your batting, no matter what your final quilt top size is.
Go ahead and bookmark this page. I promise it's a tool you’ll come back to for every new project on your list. For an even more detailed look, you can always download a free Hobbs Batting Spec Chart which offers product-specific recommendations.
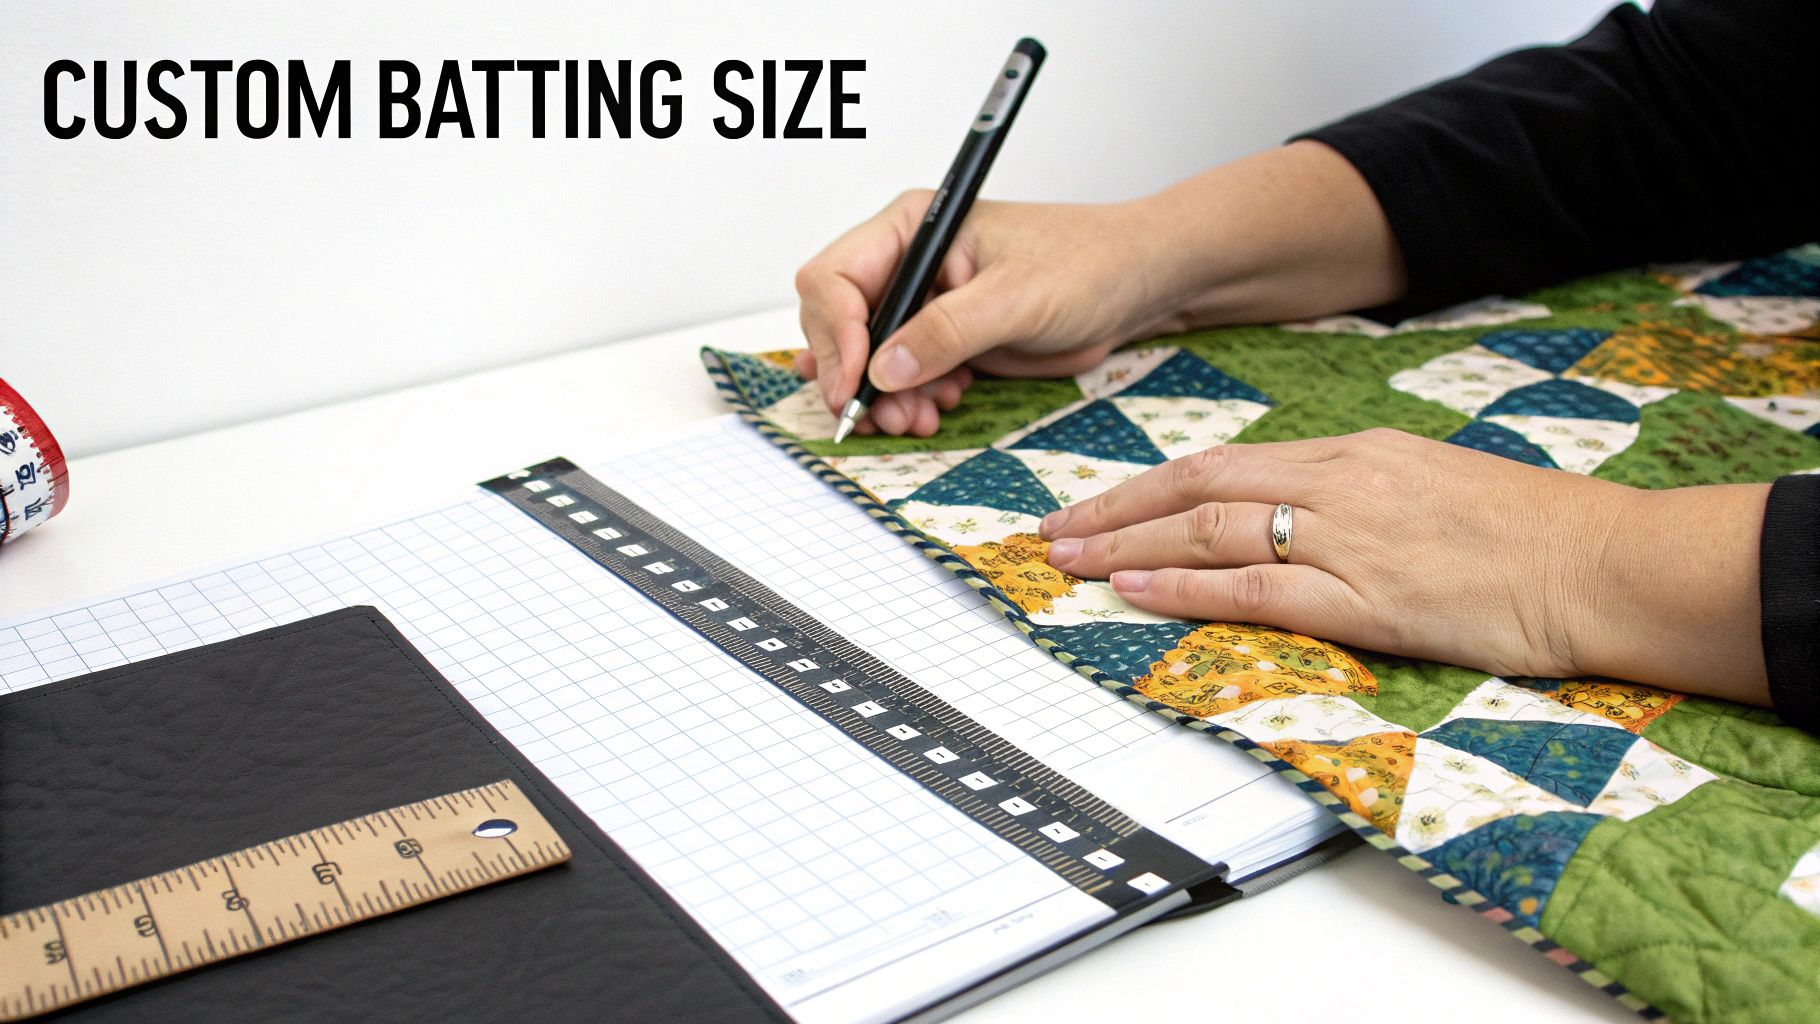
How to Calculate Custom Batting Sizes
Standard quilt sizes are a helpful guide, but let's be honest—some of the most rewarding projects are the ones that don't fit a standard mold. Whether you're crafting a unique table runner, an art quilt for a specific wall, or a cozy lap blanket sized just for you, you’re not limited to pre-packaged dimensions.
When you go custom, figuring out the right batting size can feel a little intimidating. But it’s actually far simpler than you think. There's no complex math involved, just a tape measure and a little addition. This straightforward approach will take the guesswork out of the equation, so you can cut into your batting with total confidence.
The secret is to give yourself a generous safety margin—what quilters call "overage"—around your quilt top. It’s the key to a stress-free finish.
The Foolproof Custom Size Formula
No matter what you're making, this simple three-step method works every single time. It's all about measuring your finished piece and adding a comfortable buffer.
-
Measure Your Finished Quilt Top: First things first, lay your quilt top out on a flat surface. Use a reliable tape measure to find the exact width and length at their widest points. Jot those two numbers down.
-
Decide on Your Overage: Now, decide how much extra batting you want extending beyond the edges of your quilt top. A good rule of thumb for most projects is 4 inches on every side. This adds a total of 8 inches to both your width and your length measurements, giving you plenty of wiggle room.
-
Do the Simple Math: Add the total overage to each of your quilt top measurements. The final numbers are your batting dimensions!
Simple Batting Formula:
- (Quilt Top Width + 8 Inches) = Your Required Batting Width
- (Quilt Top Length + 8 Inches) = Your Required Batting Length
Putting the Formula into Action
Let's walk through a quick example. Say you just finished a beautiful custom lap quilt that measures 52 inches wide by 65 inches long. It's the perfect size for a favorite reading chair.
Time to apply the formula with our standard 4-inch overage on all sides:
- Calculate the Width: 52" (quilt width) + 8" (4" for the left + 4" for the right) = 60 inches
- Calculate the Length: 65" (quilt length) + 8" (4" for the top + 4" for the bottom) = 73 inches
That’s it! For your 52" x 65" quilt top, you'll need to cut a piece of batting that is 60" x 73". This simple step ensures you have more than enough batting to handle any shifting during quilting and makes squaring up your finished quilt a breeze.
For those larger or uniquely shaped projects, it’s often more economical and practical to purchase your quilt batting by the yard. This way, you get a single, continuous piece cut exactly to your needs.
Choosing the Right Batting Roll for Your Projects
For any quilter who's got a running list of "next" projects, buying batting by the roll is a total game-changer. It’s that moment you level up from one-off purchases to creating a quilting stash that’s ready for anything. This isn't just about being prepared; it's a smart move that saves you real time and money.
Think about it: no more last-minute trips to the fabric store because you're finally ready to quilt. Having a roll on hand means you can flow right from finishing your quilt top to layering your sandwich without missing a beat. That kind of creative momentum is priceless.
Matching Roll Width to Your Quilting Habits
The real trick, though, is picking the right roll width. If you choose one that's too narrow, you'll be stuck piecing batting scraps together. Too wide, and you're just creating waste. The most common widths you'll find are 90", 96", 108", and 120", and each one has its own sweet spot.
Let's figure out which one fits the way you quilt:
-
90-Inch and 96-Inch Rolls: These are the workhorses of the quilting world. A 96" roll is perfect for almost everything from baby quilts and throws all the way up to Twin and Full/Double beds—no seams required. If you find yourself making quilts in this range most of the time, this width gives you incredible flexibility with very little leftover.
-
108-Inch Rolls: Do you make a lot of Queen-sized quilts? This is your go-to. A standard Queen top is usually about 90 inches across, so a 108" roll gives you that ideal amount of extra batting on all sides for quilting. It saves you the headache of joining batting for what might be your most frequent large-scale project.
-
120-Inch Rolls: For those of us who love to go big, the 120" roll is an absolute must-have. This is the powerhouse for King and California King quilts. It completely eliminates the need for seams on your grandest creations, which is a massive time-saver and helps you get that smooth, flawless finish every single time.
Choosing the right roll is like picking the right tool for the job. Sure, you can make a 96” roll work for a king quilt by seaming it, but a 120” roll makes the process faster, easier, and just looks better in the end.
The Financial Sense of Buying in Bulk
Beyond just finding the perfect fit, buying batting by the roll just makes good financial sense. The price per yard drops significantly when you commit to a full 30-yard or 40-yard roll instead of buying those individual pre-cut packages. For a quilter selling their work, that savings goes straight to the bottom line. For the rest of us, it means more money for fabric!
This one investment streamlines your entire process, cuts down on material costs, and keeps your creative energy flowing. To dive deeper, you can explore the different kinds of cotton batting rolls available for purchase. Just think about the quilts you truly love to make, and you’ll find a roll that’s ready to help you bring them to life.
How Batting Fiber Affects Your Sizing Decisions
So, you might be thinking, "batting is batting, right?" Well, not exactly. The very fiber your batting is made from can dramatically change how you should approach its size. Think of it like this: choosing the right batting is like picking the right flour for a recipe. What it's made of completely changes the final result.
This is especially true when it comes to a little thing called shrinkage. We've all had a favorite t-shirt come out of the dryer a bit more snug than it went in—and natural batting fibers do the exact same thing. This is a crucial detail you absolutely must account for in your sizing plan.
Understanding Shrinkage Rates
Every fiber has its own personality. Some are incredibly stable, while others are famous for creating that beautiful, crinkly texture after washing. That crinkle? That's shrinkage in action.
-
100% Cotton Batting: This is the quilter's classic, hands down. It gives that soft, traditional finish we all love. But, it's also the one most likely to shrink, typically drawing up by 3% to 5%. You'll want to give yourself a more generous overage to make sure your quilt doesn't end up smaller than you planned.
-
Polyester Batting: Consider polyester your reliable workhorse. As a synthetic fiber, it experiences virtually zero shrinkage. Its stability means you can work with a tighter overage, though you'll still need that extra room for the quilting process itself.
-
Wool and Blends: Wool is wonderfully light yet incredibly warm, and it tends to shrink about as much as cotton. For a happy medium, many quilters swear by blends like the popular 80/20 cotton/poly mix. This gives you a hint of that cottony crinkle but with less shrinkage, making it a very forgiving and popular choice.
Here’s the key takeaway: The more natural the fiber, the more shrinkage you should anticipate. Planning for this from the start is the best way to avoid any unwelcome surprises when your beautiful quilt comes out of the wash.
How Loft Plays a Part
Beyond the fiber, you also need to think about loft. That’s simply the fancy term for the batting's thickness and fluffiness. A high-loft batting will give you a puffy, almost comforter-like quilt, while a low-loft batting creates a flatter, more modern drape.
Now, loft won't directly change your initial width and length calculations. However, it does impact the actual quilting experience. A thick, fluffy batting can be a bit of a beast to maneuver through a domestic sewing machine and often requires a little more wiggle room for handling. It's just one more piece of the puzzle to consider when choosing your materials.
If you're curious about how all these different characteristics come together, you can dive deeper into the various types of quilt batting out there.
By really getting a feel for how fiber and loft influence your project, you can stop guessing and start measuring with confidence. This is the kind of know-how that empowers you to choose the perfect foundation for your quilt, guaranteeing a flawless finish you can be proud of every single time.
Mastering Large Quilts and Joined Batting
So, you've pieced together a gorgeous king-sized quilt top, or maybe you've just realized your favorite batting is a few inches too small. Don't panic! This is a rite of passage for every quilter, and learning how to handle oversized projects or join batting scraps is a game-changing skill.
Getting this right means you can confidently tackle any ambitious project and make the most of every last scrap of your precious batting.
The number one mistake I see quilters make is just overlapping two pieces of batting and hoping for the best. This creates a thick, lumpy ridge that's a nightmare to quilt over. Worse, that lump will be a permanent feature in your finished quilt. The goal is a perfectly flat, invisible seam.
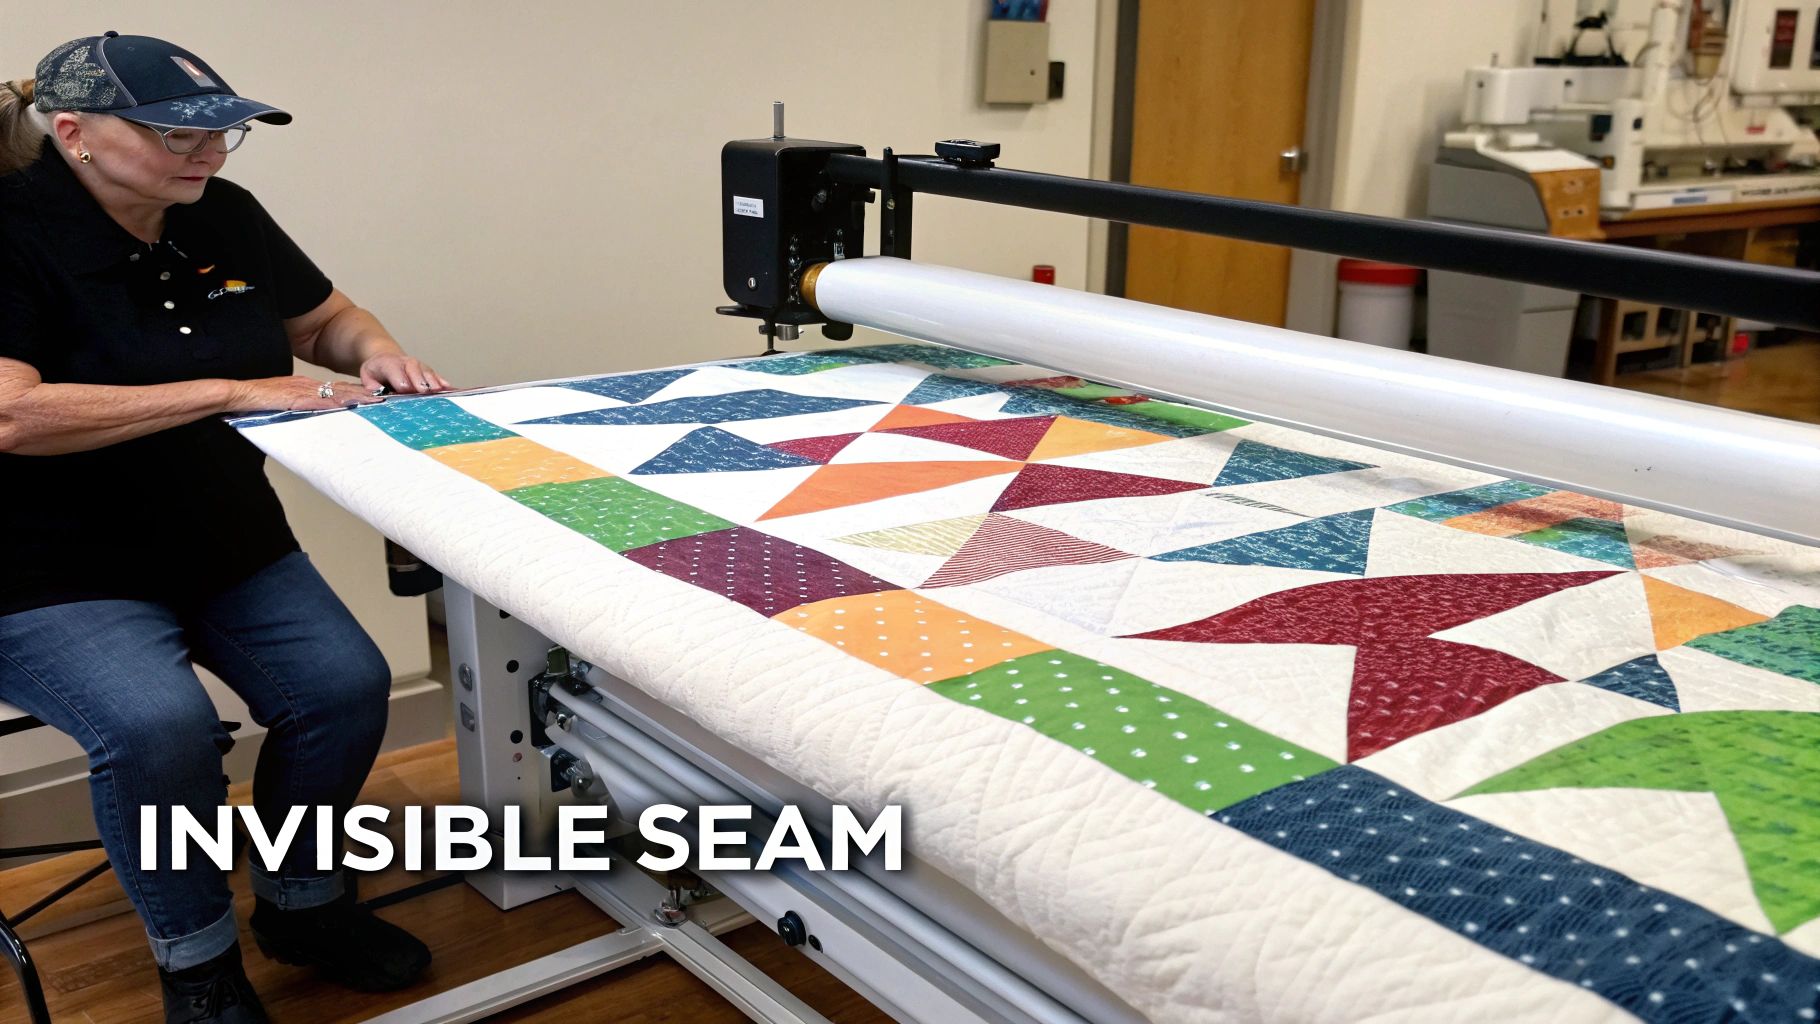
Creating an Invisible Batting Seam
To get that flawless finish, you need to butt the two clean-cut edges of your batting right up against each other. No overlap, just edge to edge. From there, you have a couple of fantastic options to secure them.
- Fusible Batting Tape: This stuff is magic. It's a specialty tape you simply iron over the seam, and it melts to bond the two pieces together without adding any bulk. It’s a super fast and reliable way to get a strong, seamless join.
- Zigzag Stitch: Set your sewing machine to a wide zigzag stitch and sew right over the seam where the two edges meet. The stitch acts like a little bridge, catching the fibers on both sides and pulling them snugly together.
Pro Tip: When you're wrestling with a huge quilt, that extra batting overage is your best friend. It gives you something to grab onto when loading the quilt onto a longarm frame or smoothing it out on the floor for basting.
That extra material isn't waste; think of it as a set of built-in handles. It gives you the control you need to manage the quilt sandwich, turning a potentially frustrating job into a smooth and successful one. Once you master these simple joining and handling tricks, no quilt will ever seem too big to conquer.
A Few Common Questions About Quilt Batting
Once you get the hang of the basics, you'll find that specific situations pop up. Let's tackle some of the most common questions quilters ask when they’re standing in front of a wall of batting rolls, trying to make the right call.
How Much Extra Batting Do I Need for a Longarm Quilter?
This is a big one, and getting it right is crucial. Your longarm quilter will almost always ask for at least 4 to 6 inches of extra batting on all four sides of your quilt top.
So, if you do the math, that means your piece of batting should be a total of 8 to 12 inches wider and 8 to 12 inches longer than your finished quilt top. This extra fabric isn't just for fun—it's what allows them to properly clamp your quilt onto the machine's frame and quilt all the way to the very edge without any trouble.
What's the Most Practical Batting Roll Width to Buy?
If you’re like most quilters juggling projects of all sizes, a 90-inch or 96-inch width roll is your best friend. It’s the sweet spot, giving you enough width to cover everything from baby quilts and throws all the way up to a Twin or even a Full/Double bed quilt without having to piece your batting together.
Now, if you're someone who loves making larger quilts for Queen or King beds, it's a completely different story. In that case, grabbing a 108-inch or 120-inch roll is a smart move. It saves you the headache of seaming batting for your biggest projects and is much more cost-effective in the long run.
Quick Tip: Take a look at the last five quilts you've made. The sizes you gravitate toward will tell you exactly which batting roll width makes the most sense for your sewing room.
Should I Cut My Batting Before or After Pre-washing It?
Absolutely, 100% after. If you like to pre-wash your batting, especially 100% cotton batting, to get the inevitable shrinkage out of the way, you have to do it before you take your rotary cutter to it.
Think of it this way: pre-washing locks the batting into its final, true size. Once it’s been washed and dried, then you can lay it out, measure your quilt top, and cut your batting with that standard 4 to 6 inches of overage on each side.
At Quilt Batting, we stock premium, bulk-friendly batting rolls in all the standard widths, so your projects always have the perfect foundation to build on. Find the ideal batting roll for your next quilt today!