

If you've ever spent hours on your hands and knees, painstakingly pinning a quilt sandwich together, you know the struggle. Or maybe you've dealt with the sticky overspray and fumes from temporary adhesives. What if you could skip all that and get a perfectly smooth, ready-to-quilt sandwich in minutes?
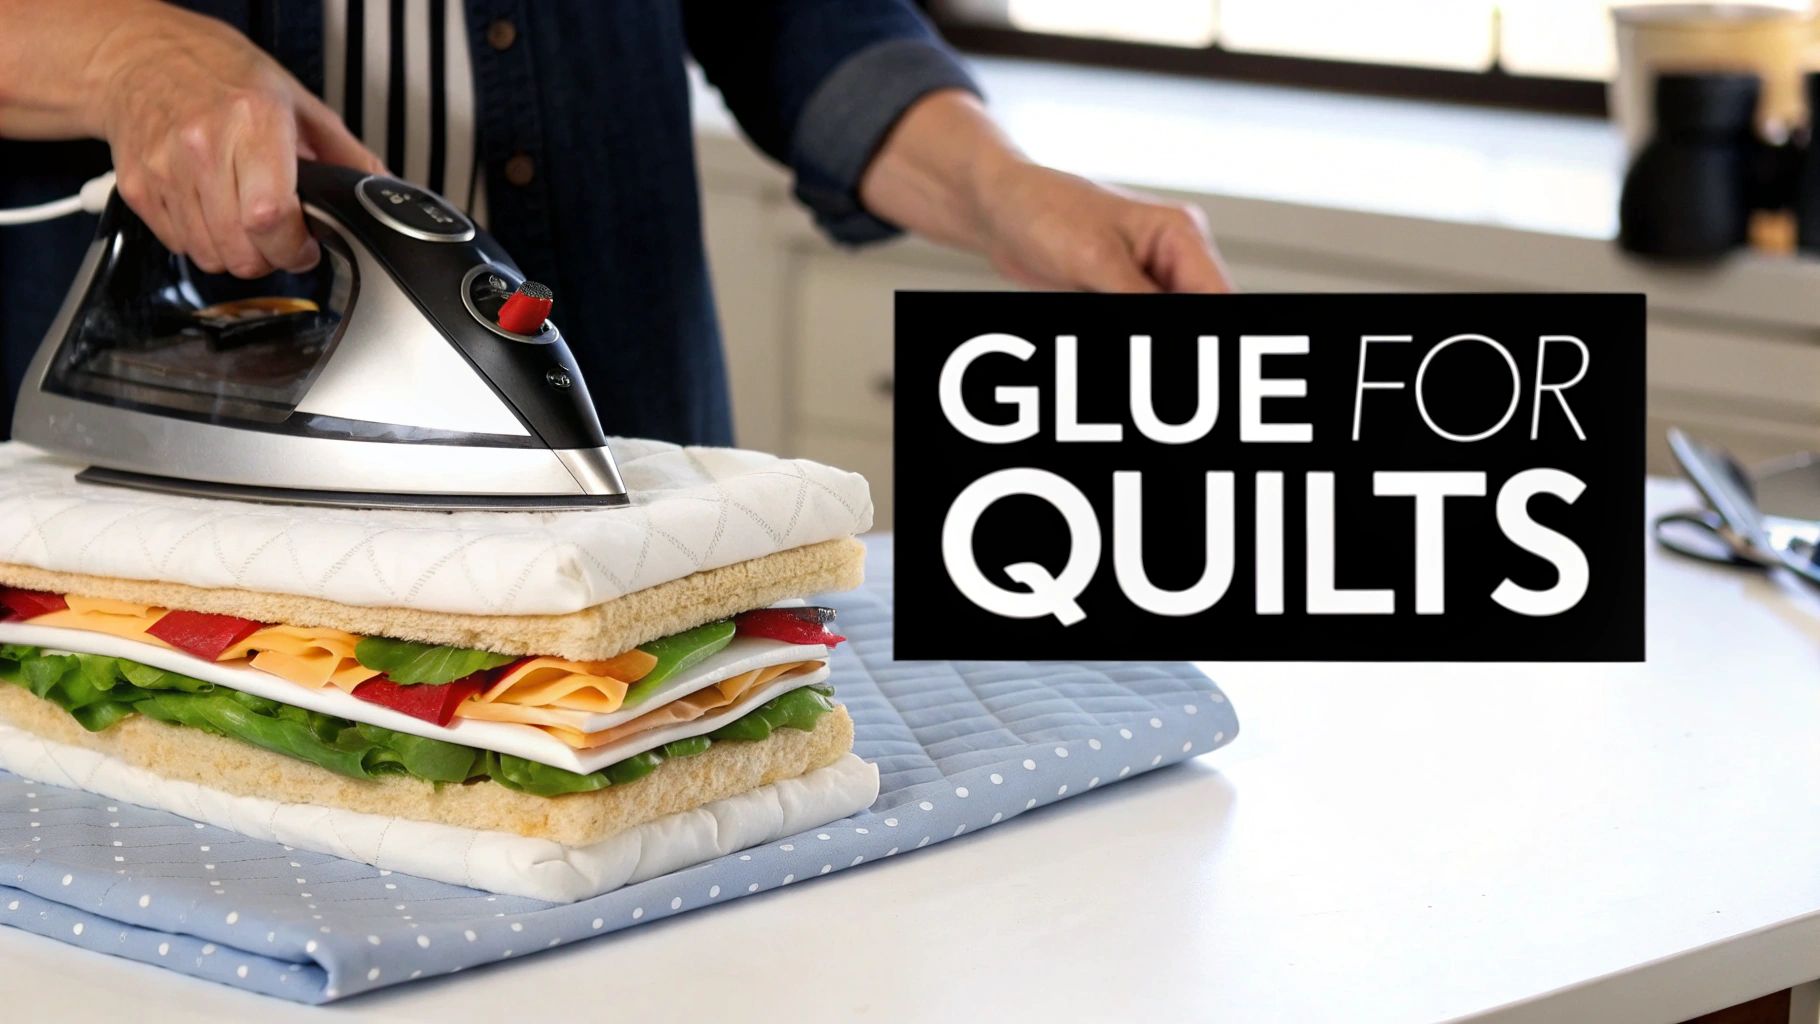
That’s exactly what fusible batting brings to the table. Think of it as having a "glue stick" built right into your batting. When you press your quilt top, batting, and backing with a hot iron, a special heat-activated adhesive on both sides of the batting fuses all three layers together. No pins, no sprays, no fuss.
What Is Fusible Batting and Why Quilters Swear By It
Basting—the process of temporarily securing your quilt's three layers—is one of those necessary evils. It’s absolutely critical for a good result, but let's be honest, it's rarely the fun part. Traditional methods can be tedious and often lead to frustrating problems like shifting fabric, puckering, or uneven stitches.
Fusible batting offers a refreshingly simple fix for this age-old headache.
The Magic of Heat-Activated Adhesive
So, how does it work? At its core, fusible batting is just high-quality batting with a fine, web-like adhesive applied to both sides. This adhesive is completely dormant until you introduce heat and steam from your iron.
Once you press the layers, the adhesive melts just enough to gently bond the batting to your quilt top and backing. The result is a secure, semi-permanent quilt sandwich that stays perfectly flat and won't budge while you quilt. It’s a brilliant way to take the guesswork out of basting.
The real beauty here is how flawlessly smooth your surface becomes. It’s the ultimate shortcut to a professionally basted quilt, giving you a perfect canvas for both machine and hand quilting.
This is why so many quilters have fallen in love with it. It removes a major hurdle from the creative process, letting you get to the quilting part faster and with less stress.
Why It’s a Quilter’s Best Friend
The benefits go way beyond just saving time. Using fusible batting can fundamentally change your quilting experience for the better and even improve your finished project.
Here’s why it has become a staple in so many sewing rooms:
- No More Pins or Sprays: Say goodbye to pricked fingers and the sticky mess of spray adhesives. The whole basting process becomes cleaner, quicker, and a lot more pleasant.
- Stops Shifting and Puckering: Because the layers are uniformly bonded from edge to edge, there’s virtually no chance of the fabric shifting or bunching up as you quilt. This helps you avoid those dreaded tucks and pleats on the back of your quilt.
- Creates a Perfectly Flat Surface: The fused layers lie incredibly flat, making it so much easier to achieve beautiful, even stitches. This is a huge advantage for machine quilters who need a smooth, drag-free path for the needle.
- Great for Projects of All Sizes: While it’s a lifesaver for large, unwieldy quilts, it's also fantastic for small, precise projects like table runners, placemats, and bags where perfect alignment is everything.
Ultimately, fusible batting gives you more control. By ensuring your quilt sandwich is perfectly aligned from the very start, you’re setting yourself up for a much more successful and enjoyable quilting journey.
Fusible Batting vs Traditional Basting At a Glance
To really see the difference, it helps to put the methods side-by-side. Here’s a quick comparison of how fusible batting stacks up against classic pin and spray basting.
| Feature | Fusible Batting | Pin Basting | Spray Basting |
|---|---|---|---|
| Speed | Fast; time depends on iron heat-up and project size. | Slow and laborious, especially on big quilts. | Fast, but requires prep time for the workspace. |
| Mess Factor | None. Clean and contained. | None. Just pin management. | Can be messy with overspray and fumes. |
| Shifting | Minimal to none. Creates a stable, uniform bond. | High risk. Pins can allow fabric to shift. | Low risk if applied evenly, but can wear off. |
| Repositioning | Yes, most brands allow for some repositioning. | Easy. Just unpin and repin. | Difficult once bonded. Can leave residue. |
| Tools Needed | Iron, pressing surface. | Safety pins (lots of them!), floor space. | Spray adhesive, well-ventilated area, drop cloth. |
As you can see, fusible batting hits a sweet spot, offering the security of spray basting without the mess and a much faster process than pinning.
Curious how it compares to other batting types? For a deeper dive into lofts, fibers, and more, check out our comprehensive quilt batting comparison chart.
How to Choose the Right Fusible Batting
Walking into the world of fusible batting can feel a bit like discovering a new aisle in your favorite fabric shop—so many exciting options, but where do you even start? The truth is, not all fusible batting is created equal. The perfect choice really comes down to what you’re making. A flat, modern wall hanging has completely different needs than a plush, cuddly bed quilt.
Think of it like picking the right flour for a recipe. A delicate pastry calls for a fine, light flour, while a hearty artisan bread needs something with more structure. In the same way, the fiber content, loft, and even the brand of your batting will dramatically shape your quilt's final look, feel, and drape.
Decoding Fiber Content
The material your fusible batting is made from is probably the most important decision you'll make. It’s what determines the warmth, weight, and how the quilt will hang or cuddle. Getting this right is the key to bringing your vision to life.
-
100% Cotton: If you adore that classic, crinkly texture of a vintage quilt, 100% cotton is your best friend. It’s breathable, gets wonderfully soft over time, and shrinks just enough after the first wash to create that beloved puckered look. It's my go-to for bed quilts that are meant to be loved and used for years.
-
Polyester: For quilts that need to be true workhorses—durable and lightweight—polyester is a fantastic choice. It resists shrinkage, holds its shape beautifully through countless washes, and often comes in a higher loft that really makes your quilting stitches pop. This makes it ideal for kids' quilts or decorative pieces that see a lot of action.
-
80/20 Cotton/Poly Blends: Here's the sweet spot for many quilters. An 80/20 blend gives you the best of both worlds: the soft, natural feel of cotton combined with the stability and low shrinkage of polyester. Brands like Hobbs Heirloom offer a fusible 80/20 blend that is a dream for machine quilters and a great all-around choice.
-
Wool: Looking for luxury? Wool is surprisingly lightweight yet incredibly warm. It creates a quilt with a beautiful, elegant drape and it naturally resists creases, which is a huge plus for show quilts or special throws. Wool also offers incredible stitch definition, making intricate quilting patterns stand out.
To really get a feel for these materials, it helps to dig a little deeper. For a more detailed comparison, you might find our guide covering the different types of quilt batting helpful.
Understanding Loft and Drape
Once you've picked a fiber, the next thing to consider is loft. It’s a simple term for the thickness and fluffiness of the batting, and it has a huge impact on your quilt's finished look.
A low-loft fusible batting is thin, creating a flat, sleek profile. It's perfect for wall hangings, table runners, and modern quilts where you want the patchwork to be the star of the show. A higher loft batting, on the other hand, is thicker and creates a puffier, more traditional quilt where the quilting stitches look beautifully textured and defined.
Keep in mind that loft also affects the quilt's drape—how it hangs and folds. A low-loft cotton will feel soft and fluid, while a high-loft polyester might have a bit more body and structure.
Leading Brands Hobbs and Pellon
When you start shopping for fusible batting for your quilts, you'll see two names pop up again and again: Hobbs and Pellon.
Hobbs Batting is a long-time favorite among longarm and domestic machine quilters, and for good reason. Their fusible options, like the Hobbs Heirloom Fusible 80/20, are known for creating a soft, reliable bond that doesn't make your quilt feel stiff. It's a product you can really trust.
Pellon is another powerhouse in the industry, offering a huge range of fusible products for just about any project you can imagine. Their battings are easy to find and consistently reliable, making them a solid choice for quilters at every skill level.
As you choose, it's also exciting to see the bigger shifts happening in the quilting world. There's a real movement toward sustainable and eco-friendly materials, driven by quilters who want high-quality, natural fibers that are also responsibly sourced. This trend reflects a shared desire for materials that are not only beautiful and durable but also kind to the planet. You can learn more about these insights into 2025 quilting industry trends on craftindustryalliance.org. This shift means we can all look forward to even more innovative, earth-friendly fusible options in the future.
Your Step-by-Step Guide to the Fusing Process
Alright, let's get hands-on. Getting that perfect bond with fusible batting isn't about some secret, complicated skill. It’s all about following a simple, proven process that really works. Our goal here is to create a flawlessly smooth quilt sandwich that’s an absolute dream to quilt on—completely free of the wrinkles, puckers, and stiffness that can creep in when you take shortcuts.
Think of it like baking a perfect cake. You need the right ingredients, sure, but it’s the method that truly guarantees success. Follow these steps, and you’ll take all the guesswork out of the equation. You'll be fusing your layers with confidence from the very first try.
Prepare Your Workspace and Fabrics
Before you even think about plugging in your iron, a little prep work goes a very long way. First things first: give your quilt top and backing fabric a thorough press. I mean, get every last wrinkle and fold line out. Any crease you leave in now is going to become a permanent part of your quilt once it’s fused, so this is the time to be picky.
Next, find yourself a large, flat surface that can handle the heat, like a clean floor or a big pressing mat. Lay your backing fabric down, wrong side facing up, and smooth it out until it’s perfectly flat. I always like to use painter's tape to secure the corners and edges to the surface. This keeps it nice and taut, preventing any shifting while you work.
This visual guide breaks down the core decisions in batting selection, from your project's purpose to its final texture.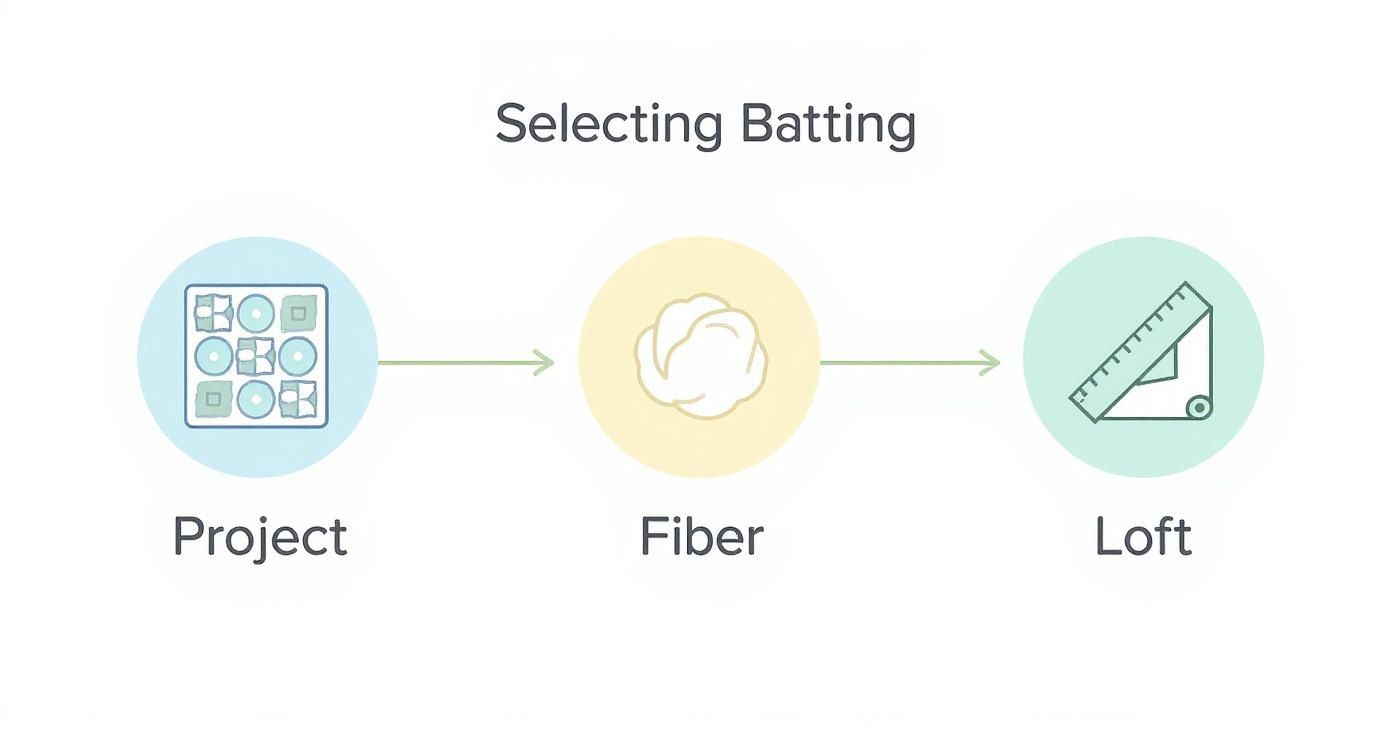
The process highlights how fiber content and loft directly influence the quilt's final look and feel.
Layering Your Quilt Sandwich
With your backing all squared away, it's time to build your quilt sandwich. Gently place your fusible batting for quilts on top of the backing, smoothing out any bumps from the center outwards. The adhesive is on both sides, so it should be facing down toward the backing and up toward where your quilt top will go.
Finally, lay your quilt top over the batting, right side up. Once again, smooth it out meticulously from the center to the edges. You're aiming for a perfectly flat, three-layer stack with no wrinkles or trapped air bubbles.
Pro Tip: Make sure your backing and batting are at least four inches larger on all sides than your quilt top. This extra fabric is your insurance policy against shifting, and it gives a longarm quilter something to attach to their machine.
The Secret to a Perfect Fuse: Pressing vs. Ironing
Listen up, because this is the single most important part of the entire process. To activate the adhesive in fusible batting, you absolutely must press, not iron.
So, what's the difference?
- Ironing is that classic sliding, back-and-forth motion we all use on a shirt. That’s a disaster for a quilt sandwich. It will push, stretch, and distort your fabric layers, creating ugly waves and puckers.
- Pressing is a simple up-and-down motion. You set the iron down, hold it in place for a few seconds, and then lift it straight up before moving to the next spot.
This direct, gentle pressure is what melts the adhesive evenly, bonding the layers together without messing up their perfect alignment. It is the absolute key to a smooth, beautiful finish. While this method replaces pins and sprays, it’s still good to know about other techniques. To see how this compares to traditional methods, check out our guide on how to baste a quilt.
Your Fusing Action Plan
Ready to go? Always glance at the manufacturer's instructions for the specific brand you're using, but this general game plan works for almost every fusible batting out there.
-
Set Your Iron: Adjust your iron to the temperature recommended on the batting package, which is usually a medium-hot setting with steam. Let it get fully heated before you start.
-
Start in the Center: Begin right in the middle of your quilt. Place the iron down and hold it still for several seconds (the sweet spot is often 5-10 seconds, but check your instructions).
-
Lift and Overlap: Lift the iron straight up—no dragging!—and move to an adjacent spot, slightly overlapping the area you just pressed. Keep up this lift-and-press rhythm, working your way methodically from the center out toward one corner.
-
Work in Sections: Once you’ve fused one whole quadrant, go back to the center and work your way out to another corner. Repeat this until the entire quilt top is securely bonded to the batting.
-
Flip and Repeat: Now, carefully remove the tape, flip the whole quilt sandwich over, and do the exact same pressing process on the backing. This double-fusing ensures the batting is stuck securely to both fabrics, creating a wonderfully stable project that's ready for quilting.
The Honest Pros and Cons of Fusible Batting
So, should you use fusible batting for your next quilt? This isn't just a technical question—it's about what you value most in your quilting process. Let's have a real heart-to-heart about its strengths and weaknesses so you can decide if it's the right partner for your creative vision.
There are some fantastic reasons to love fusible batting, but I'll be the first to admit it isn't the perfect choice for every single project. For many quilters, the time saved and the headache-free finish are total game-changers. For others, the slight change in feel or the extra cost is a deal-breaker. Let's break it down.
The Big Wins: The Pros of Fusing
The number one reason quilters fall in love with fusible batting is the sheer amount of time and back-breaking effort it saves. Think about it: the traditional basting process can mean hours spent crawling around on the floor, painstakingly pinning every few inches or dealing with the fumes and overspray of temporary adhesives. Fusible batting turns all that into a quick, clean session with your iron.
But the speed is just the start. The real magic is in the incredible stability it gives your quilt sandwich.
- Zero Pins Required: This is a bigger deal than it sounds. No more pricking your fingers, no more stopping to pull out pins as you quilt, and zero worry about them shifting or falling out on you.
- A Perfectly Flat Surface: Because the heat-activated adhesive bonds your layers together so evenly, you get a beautifully smooth, stable surface to work on. For machine quilters, this is an absolute dream—it dramatically cuts down on the drag and friction that can make quilting feel like a workout.
- No More Shifting or Puckering: Let's face it, the enemy of a gorgeous quilt is fabric that shifts while you're stitching. It’s the top cause of those frustrating tucks and pleats on your quilt back. Fusible batting locks everything in place, virtually eliminating this common problem.
By creating a single, cohesive unit out of your quilt top, batting, and backing, fusible batting gives you a level of control that's almost impossible to get with temporary methods. It sets you up for cleaner stitches and a more professional finish right from the get-go.
The Trade-Offs: The Cons to Consider
Of course, nothing's perfect, and you need to know about the potential downsides before you commit. This is where your personal quilting style and preferences really come into play.
The main hesitation for many quilters is the final drape of the finished quilt. The adhesive, even though it’s very light, can add a bit of stiffness that you wouldn’t find in a non-fusible batting. Modern fusibles are worlds away from the stiff old versions, but a quilt made with one might not feel quite as soft and cuddly as one made with a simple, traditional cotton.
Another thing to keep in mind is that the bond is semi-permanent. While this is what gives you that amazing stability, it's also less forgiving if you make a mistake while layering. You can usually reposition it, but it's not as simple as pulling out a pin. There's less room for error, which can feel a little nerve-wracking if you're new to it.
Finally, there are a couple of other practical points to weigh:
- Higher Cost: Fusible batting is almost always more expensive per yard than its non-fusible cousins. On a big quilt, that extra cost can definitely add up.
- Fiber Integrity: The adhesive creates a fine web over the fibers, which can feel different from the pure, unadulterated batting. This is a lot like how batting with a scrim—a thin internal stabilizer—can change the texture. If you're curious about the nitty-gritty, you can learn more about what is scrim in batting to see how these internal structures work.
To make the decision a little easier, here's a quick side-by-side look:
Pros and Cons of Fusible Batting
| Advantages (Pros) | Disadvantages (Cons) |
|---|---|
| Saves hours on basting time. | Can make the final quilt feel slightly stiffer. |
| Eliminates the need for pins or messy spray. | Generally more expensive than non-fusible options. |
| Creates a perfectly smooth, stable surface. | Less forgiving of layering mistakes. |
| Prevents shifting, puckering, and tucks. | Can be trickier to manage on very large quilts. |
| Ideal for machine quilting and beginners. | Adhesive may feel different than pure fiber. |
Ultimately, choosing fusible batting comes down to your priorities. Are you willing to trade a little softness and a higher price tag for a faster, easier, and more reliable basting experience? For so many of my projects, the answer is a resounding "yes!"
Finishing and Caring for Your Fusible Quilt

Okay, your quilt sandwich is perfectly fused. Now the real fun starts! Stitching through a fused project is one of those wonderfully satisfying experiences in quilting. Because everything is locked in place, you have total control, and the layers behave exactly as they should.
Let's talk about getting this beautiful quilt finished and making sure it stays that way for years. Proper care is everything, but it's also where I see a lot of quilters hesitate with fusible batting. Don't worry—caring for your fused quilt is straightforward. With just a few simple tips, that soft, secure bond will last a lifetime.
Quilting Your Fused Project with Confidence
Whether you’re working on a domestic machine or a longarm, quilting a fused top is an absolute dream. The layers are so stable that you get none of that annoying bunching or shifting. Your needle just glides right through, leaving you with beautiful, even stitches.
To make sure things go smoothly, here are my go-to best practices:
- Start with a Fresh Needle: This is non-negotiable. A sharp new needle, usually a size 80/12 or 90/14 Universal or Quilting needle, will pierce cleanly through all three layers without a fight.
- A Walking Foot is Your Best Friend: If you're on a domestic machine, a walking foot is essential. It works with the fused batting to feed the layers evenly, pretty much guaranteeing you won't see a single pucker.
- Dial in Your Stitch Length: I find a slightly longer stitch, somewhere around 2.5 to 3.0 mm, really looks best on a quilt. It lets the stitches sit proudly on top of the fabric instead of sinking in and pulling.
It's amazing to think about how much the quilting world has grown. The global market for batting was valued at around $500 million in 2025 and is projected to hit $750 million by 2033! That growth, fueled by the 9 to 11 million quilters out there, is what drives innovation in products like fusible batting for quilts. If you're curious, you can discover more insights about quilt batting market growth and see where the industry is headed.
Washing and Drying Your Quilt
One of the biggest myths I hear about fusible batting is that it can't handle being washed. That couldn't be more wrong! Today's fusible adhesives are built to be permanent and durable, especially once the project is quilted.
Think of it this way: The fusible bond holds everything perfectly still for you to quilt it. Once you've added your stitches, they become the primary structural support that locks it all in for good.
Here’s how to wash your quilt to keep it looking and feeling fantastic:
-
Go Gentle: Always use a gentle or delicate cycle on your machine with cold water. This is kind to your seams and stitches.
-
Use a Mild Soap: A gentle, pH-neutral detergent made for delicates is the way to go. Harsh chemicals can be tough on fabric dyes and batting fibers over time.
-
Drying is Easy: You can absolutely tumble dry your quilt on a low-heat setting. I like to toss in a few wool dryer balls to help it dry evenly and stay fluffy. If you prefer, laying it flat to air dry works just as well.
That’s all there is to it! By following these simple steps, your finished quilt will stay soft, beautiful, and ready for years of cuddles. You get all the convenience of fusible batting for quilts without having to sacrifice an ounce of durability.
Troubleshooting Common Fusible Batting Issues
Even the most seasoned quilters run into a snag with fusible batting every now and then. One minute you're sailing along, the next you've hit a stubborn spot that just won't stick. But don't worry—most of these little hiccups are surprisingly easy to solve once you know the secret.
Think of this as your personal cheat sheet for turning a moment of quilting frustration into a quick fix. By understanding what trips up the fusing process, you'll be able to confidently handle any issue and get right back to the fun part.
Correcting Patchy or Weak Adhesion
This is hands-down the most common complaint I hear. You press your quilt sandwich, but when you check it, some areas are perfectly bonded while others are lifting right off. The good news is, this almost always comes down to two simple things: heat and time.
That fusible adhesive needs just the right amount of heat, held for just the right amount of time, to properly melt and grab onto the fabric. If your iron is too cool or you move it too quickly, the glue simply doesn't get a chance to activate.
- What's Happening: The iron is likely set too low, you're not lingering long enough in each spot, or your iron has "cool spots" that aren't delivering consistent heat.
- How to Fix It: First, go back to the manufacturer's instructions and double-check the recommended heat setting—you might need to bump it up a notch. When you press, make it a slow, deliberate count to ten before lifting the iron and moving to the next section. If you think your iron is the problem, just be sure to generously overlap each press to ensure every inch gets enough heat. A quick re-press of the problem area is usually all it takes!
Solving a Stiff or Board-Like Feel
Your finished quilt should be soft and drapable, not stiff as a board. If your fused project feels rigid and inflexible, the culprit is usually too much heat or simply choosing a batting that's a bit too firm for your project's needs.
When the iron is too hot, it can essentially "overcook" the adhesive, making the bond hard instead of pliable. It’s also worth noting that some polyester fusibles just have a naturally stiffer hand than their cotton or wool counterparts.
Remember, you're just trying to melt the adhesive enough to create a bond. You're not trying to flatten the layers into oblivion. Gentle, steady heat always wins over scorching, high heat.
To fix it, first make sure your iron setting isn't cranked up too high. If the stiffness is still there after you've quilted and washed it, consider trying a 100% cotton or an 80/20 blend fusible on your next project. You’ll be amazed at the difference in softness.
Smoothing Out Fused-In Wrinkles
It’s a moment that makes any quilter’s heart sink. You lift your iron, feeling accomplished, only to see you've permanently fused a giant wrinkle into your quilt top. It looks like a disaster, but it’s often salvageable.
The trick is to gently reheat the glue just enough to release its grip. Set your iron to the same temperature you used before and hover it over the wrinkled spot, giving it a little puff of steam for a few seconds. As the adhesive softens, you should be able to carefully peel the fabric layer away from the batting. Smooth the wrinkle out with your hands, let it cool for a second, then press the area again—this time, nice and flat. This simple rescue mission for fusible batting for quilts has saved more than a few of my own projects from the scrap bin.
Your Fusible Batting Questions, Answered
Even after you get the hang of it, a few common questions always seem to come up when you're working with fusible batting for the first time. Let's tackle them head-on, so you can start your next project with confidence and get those beautiful, flat results you're looking for.
Can I Use Fusible Batting for Hand Quilting?
You absolutely can. In fact, many hand quilters swear by it. While the fused quilt sandwich might feel a tiny bit firmer to your needle than a non-fusible one, the trade-off is huge: your layers are locked in place and won't shift, pucker, or move an inch while you stitch.
To make the experience as smooth as possible, just keep a few things in mind:
- Stick with a fusible batting for quilts that has a good amount of cotton, like a classic 80/20 blend. The cotton keeps it soft.
- A lower loft batting is your friend here. It's less dense, making it much easier to needle through.
- Don't skimp on your needle! A sharp, high-quality "between" will glide through the layers like a dream.
Will the Adhesive Gum Up My Sewing Machine Needle?
This is probably the number one concern I hear, but I'm happy to report you can put that fear to rest. The technology behind modern fusible battings has come a long way. The adhesive is specifically engineered to create a dry, secure bond only when activated by heat.
Once it cools, it's not tacky at all. As long as you follow the manufacturer's pressing instructions and don't get carried away with the iron, the adhesive won't transfer or build up on your needle. It's a clean process from start to finish.
The key is proper heat application. The adhesive is designed to bond with fabric fibers, not your quilting tools. Get the heat right, and you'll have a clean, hassle-free machine quilting experience.
Is Fusible Batting Safe for Baby Quilts?
Yes, it is. Reputable brands like Hobbs and Pellon use adhesives that are inert and stable once they've been heated and cooled. This means they are non-toxic and don't contain harmful chemicals, making them a safe choice for quilts meant for little ones.
These products are made to meet high safety standards. Of course, if you have any specific concerns about sensitivities, it never hurts to double-check the packaging. Look for labels that mention the batting is hypoallergenic or certified safe for children's items for that extra peace of mind.
Ready to ditch the pins and get a perfectly smooth start on your next project? At Quilt Batting, we stock premium Hobbs and Pellon fusible options by the roll—perfect for quilters who value quality and convenience. Find the ideal foundation for your masterpiece today at https://quiltbatting.shop.