

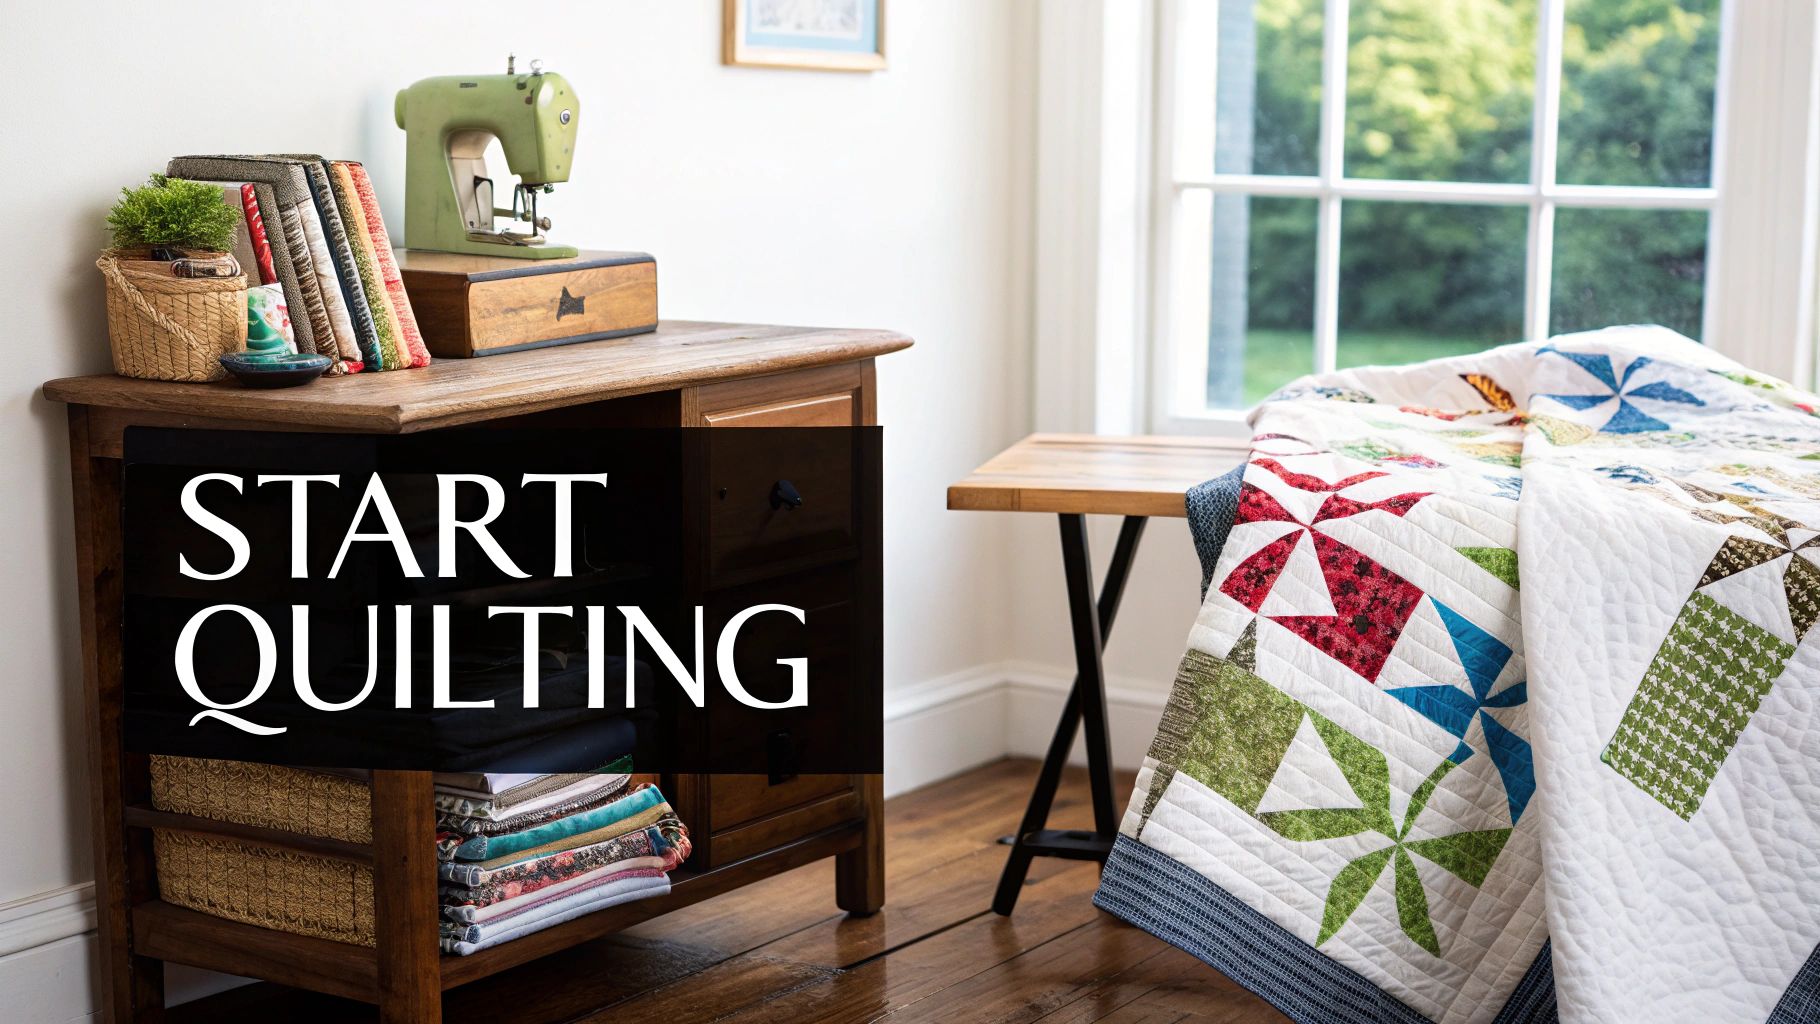
Welcome to the wonderful world of quilting! If you've ever admired a beautiful handmade quilt and thought, "I could never do that," I'm here to tell you that you absolutely can. At its heart, quilting is beautifully simple: it's all about stitching together three layers to create a "quilt sandwich"—a decorative top, a cozy middle, and a solid backing.
Once you grasp a few key ideas, you'll be on your way to making something you can be proud of.
Your Quilting Journey Begins Here
Diving into a new hobby can sometimes feel a bit overwhelming, almost like learning a new language. But quilting is different. It’s built on a series of simple, satisfying steps that come together to create something truly special. Think of yourself not just as someone sewing fabric, but as a storyteller connecting with a craft that has been passed down for generations.
This guide is designed to walk you through the process, making it feel less like a mystery and more like an exciting new adventure. Let's break down the three essential layers that bring every quilt to life.
- The Quilt Top: This is where your creativity shines! It’s the top layer, where you piece together different fabrics to create your unique pattern or design.
- The Batting: This is the unsung hero of the quilt. Tucked in the middle, batting is what provides warmth, determines the quilt's weight, and gives it that wonderful, puffy texture we all love. Getting to know batting is a huge step when you learn how to quilt.
- The Backing: This is the sturdy foundation of your quilt, the final piece of your textile sandwich that holds it all together.
When you start quilting, you're not just picking up a needle and thread; you're joining a vibrant and supportive community. It's a craft that's bigger than ever, with the global quilting industry now generating an annualized revenue of $4.5 billion. That's a lot of quilts! This growth is fueled by an estimated 9-11 million quilters, which just goes to show how many people have fallen in love with this timeless art.
The Anatomy of a Quilt: What Are the Three Layers?
Every quilt you've ever snuggled under, from a treasured family heirloom to a modern wall hanging, is built the same way. It's essentially a creative and cozy sandwich, with three distinct layers that work in harmony. Getting a handle on this simple concept is the first real step into the world of quilting; everything else builds from here.
This three-part structure is your canvas, your warmth, and your foundation all rolled into one.
The Quilt Top: The Star of the Show
First up is the quilt top. This is the layer that gets all the attention—it’s the beautiful, decorative side where your artistry shines. This is where you piece together fabrics to create stunning patterns, tell a story with colors, or showcase intricate appliqué work.
The quilt top is the visual heart of your project. Think of it as the top slice of bread in our quilt sandwich, the part that makes everyone say "Wow!"
Batting: The Soul of the Quilt
Tucked away in the middle, you’ll find the batting. This is the unsung hero of the quilting world. It's the soft, fluffy layer that gives a quilt its warmth, its weight, and its wonderful texture. Batting is what makes a quilt feel like a hug.
You'll find it made from various materials—cotton, wool, polyester, and blends—and each one gives a different result.
The batting you choose has a huge impact on the final look and feel of your quilt. A thin, low-loft batting creates a flat, antique drape, while a thick, high-loft batting gives you a puffy, cloud-like comforter.
This middle layer is what truly turns a decorative blanket into a quilt. To get a better sense of your options, check out our guide on what is quilt batting—it’s a great resource for understanding how different types will affect your project.
The Backing Fabric: The Sturdy Foundation
Last but not least is the backing fabric. This is the bottom of your quilt, the foundation that holds everything together. It provides stability and durability, and while it's often a single, large piece of fabric, many quilters get creative here, too. You can piece together leftover scraps or use a bold print for a fun, reversible effect.
Once you have your top, batting, and backing, you've officially made a "quilt sandwich." Now, you're ready for the magic of stitching them all together.
How to Choose the Right Quilt Batting
Think of batting as the secret ingredient in your quilting recipe. It's the cozy, hidden layer that gives your quilt its personality—determining how warm it feels, how it hangs, and how it cuddles. Getting this middle layer right is one of the most important first steps in your quilting journey.
Batting comes in a few different flavors, and each one brings something unique to the table. For a beginner, sticking to the classics is always a great start.
- 100% Cotton: You can't go wrong with cotton. It's soft, breathable, and gives you that classic, crinkly quilt look we all love after it’s been washed. It’s perfect for a traditional feel.
- 80/20 Cotton-Poly Blend: This is my go-to recommendation for new quilters. You get the best of both worlds: the lovely softness of cotton, plus a little extra stability and loft from the polyester. It's wonderfully forgiving to work with.
- Wool: If you’re dreaming of a quilt that’s exceptionally warm and puffy without being heavy, wool is your answer. It has incredible loft and insulation, making it ideal for those deep-winter snuggles.
If you want to dive deeper into all the options out there, our complete guide on the different types of quilt batting is the perfect place to explore.
Understanding Loft and Width
As you shop for batting, you'll hear the term "loft" thrown around. It’s just a fancy word for thickness or "fluffiness." Low-loft batting is thin and creates a flatter quilt, which really lets your piecing and quilting stitches shine. High-loft batting is much thicker, giving you that puffy, comforter-style finish. As a beginner, I’d suggest starting with a low-to-medium loft—it’s much easier to quilt through.
You also need to think about width. Batting comes on rolls in standard widths, like 90" or 120". For those of us who quilt a lot, buying it by the roll is a game-changer. It’s way more economical and you always have what you need ready to go for your next burst of inspiration.
This flowchart gives you a great visual of how the three layers—your quilt top, the batting, and the backing—all come together to create your finished quilt.
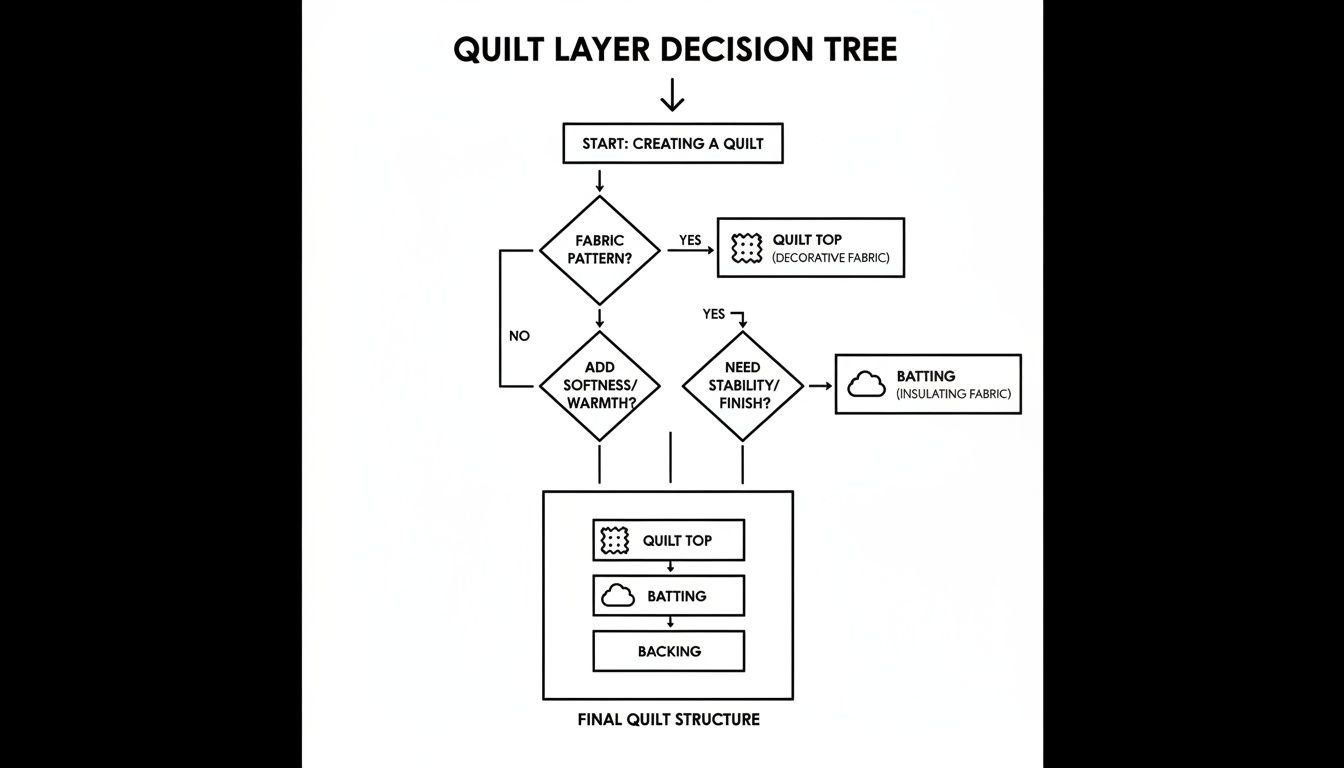
As you can see, batting is literally the heart of the quilt, providing all that wonderful warmth and structure.
Here’s a quick reference to help you choose the right batting for your project.
Quilt Batting Comparison Guide
| Batting Type | Key Characteristics | Best For Projects Like... |
|---|---|---|
| 100% Cotton | Soft, breathable, low loft, classic crinkle finish. | Traditional quilts, wall hangings, table runners. |
| 80/20 Cotton-Poly | Durable, soft, medium loft, less shrinkage. | Everyday quilts, charity quilts, baby blankets. |
| Wool | Very warm, high loft, lightweight, great stitch definition. | Winter quilts, heirloom projects, comforters. |
This table should give you a solid starting point, but don't be afraid to experiment as you get more comfortable!
Choosing the right batting isn't just a technical decision; it's a creative one. It determines if your quilt will be a lightweight summer throw or a heavy, comforting winter blanket.
Ultimately, your batting choice is a personal one that shapes the entire look and feel of your finished masterpiece. So take your time, choose wisely, and have fun with it
Gathering Your Essential Quilting Tools
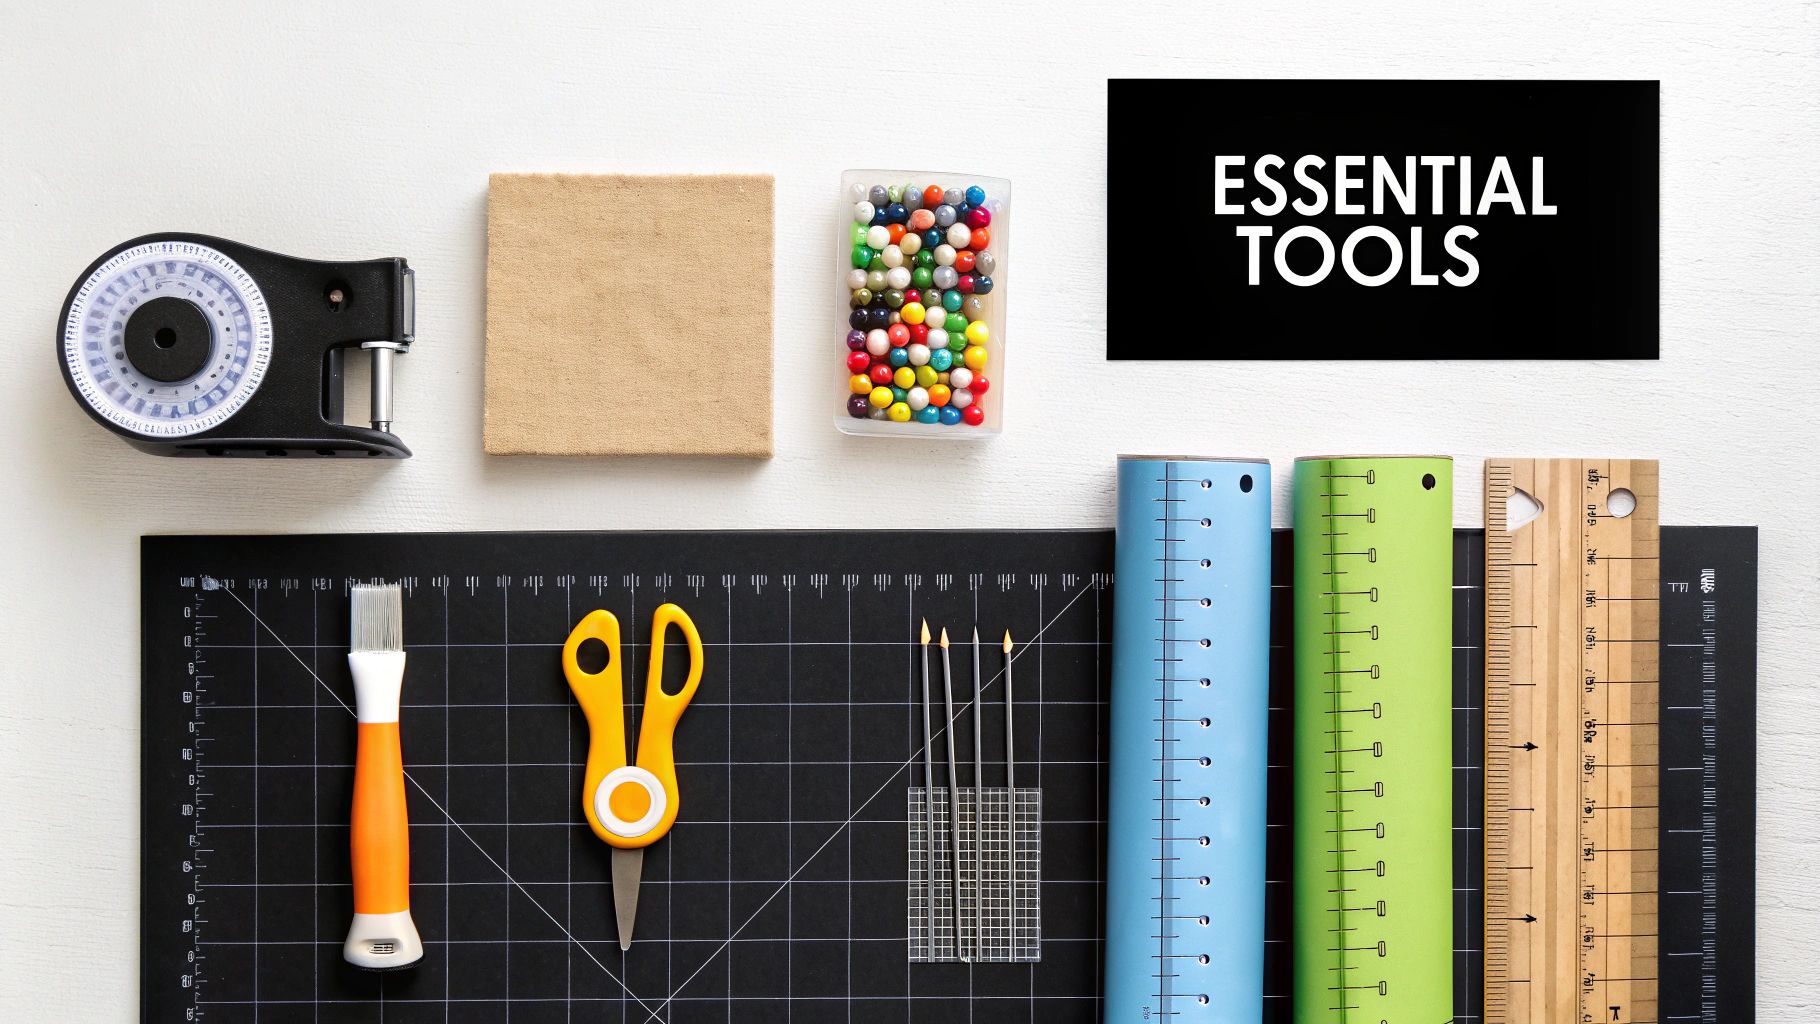
Jumping into a new hobby can feel overwhelming, especially when you see all the gadgets available. But here’s a little secret from one quilter to another: you only need a handful of core items to get started on the right foot.
Think of it like stocking a kitchen—you need a good knife, a cutting board, and a reliable pan before you worry about the fancy stuff. Investing in a few quality tools right away will make your quilting experience smoother, more accurate, and a whole lot more fun.
The Holy Trinity of Cutting Tools
Most seasoned quilters will tell you there are three tools they simply can't live without. This trio works in perfect harmony to give you the kind of straight, precise cuts that scissors just can't deliver.
- Rotary Cutter: Imagine a pizza cutter, but for fabric. This rolling blade zips through multiple layers of cotton with incredible ease, leaving you with a perfectly clean edge every single time.
- Self-Healing Mat: This is your rotary cutter's best friend. It protects your table from the blade while "healing" over the cuts, and the grid lines are a lifesaver for keeping your fabric perfectly straight.
- Acrylic Ruler: A see-through ruler, usually a 6" x 24" workhorse, lets you see the fabric underneath. You'll use it to guide your rotary cutter, ensuring every single strip and square is exactly the size you need it to be.
Beyond those three essentials, you’ll just need a few more things to round out your toolkit. A dependable sewing machine that can sew a nice, straight stitch is non-negotiable, and you'll want to pair it with a good quality, 100% cotton thread. Finally, grab some straight pins or quilting clips to hold your fabric pieces together while you sew.
Building your toolkit is the first real step in the basics of quilting. Having these foundational supplies on hand is what turns a potentially frustrating project into a joyful, creative process with a beautiful quilt at the end.
If you're looking for a complete shopping list, check out our guide on quilting supplies for beginners. It breaks down everything you’ll need to start your quilting journey with confidence.
Your First Quilt From Start to Finish
So, how do all those little fabric pieces actually become a quilt? It might seem like magic, but there’s a wonderfully logical path that every quilter follows. We can break the whole process down into five core stages.
Think of it as a roadmap. Once you understand the journey, your first project feels way less intimidating and a lot more like a creative adventure you can actually finish.
The Five Core Stages of Quilting
Every single quilt, from a simple baby blanket to a king-sized masterpiece, comes together following these same five steps. This is the fundamental workflow that turns a stack of fabric into a work of heart.
- Piecing the Quilt Top: This is where your design comes to life! You'll cut your fabric into shapes—squares, triangles, you name it—and sew them together to create the face of your quilt. It’s pure color and pattern play.
- Assembling the Quilt Sandwich: With your top done, you'll layer it with your batting and backing fabric. This creates the classic three-layer "sandwich" that is the soul of every quilt.
- Quilting: Now it's time to stitch it all together. The quilting stitches go through all three layers, locking them in place while adding incredible texture and design. You can start with simple straight lines or get as fancy as you want.
- Squaring Up: Things get a little messy after quilting, with uneven edges of batting and backing hanging out. Squaring up is simply trimming everything flush to create perfectly straight, clean edges. It makes a huge difference.
- Binding: The grand finale! You’ll wrap the raw edges of your quilt with a final strip of fabric. This durable binding gives your quilt a beautiful, polished frame and protects it for years to come.
Following these five steps in order is the secret sauce. It turns a big, complex project into a series of small, satisfying tasks. This is the tried-and-true process that brings every quilt to life.
And it’s a process that millions of people love. The global market for quilting fabric was valued at a staggering $3.5 billion in 2023 and is expected to grow to $5.7 billion by 2032. It’s incredible to think about how much creativity is fueled by these foundational materials. You can find more details about this growing craft on dataintelo.com.
Got Questions? Let's Talk Quilting.
Jumping into a new hobby always brings a wave of questions. It's totally natural to wonder if you're on the right track or if you've got the right tools for the job. Let's walk through some of the most common things new quilters ask so you can stitch with confidence.
Think of this as a chat with a seasoned quilter, here to clear up the confusion and make sure your new adventure is all fun and no fuss.
What’s the Best Quilt to Start With?
Hands down, the easiest first project is a simple patchwork quilt made from pre-cut fabric squares. You'll see these sold as "charm packs" or "layer cakes," and they are a beginner's secret weapon.
Why? Because using pre-cuts lets you skip the most nerve-wracking part—cutting everything perfectly—and get right to the good stuff. You can focus on mastering the single most important skill: sewing a consistent ¼ inch seam. It’s a huge confidence boost and gets you to a finished quilt so much faster.
Do I Really Need a Special Sewing Machine?
Nope! You absolutely do not need a high-end, specialized quilting machine. Any basic home sewing machine that can sew a decent straight stitch will work just fine for your first few quilts.
The one thing that will make your life infinitely easier is a walking foot. This little attachment is a game-changer. It grips the top layer of your quilt and pulls it through the machine at the same speed as the bottom layer, preventing all that frustrating bunching and shifting. Most machines come with one, but if not, they're easy and inexpensive to find.
A walking foot is like having an extra set of hands guiding your quilt. It ensures all three layers of your quilt sandwich—the top, the batting, and the backing—move together in perfect harmony for beautifully smooth stitches.
How on Earth Do I Choose Batting?
For a first-timer, you can't go wrong with an 80/20 cotton-polyester blend. It's the MVP of quilt batting for a reason. You get the soft, breathable feel of cotton, but the polyester adds a bit of strength and keeps it from shrinking too much.
This blend is incredibly forgiving, drapes beautifully once it’s quilted, and won’t give you a headache when you're maneuvering it through your sewing machine. It has just enough puff to give your quilt a lovely, snuggly texture without being a beast to handle.
I Keep Hearing About "Loft." What Is It?
Loft is just a quilter's way of talking about the thickness and fluffiness of the batting. It's what determines how your finished quilt will look and feel.
- Low-Loft Batting: This is thin and dense. It creates a flatter quilt that drapes beautifully, giving it that classic, vintage heirloom vibe.
- High-Loft Batting: This is thick and airy. It's what you'd use for a puffy, comforter-style quilt where you want the stitching to create deep, defined valleys.
My advice? Stick with a low or medium loft to start. It's much, much easier to quilt.
Ready to find the perfect heart for your first quilt? Quilt Batting has a fantastic selection of batting by the roll, perfect for getting started or stocking your studio. Take a look at our collection and let the creative journey begin