

So, you want to learn how to quilt? The whole process might seem a little intimidating at first, but it really just boils down to a few key stages: picking your tools, cutting your fabric, piecing the top, layering it all together, and finishing the edges. Don't let the big picture overwhelm you. Anyone can learn these skills one step at a time and turn a simple stack of fabric into a work of art.
Your Quilting Journey Starts Here
Welcome to the wonderfully addictive world of quilting. This craft is so much more than just sewing fabric scraps together; it’s about creating something beautiful, personal, and lasting with your own two hands. Staring at a pile of fabric and imagining a finished quilt can feel like a huge leap, but I'm here to walk you through it.
Let's get one thing straight: quilting isn't just for experts. Forget the idea that it’s too complicated for a beginner. It's really a series of small, satisfying steps that build on each other. Think of this guide as your quilting mentor, showing you the way from picking your first pattern to adding that final, perfect stitch on the binding.
What to Expect on Your Quilting Adventure
Consider this your warm-up lap. It's a chance to get inspired and see the road ahead without getting lost in the technical details right away. My goal is for you to finish this section feeling excited and ready to make that first cut.
You’re also stepping into an amazing community. Quilting has seen a massive resurgence, growing from a quiet hobby into a huge creative industry. In fact, the quilting market hit $4.5 billion in annualized revenue, a huge jump from $1.8 billion back in 2000. For a newcomer like you, this boom means there are more resources—from YouTube tutorials to local guilds and online classes—than ever before. You can see more stats on this over at craftindustryalliance.org.
Quilting is the perfect blend of artistry and precision. It lets you play with color and design while building a tangible, practical skill. Every quilt you finish will tell a story—your story.
Your Path to Success
We're going to cover everything you need to know to get started on the right foot. Trust me, learning the fundamentals from the beginning will save you a ton of frustration (and fabric!) down the road.
Here are the core skills you'll be building:
- Accurate Cutting: Getting comfortable with a rotary cutter and ruler is a game-changer for clean, precise pieces.
- Consistent Seams: Mastering the quarter-inch seam is the absolute bedrock of all patchwork.
- Block Construction: This is where the magic starts, as you assemble your cut pieces into beautiful, uniform quilt blocks.
- Quilt Assembly: You'll learn how to join your blocks to create a full quilt top, ready for quilting.
By tackling it this way, you'll build confidence with every little win. For a little extra prep, you can check out our essential quilting tips for beginners to get a head start. Before you know it, you'll be making heirlooms that your family will cherish for years to come.
Building Your Essential Quilting Toolkit
Jumping into quilting without the right gear is a recipe for frustration. You don't need to buy out the entire craft store, but getting a few key items will make your first project a joy instead of a chore.
Think of it this way: your first few quilts are all about building confidence. The right tools help you get straight cuts and accurate seams, making the whole process feel smooth and rewarding right from the start.
The Non-Negotiable Cutting Tools
Let’s get right to the must-haves for preparing your fabric. While it’s tempting to just grab a pair of scissors, the quilting world runs on a specific trio of tools for a reason: incredible accuracy and speed. If you want to avoid wonky edges and inconsistent blocks, these three things work together to deliver professional-looking results.
Honestly, these are the foundational tools you'll use for every single quilt you ever make, so they are absolutely worth the initial investment.
- Rotary Cutter: This is basically a pizza cutter for fabric, and it's a game-changer. A sharp, 45mm rotary cutter will glide through multiple layers of fabric with ease, giving you crisp, clean edges that scissors just can't compete with.
- Self-Healing Cutting Mat: This mat is your rotary cutter's best friend. It protects your table and keeps your blade from dulling too quickly. Plus, the grid lines are a lifesaver for lining up your fabric and ruler for perfectly square cuts. A 24" x 36" mat is a fantastic size to start with.
- Acrylic Ruler: A long, clear quilting ruler works hand-in-hand with your rotary cutter. The most versatile size, by far, is the 6" x 24" ruler. It’s perfect for cutting long strips from your yardage and squaring up smaller pieces with total precision.
Once you have your cutting system sorted, you’re ready to think about the soft, cozy center of your quilt.
This little guide can help you figure out if you're ready to dive in.
The decision tree above is a great way to visualize the simple starting points, whether you have your tools ready to go or need a minute to gather more info.
Understanding the Heart of Your Quilt: Batting
The batting is the middle layer of your "quilt sandwich," and it’s what provides warmth and gives the quilt its dimension. The type you choose has a huge impact on the final look, feel, and weight of your quilt. It isn't just filler; it's the soul of your project.
With so many options out there, choosing the right batting can feel a bit overwhelming at first. Here’s a quick breakdown to help you pick the perfect one for your first project.
Choosing the Right Batting for Your First Quilt
This table compares the most common batting types, helping you decide what kind of finish you're hoping to achieve.
| Batting Type | Best For | Key Characteristics |
|---|---|---|
| 100% Cotton | Traditional quilts, breathability, and that classic flat look after washing. | It's a natural fiber, feels soft, and gives you that lovely "crinkled" texture once washed. |
| Polyester | Baby quilts, puffy comforters, and projects needing high loft and durability. | Resists shrinking and wrinkling, is very lightweight, and offers more puffiness (loft). |
| Cotton/Poly Blend | The best of both worlds—durable, soft, and really easy to quilt with. | Usually an 80/20 blend, it combines the softness of cotton with the stability of polyester. |
| Wool | Warm yet lightweight quilts; great for both hand and machine quilting. | Incredibly warm, breathable, and has a wonderful drape. It also resists creases. |
For a first-timer, an 80/20 cotton/polyester blend is a fantastic and forgiving choice. It’s easy to work with and gives a beautiful, classic finish without being too heavy or difficult to handle.
Pro Tip: When you buy batting, always make sure it's at least 4-6 inches larger than your quilt top on all four sides. This extra margin is essential. It gives you room to breathe during the quilting and trimming stages, saving you from the stress of running out of fabric right at the end.
Decoding Batting Sizes and Loft
You'll also hear terms like "loft" and see batting sold in pre-cut packages or on large rolls. Loft just refers to the thickness or puffiness of the batting. Low loft creates a flatter, more traditional quilt, while high loft gives you a fluffier, comforter-like result.
For someone just learning how to quilt, a low-to-medium loft is much easier to manage on a standard home sewing machine.
While pre-cut packages are handy, buying batting by the roll can be a smart move if you know you’ll be making more than one quilt. It often lowers the cost per quilt and means you have quality material on hand for your next burst of inspiration. For a deeper dive into all your options, our guide to quilting supplies for beginners can help you build your complete shopping list.
With these essential tools in hand, you're ready for the really creative part—cutting your fabric and piecing your first quilt top.
Bringing Your First Quilt Top to Life
Alright, this is where the real fun starts. You've got your tools lined up and your fabric is waiting—now it’s time to turn that beautiful stack of material into a quilt top. This is the part of the process where precision and a little bit of patience really pay off, and you get that amazing feeling of watching your design come together, one seam at a time.

Trust me on this: building good habits now while you're constructing the quilt top will save you a world of frustration later. Taking the time to get these foundational techniques right will make every single quilt you create from here on out so much easier.
Precision Cutting Is Everything
Before you even think about touching your sewing machine, the most important thing you can do is cut your fabric accurately. It’s no exaggeration to say that sloppy cuts are the number one cause of quilting headaches. They lead to blocks that don't line up, points that don’t match, and a quilt top that just refuses to lie flat.
So, slow down and think of your rotary cutter and ruler as your partners in this. Always line up your fabric on your cutting mat, hold that ruler down firmly, and use steady, even pressure on the cutter. It's the old "measure twice, cut once" mantra for a reason—it's a lot less painful than realizing a piece is too small.
Mastering the Quarter-Inch Seam
If there's a golden rule in quilting, it's the quarter-inch seam. This is the standard, the bedrock of patchwork. Your ability to sew a consistent 1/4" seam is what makes or breaks a quilt. If your seam allowance wavers, even by a tiny bit, that error multiplies across the entire quilt, throwing all your dimensions off.
Most modern sewing machines have a special quarter-inch foot that makes this a breeze. If you don’t have one, no problem. Just create a guide by stacking a few pieces of painter's tape on your machine's throat plate, exactly a quarter-inch from the needle.
A consistent quarter-inch seam is non-negotiable. It's the secret sauce that makes all your pieces fit, your points match up perfectly, and your blocks lie flat. Get this right, and you've already overcome one of the biggest hurdles in quilting.
The Art of Pressing (Not Ironing)
After you've sewn two pieces together, it's time to head to the ironing board. But here’s a crucial distinction: we press our seams, we don't iron them. Ironing is that frantic back-and-forth motion we use on clothes, and it will stretch and distort your quilt pieces, especially along the bias grain.
Pressing is a much gentler up-and-down motion. You simply set the iron down on the seam, hold it for a moment, and lift. This sets the stitches and flattens the seam allowance without warping your fabric.
- Press to the Dark Side: Generally, you'll want to press your seams toward the darker fabric. This prevents the darker seam allowance from peeking through your lighter fabric.
- "Nesting" for Perfect Points: When joining rows of blocks, try pressing the seams in opposite directions. This lets them "nest" or lock into each other when you put them right-sides-together, which is a fantastic trick for getting your corner points to match up perfectly.
This small change in technique—from ironing to pressing—is a total game-changer. It’s what gives you those crisp, flat, professional-looking blocks.
Putting It All Together: Your First Block
Let's put these skills to the test with a classic nine-patch block. It's the perfect beginner block, made of nine simple squares in a three-by-three grid.
First, sew three squares together to create the top row. Press the seams to one side. Then, do the same for the middle and bottom rows.
Here’s the trick: press the seams for your middle row in the opposite direction of the top and bottom rows. This is what sets you up for perfectly nested seams.
Now, place the top row and middle row right-sides-together. You should feel those seams lock into place. Pin them right at the intersections to keep them from shifting, and then sew the rows together. Attach the bottom row the same way. Give the whole block a final, gentle press, and you’ve done it!
Making a simple block like this builds your muscle memory and your confidence. Once you feel good about the nine-patch, you’re ready for more. For another great project that's easy to start with, take a look at this free Fence Rail quilt pattern for a little inspiration.
Focus on these three things—cutting accurately, sewing a consistent seam, and pressing properly—and you'll build a gorgeous quilt top you can truly be proud of.
Assembling the Perfect Quilt Sandwich
You’ve poured your heart into piecing a gorgeous quilt top. Now comes the moment of truth: turning that flat patchwork into a real, three-dimensional quilt. This is where we create the "quilt sandwich," and it’s arguably one of the most critical steps in the entire process.
The sandwich is exactly what it sounds like: your backing fabric on the bottom, the fluffy batting in the middle, and your beautiful quilt top sitting proudly on top.
Why is this so important? Because a poorly basted quilt is a recipe for disaster. It leads to fabric shifting, ugly puckers, and uneven stitches when you start quilting. But if you take your time and secure these three layers properly, you’re setting yourself up for a smooth ride and a finished quilt that lies beautifully flat. Think of it as the foundation of a house—if it isn't solid and square, nothing else will look right.
Prep Work: The Secret to a Smooth Start
Before you even think about layering, a little prep work will save you a world of headaches later.
First, give both your backing fabric and your quilt top a good press. Get rid of every last wrinkle and crease. This is especially vital for the backing, as any folds you miss can get permanently stitched into the quilt.
Next, make sure your backing and batting are both at least 4-6 inches larger than your quilt top on all sides. This extra material is your safety net. It gives you plenty of room to work as you quilt and prevents you from running short of fabric near the edges, which happens more often than you'd think.
My Favorite Trick: After pressing my quilt top, I like to lay it out flat on my bed or the floor overnight. This lets all the seams relax and settle, ensuring it lies as flat as physically possible before I start basting.
The Floor Basting Method: Tried and True
One of the most dependable ways to get a great baste is to use a large, clean floor. You’ll just need some painter’s tape and your basting tools of choice—either special safety pins or a temporary adhesive spray.
Start by placing your backing fabric on the floor, wrong side facing up. Using the painter's tape, pull it taut and tape it down securely. You’re aiming for smooth and stable, like the surface of a drum, but be careful not to stretch the fabric out of shape.
Now, lay your batting over the backing. Gently smooth it out from the center, working your way to the edges. Use your hands to push out any wrinkles or trapped air bubbles.
Finally, place your pressed quilt top (right side up) over the batting. Just like with the other layers, start smoothing from the middle and work your way out. This center-out motion is the key to preventing shifts and puckers. Don't rush this part; your patience here will absolutely pay off in the end.
Pin or Spray? Securing Your Layers
With your three layers perfectly smooth and aligned, it’s time to lock them in place. For beginners, there are two fantastic methods.
- Pin Basting: This is the classic approach. Using special curved safety pins designed for quilting, you'll pin the layers together. Start in the very center and place a pin every 4-5 inches—about the width of your fist. Work your way across the entire quilt. The curve in these pins makes them much easier to open and close without disturbing your layers.
- Spray Basting: A temporary adhesive spray made for fabric can be a huge time-saver. You work in small sections, peeling back the top layer, giving the batting a light mist of spray, and smoothing the top back into place. It’s incredibly fast, but make sure you’re in a well-ventilated area.
Lots of quilters (myself included) sometimes use a hybrid approach—a light spray baste to hold things in place, followed by a few pins in strategic spots for extra security.
For a deeper dive into the pros and cons of each method, check out our complete guide on how to baste a quilt for more detailed instructions. Once your sandwich is secure, you're officially ready for the magic of quilting
Alright, this is where the magic really happens. We're about to turn that beautiful, flat quilt top into an actual, honest-to-goodness quilt. The "quilting" is the stitching that goes through all three layers—top, batting, and backing. This is what locks everything together, gives it that incredible crinkly texture, and adds a whole new layer of artistry.
Don't for a second think you need a massive, expensive longarm machine to get stunning results. Your home sewing machine is perfectly capable of handling this final, super-creative step. Let's walk through a few of the most popular and beginner-friendly ways to get it done.
Starting with Straight-Line Quilting
If you're just getting your feet wet, straight-line quilting is your best friend. It’s clean, it’s elegant, and you can do so much with it. The absolute key to making this work without pulling your hair out is a little attachment called a walking foot.
A walking foot is a lifesaver. Seriously. It has its own set of feed dogs that grip the top of your quilt sandwich, while your machine's feed dogs grip the bottom. This synchronized pulling action prevents the layers from shifting, which is the number one cause of frustrating puckers and tucks. It keeps everything moving along as one happy unit.
Once you have your walking foot on, you can quilt a simple grid, stitch lines that echo your patchwork seams, or create a cool diagonal pattern. It’s a very forgiving technique that always looks polished and professional.
My best advice? Always, always start quilting in the middle of your project and work your way out to the edges. This is non-negotiable. It methodically pushes any extra fabric or fullness toward the outside, so you don't end up with a big, baggy bubble right in the center.
The Easiest First Step: Stitching in the Ditch
One of the most straightforward types of straight-line quilting is called stitching in the ditch. It’s a wonderfully subtle technique where you quilt right inside the "ditch" formed by the seams of your patchwork. The idea is to have your stitches sink right into that seam line, making them almost disappear from the front.
This approach is a winner for a few big reasons:
- It secures all your layers without taking any attention away from your piecing.
- You don't have to mark any lines—you just follow the seams you already made!
- It adds a lovely, gentle puffiness to your blocks by defining their edges.
To pull this off, just use your walking foot and aim your needle just a hair to one side of the seam, usually on the side where the seam allowance is pressed.
Exploring More Creative Avenues
After you get the hang of straight lines, you might get that itch to try something a little more freeform. This is where you can really start to play and add your own personality to the quilt.
Free-Motion Quilting (FMQ)
Think of this as drawing on your quilt with your sewing machine needle. For free-motion quilting, you'll drop the feed dogs on your machine (that's the little teeth that pull the fabric) and put on a special "darning" or free-motion foot. This setup lets you move the quilt freely in any direction—forward, backward, sideways—to create anything you can imagine. People do simple meandering stipples, loops, or go all out with intricate feathers and flowers. It definitely takes some practice to get the rhythm down, but once you do, it opens up a whole universe of creative expression.
Hand Quilting
If you love the idea of a slower, more meditative process, you can't beat hand quilting. It’s a timeless art form. Using a special short, sturdy needle called a "between," a thimble to protect your finger, and a good quality quilting thread, you create small, even running stitches through all three layers. There's nothing quite like the dimpled, heirloom texture of a hand-quilted piece. It’s a beautiful way to connect with the long history of this craft and leave a truly personal, handmade signature on your work.
Finishing Your Quilt with a Professional Binding
You're in the home stretch! Binding is the final flourish, the frame for your masterpiece. It’s what encloses all those raw edges, giving your quilt a clean, durable, and polished look. Honestly, a well-executed binding is the sign of a quilt made with care, and it’s one of the most satisfying parts of the whole process.
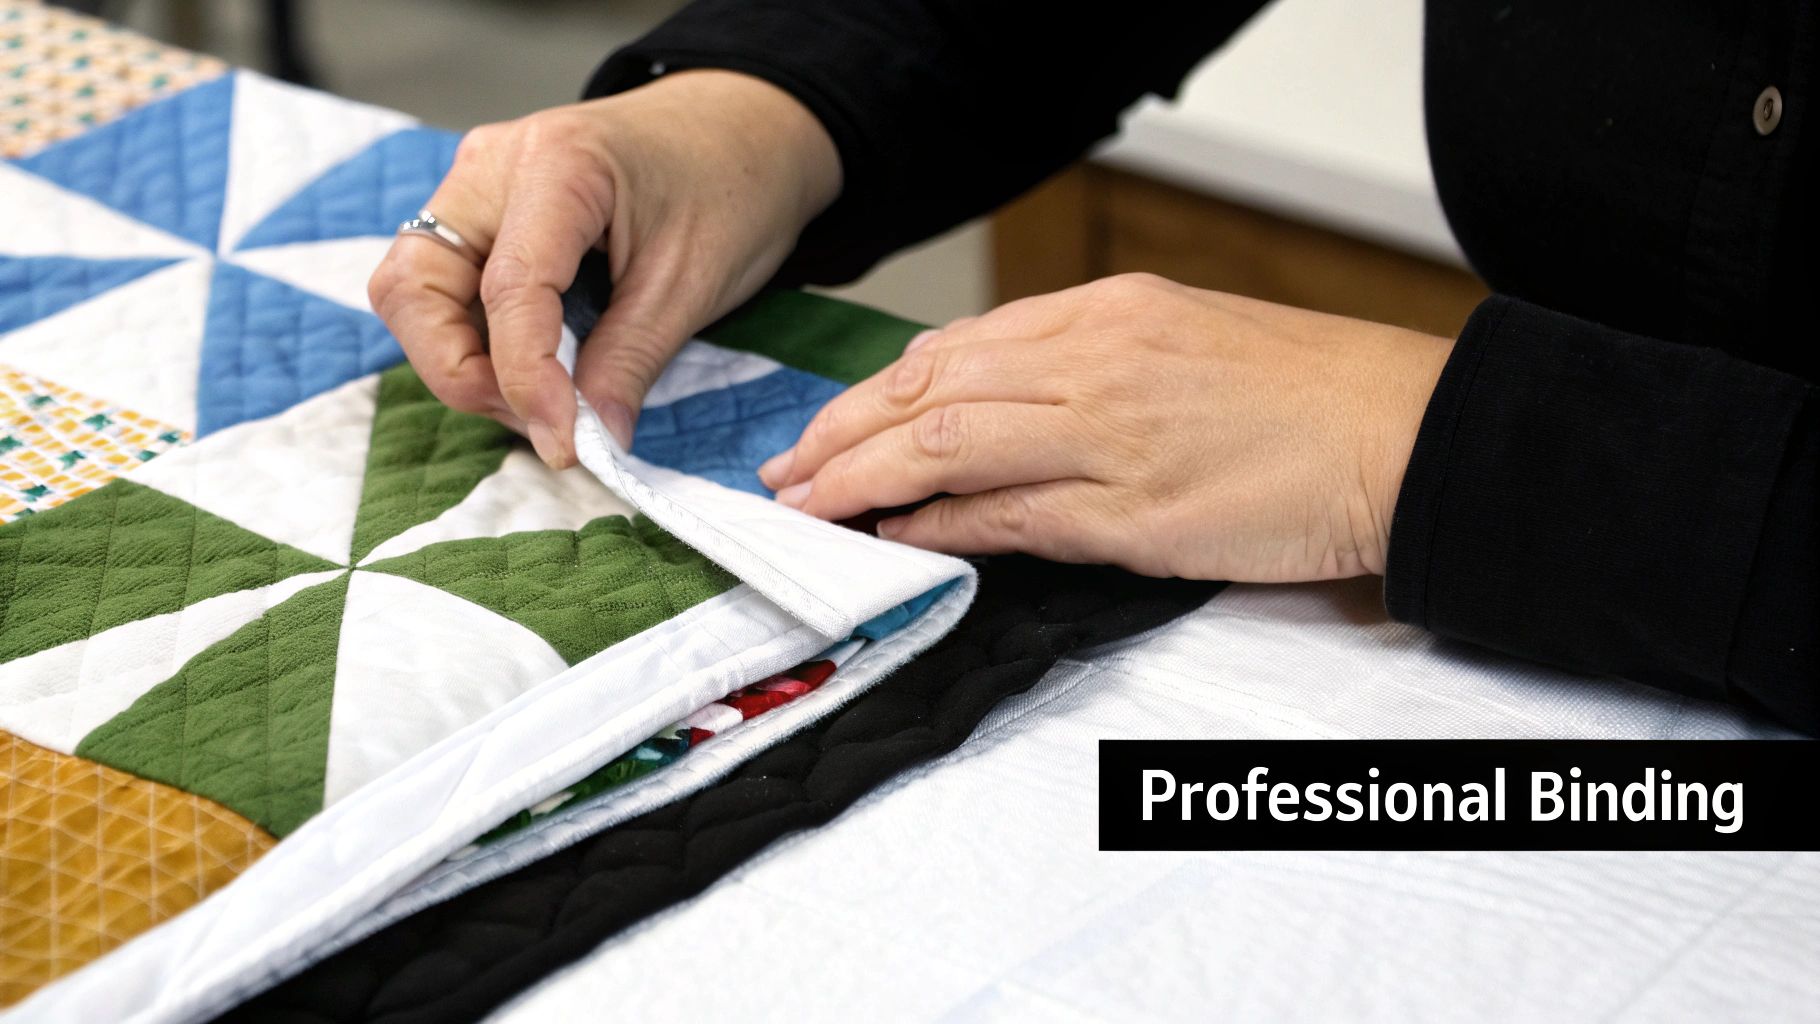
Let's walk through how to get that perfect finish that will stand up to years of snuggles and washes. We'll cover everything from figuring out your fabric needs to putting in that very last stitch.
Figuring Out and Prepping Your Binding
First things first: math. But don't worry, it's easy. To figure out how much fabric you'll need, just measure the perimeter of your quilt—add up the lengths of all four sides. Then, add an extra 10-15 inches to that number. This little bit of extra gives you enough wiggle room for joining the ends neatly without any stress.
The go-to width for binding strips is 2.5 inches. It’s the sweet spot—wide enough to be easy to handle and fold, creating a really substantial edge that can take a lot of wear and tear. You'll cut these strips and then sew them together to create one long, continuous piece.
For a truly professional look, join your strips together on a diagonal seam (a 45-degree angle). Why? This little trick distributes the bulk of the seam allowance across a wider area, so you don't get a clunky lump in your binding. The result is a much smoother, flatter finish all the way around your quilt.
Attaching the Binding
Once your long binding strip is made and pressed neatly in half lengthwise, you're ready to attach it to the quilt.
Start by aligning the raw edge of the binding with the raw edge of your quilt top. Leave a "tail" of about 8-10 inches loose at the beginning—you'll need this later to join the ends. Using your walking foot and a quarter-inch seam allowance, start sewing the binding down.
Sew all the way down the first side, but stop when you’re a quarter-inch from the corner. Backstitch, and pull the quilt out from under the needle. Now for the fun part: the mitered corner.
Pro Tip: The secret to a perfect mitered corner is all in the fold. Take your binding strip and fold it straight up, away from the quilt, which creates a 45-degree angle. Then, fold it back down along the next side you’re about to sew. This creates a neat little triangular flap of fabric at the corner.
Hold that fold securely and start sewing again right from the top edge of this new side. That little flap you made is what creates that crisp, professional corner when you eventually flip the binding over to the back. Do this for all four corners.
Creating That Seamless Finish
After you’ve gone around all four sides, you'll be left with the two tails you started and ended with. Overlap them, trim away the excess so they meet perfectly, and then sew them together to make a continuous loop. All that's left is to stitch that final section of binding down onto the quilt.
Now, simply wrap the folded edge of the binding around to the back of the quilt. It should just cover the line of stitching you made. You have two main options for securing it: by hand or by machine.
Many quilters adore the traditional look of hand-stitching the binding down with an invisible ladder stitch. It's a beautiful, classic finish.
If you want a faster and arguably more durable finish, you can "stitch in the ditch" from the front of the quilt. This means sewing directly in the seam where the binding meets the quilt top, which catches the edge of the binding on the back. It’s a fantastic choice for quilts that are going to be loved and used a lot.
Once that final stitch is in, step back and admire your work. You've officially finished a quilt
Got Questions? Every New Quilter Does.
As you start your quilting journey, you're going to have questions. Everyone does! Getting those questions answered quickly is the key to keeping your confidence up and your project moving forward. Let's dig into some of the things new quilters ask all the time.
First up: fabric prep. "Do I really need to wash my fabric first?" Yes, you absolutely should pre-wash your quilting cotton. It might seem like an annoying extra step, but it prevents a world of hurt later. Pre-washing preshrinks the fabric, gets rid of any sizing or chemicals from the factory, and—most importantly—stops bright colors from bleeding all over your beautiful work after the first wash.
Then there's the thread debate. For most of your piecing and quilting on a machine, a high-quality 50-weight 100% cotton thread is going to be your workhorse. It's the perfect balance—strong enough to hold everything together for years, but fine enough that it doesn't create bulky, noticeable seams.
Can I Actually Make Money From This?
You bet. For many, quilting starts as a creative outlet and blossoms into a source of income. It's not just a quaint hobby; the global quilting market is booming, expected to jump from $5.32 billion in 2024 to an incredible $7.8 billion by 2031. People are actively seeking out handmade, artisanal goods, which puts quilters in a fantastic position. You can see just how much quilting is growing in this comprehensive industry report.
A quick word of encouragement: Don't ever hesitate to ask for help. Every single expert quilter was once a beginner fumbling with a rotary cutter. The quilting community is one of the most generous and supportive groups you'll ever find.
So, where should you start? The best first project is one that lets you nail the basics without feeling totally overwhelmed.
Here are a few classic starter projects that are perfect for learning:
- A nine-patch block quilt: This is fantastic practice for accurate cutting and sewing a consistent seam allowance.
- A rail fence pattern: Made from simple strips, this design is super forgiving and comes together surprisingly fast.
- A baby quilt or table runner: Smaller projects are just less intimidating. You can learn the whole process from start to finish on a manageable scale.
By starting with a smaller, simpler project, you build muscle memory and confidence. You'll master the core skills that you'll use on every single quilt you make from here on out.
At Quilt Batting, we're here to supply you with the high-quality batting and materials you need for any project on your list—from that very first practice block to a future family heirloom. Find the perfect foundation for all your creations at https://quiltbatting.shop.