

Think of a rotary cutter like a chef's favorite knife. It's not just about being sharp; it's about balance, feel, and how it becomes an extension of your own hand. The right one makes all the difference, turning a chore into a satisfying part of the quilting process.
What Makes a Good Rotary Cutter for Quilting
A great rotary cutter isn't just a tool; it's your partner in precision. It's what stands between a pile of fabric and perfectly matched quilt blocks. When you find the right one, the blade glides, the cuts are clean, and your hands don't ache after an hour of work.
But what separates a "good enough" cutter from a great one? It really boils down to three things that have to work together perfectly.
The Big Three: Blade, Handle, and Safety
Get these three elements right, and you’ll have a tool that you can rely on for years. It’s what lets you look past the fancy packaging and focus on what truly matters for your craft.
-
The Blade Itself: This is where the magic happens. The quality of the steel, how long it holds an edge, and the size of the blade all dictate whether you get a crisp, clean cut or a frayed, frustrating mess.
-
The Handle and Ergonomics: If you’re spending hours cutting, comfort is king. A well-designed handle fits your hand, prevents your wrist from cramping, and gives you the confident control you need for long, straight cuts.
-
Rock-Solid Safety Features: Let's be honest—these blades are incredibly sharp. A reliable safety lock isn't just a nice-to-have; it's an absolute must for preventing nasty accidents and giving you peace of mind.
A great rotary cutter helps you work faster and more accurately, but most importantly, it lets you work safely. It's a genuine investment in your craft.
Ultimately, your goal is to find a tool that makes your creative life easier, not more complicated. As you read on, we'll break down exactly how to judge each of these components. This is one of the most important first steps when gathering your quilting supplies for beginners or looking to upgrade your old, tired cutter. You'll soon know exactly what to look for.
Choosing The Right Blade For Flawless Cuts
The blade is the real heart of any rotary cutter. Let’s be honest, everything else is just a handle. The blade itself—its size, its sharpness, its material—is what determines whether you get crisp, clean cuts or a frustrating pile of snagged fabric. It’s the secret ingredient to that satisfying, professional finish we all crave.
A blade isn't just a sharp metal circle; it's a precision tool. Using the wrong one for the job is like trying to slice a tomato with a butter knife. You’ll get it done eventually, but it won’t be pretty. The trick is simply matching the blade’s size to the task at hand.
This diagram really breaks down what makes a rotary cutter work for you.
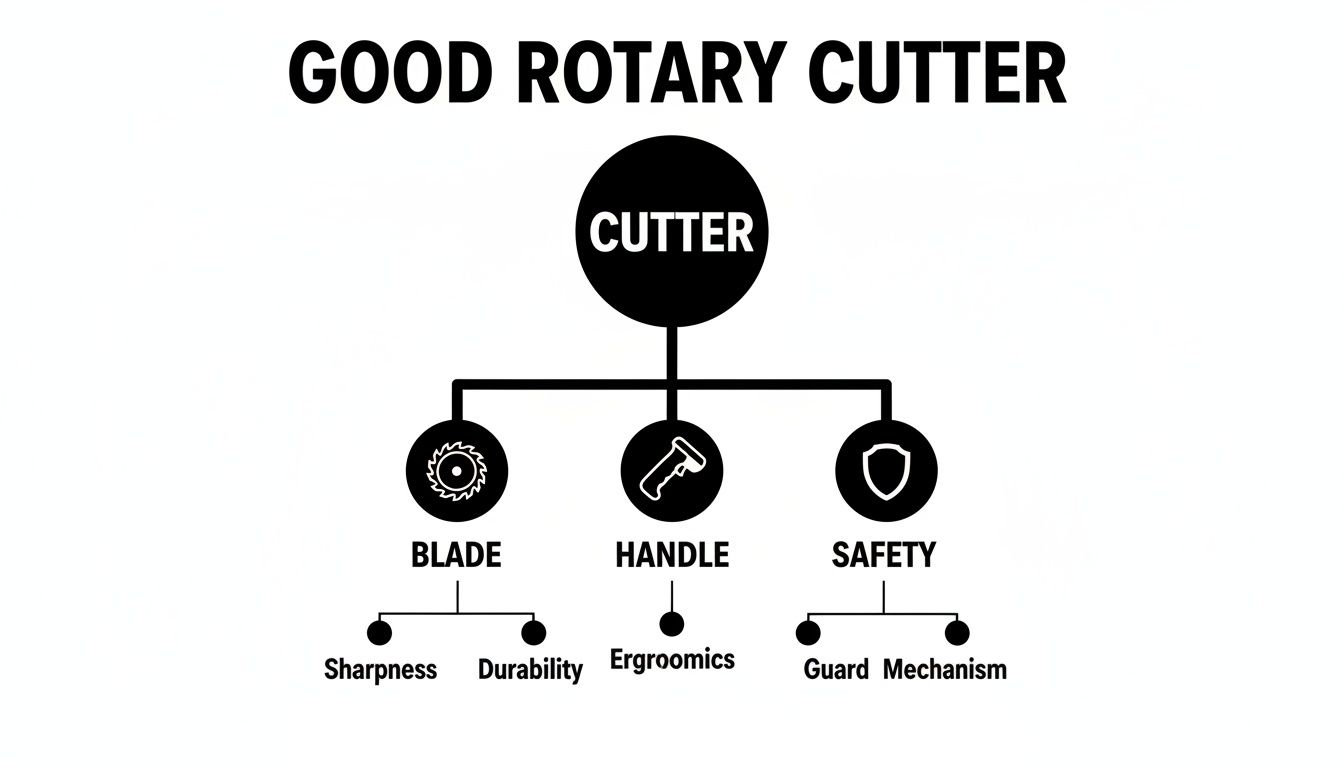
As you can see, the blade, handle, and safety lock all have to work together. They're the three pillars that support every great cut you make.
Matching Blade Size To Your Quilting Task
Think of it this way: a larger blade has more momentum and power, while a smaller one gives you more agility and control. It’s all about picking the right tool for the specific cut you need to make.
This quick guide lays out the common blade sizes and what they do best.
Rotary Cutter Blade Size Guide for Quilters
| Blade Size (Diameter) | Primary Use Case | Best For |
|---|---|---|
| 60mm | Heavy-duty cutting | Slicing through 10-12 layers of fabric, batting, denim, or even leather. Ideal for cutting long strips and squaring up large quilt tops. |
| 45mm | General purpose cutting | The go-to for most quilters. Perfect for cutting strips, trimming blocks, and handling 4-5 layers of cotton with ease. |
| 28mm | Curved and detailed cuts | Navigating tight curves for appliqué, trimming small half-square triangles, and other detailed piecing work. |
| 18mm | Miniature and precision work | Fussy cutting tiny motifs, cutting pieces for miniature quilts, and working with very small-scale patterns on a single layer of fabric. |
Each size has its place in a quilter's toolkit, but if you're just starting out, the 45mm is your best friend.
Here's a bit more on when to reach for each one:
-
The 60mm Workhorse: This is your powerhouse. The large diameter means it can slice through multiple layers of fabric and batting without breaking a sweat. If you’re cutting out a whole quilt’s worth of strips, the 60mm will save you time and keep its edge longer because it doesn't have to rotate as many times.
-
The 45mm All-Rounder: If you only buy one rotary cutter, make it this one. It’s the perfect middle-ground—strong enough to handle 4-5 layers of fabric but nimble enough for most piecing tasks. It’s a quilter’s staple for a reason and fantastic for jobs like straight line quilting prep where accuracy is key.
-
The 28mm Detailer: Think of this as your fine-point pen. It’s designed for getting into tight corners and cutting smooth curves. When a larger blade feels clunky and awkward for appliqué or trimming tiny flying geese, the 28mm gives you the control you need.
-
The 18mm Specialist: For the absolute smallest, most intricate cuts, this is your guy. It’s perfect for miniature quilts, fussy cutting a tiny detail from a print, or handling pieces as small as ¾-inch. This blade is all about precision, not power, so you'll generally use it on just one layer of fabric at a time.
Beyond Size: Blade Materials And Specialty Edges
While size is your first consideration, the metal itself matters. Most quality blades are made from high-grade tungsten steel, which is incredibly hard and holds a sharp edge for a long time. A sharper blade isn't just more effective; it's safer, too, because you don’t have to press down so hard to make a cut.
You might also see a few other types of blades out there for more creative projects:
- Pinking Blades: These create that classic zigzag edge to stop fabric from fraying.
- Wavy Blades: Just like they sound, they produce a decorative, scalloped edge.
- Skip-Cut Blades: These punch small, evenly spaced perforations, perfect for adding decorative stitching or yarn.
Once you understand how to match the blade to the job, your rotary cutter transforms from just a tool into an extension of your hands. It stops being something you fight with and starts being the thing that helps you create effortlessly.
A Handle That Fits Your Hand and Your Workflow
A razor-sharp blade is only half the story when it comes to a great rotary cutter. If the handle makes your hand cramp or your wrist ache after just a few strips, even the best blade in the world is useless. This is where ergonomics—designing for comfort and efficiency—really comes into play.
Think of it like finding the perfect pair of scissors. A cheap, clunky pair makes every snip a chore, but a well-designed one feels like it was made just for you, letting you work for hours. The right rotary cutter handle does the same thing for your quilting, preventing pain and fatigue so you can focus on your project.
This demand for well-designed, comfortable tools is making waves. The global rotary cutters market, valued at USD 261.86 million, is expected to soar to USD 411.11 million by 2032. That's a huge jump, and it shows just how much both hobbyists and pros are investing in high-quality, reliable cutting equipment. You can dig into the details of the rotary cutter market growth to see the full picture.
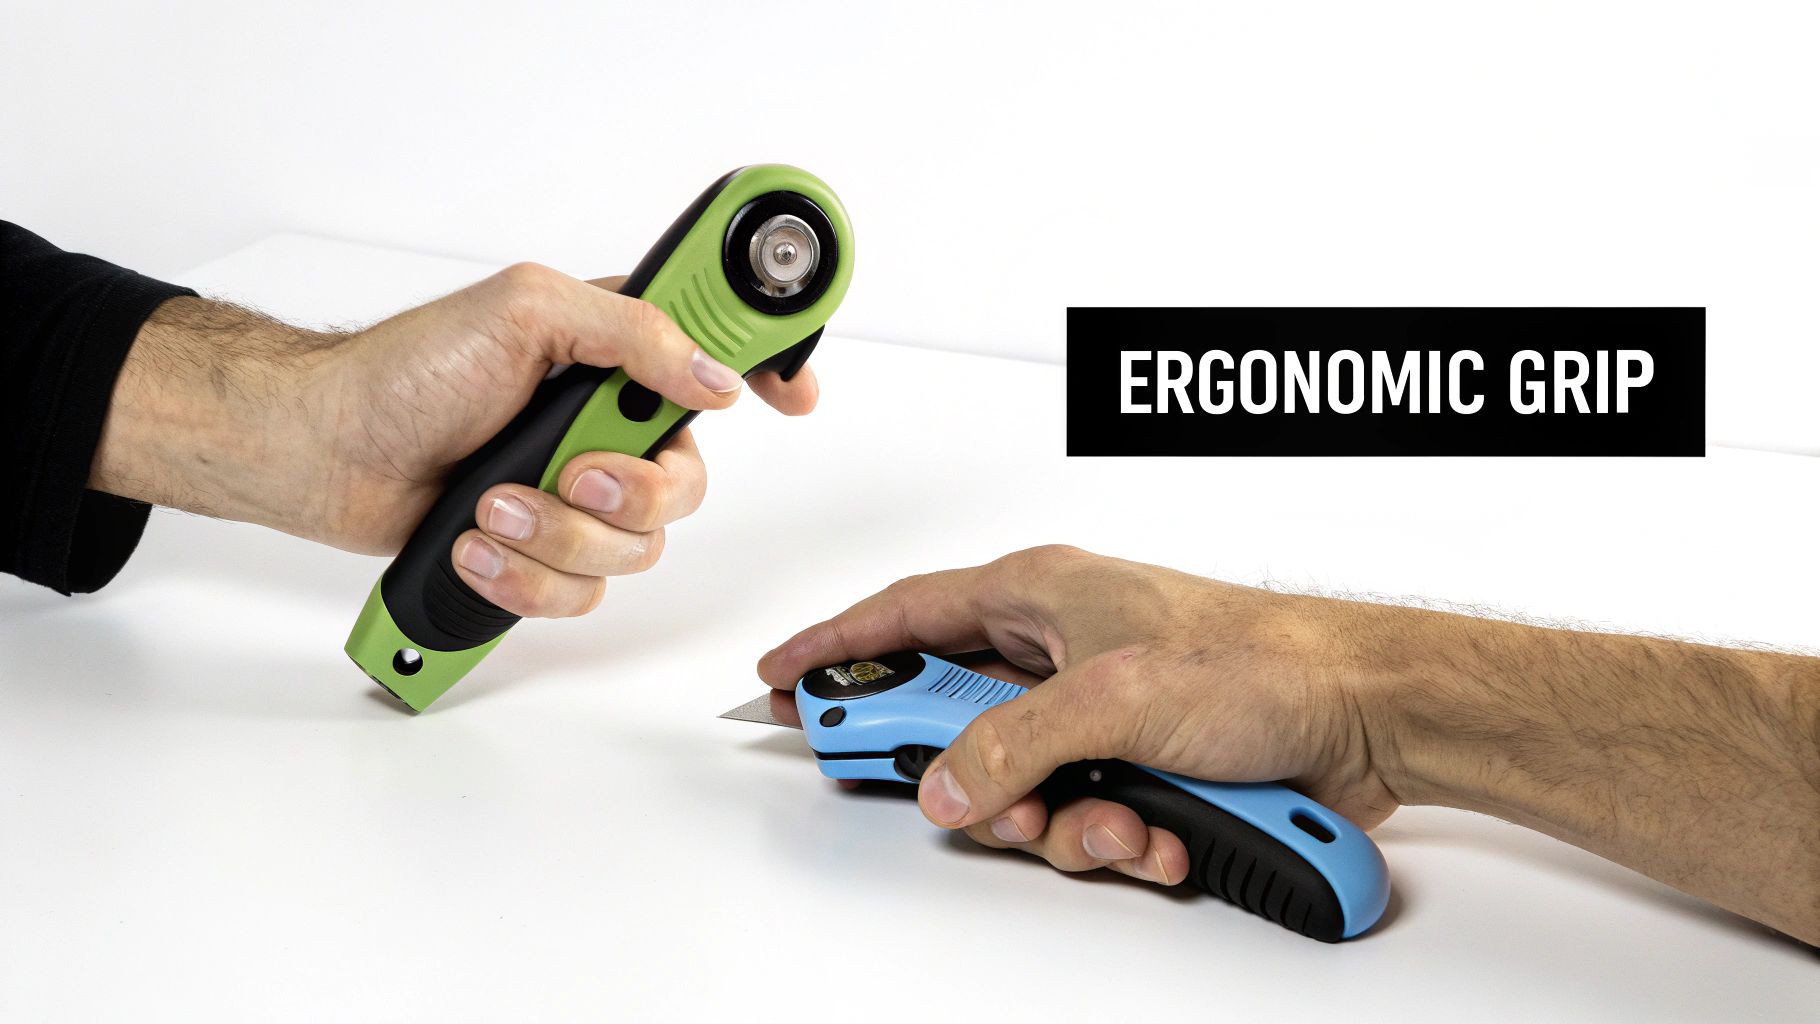
Straight vs. Ergonomic Handles
Rotary cutter handles generally fall into two camps. There’s no right or wrong answer—it all comes down to what feels best in your hand.
- Classic Straight Handles: These are the traditional, no-frills workhorses. They offer a simple, direct grip that many quilters love because it feels powerful and straightforward. If you prefer a simple tool that just works, a straight handle might be your perfect match.
- Ergonomic (Contoured) Handles: These are shaped to follow the natural curve of your hand. They usually have soft-grip materials and contours designed to take the pressure off your wrist and forearm, which is a lifesaver for long cutting sessions or for anyone dealing with arthritis or carpal tunnel.
A good handle doesn’t just hold the blade—it makes the whole tool feel balanced, like a natural extension of your own hand. That feeling of control is what gives you clean, accurate cuts every single time.
Let Your Workflow Guide Your Choice
What kind of cutting do you do most often? The answer should point you toward the right handle. The needs of a longarm studio owner are worlds away from someone making their first quilt at the kitchen table.
Think about your main cutting tasks:
- High-Volume Cutting: If you’re slicing through multiple layers of fabric all day or breaking down entire bolts, an ergonomic handle with a cushioned grip is a must. It acts as a shock absorber, preventing the repetitive strain that can lead to serious aches and pains.
- Precision and Detail Work: For fussy cutting or trimming small, intricate pieces, a slimmer handle might give you a better view of your ruler lines and more nimble control. You want something that feels agile, not bulky.
Honestly, the best way to know for sure is to get your hands on a few different models. Go to a quilt shop and hold them. A good rotary cutter will feel right from the moment you pick it up, giving you the confidence to make every cut perfect.
Understanding Essential Rotary Cutter Safety Features
Let's be blunt: a rotary cutter blade is like a circular scalpel. It’s designed to be terrifyingly sharp, and that's exactly why safety isn't just an add-on feature—it's the absolute core of a good rotary cutter. The first step to a long and happy quilting life is treating this tool with the respect it demands.
Picture your sewing room on a typical day. The phone buzzes, the cat decides to "help," or you're just reaching for another cup of coffee. An open blade in that moment of distraction is a recipe for disaster. This is why a solid safety mechanism isn't just a nice-to-have; it's your most important quilting partner.
How Safety Mechanisms Protect You
At their heart, all rotary cutter safety features do one simple job: they keep that razor-sharp edge shielded when you're not making a cut. They come in a few different flavors, and the right one for you often comes down to personal preference and workflow.
- Manual Blade Guards: Think of these as the stick shift of rotary cutters. You have to physically slide a button or lever to expose the blade and then slide it back to cover it. It puts you in total control, but it also means you have to be disciplined about building that "cover-the-blade" habit.
- Automatic Guards: This is the automatic transmission version. The blade guard is often spring-loaded, popping out of the way when you squeeze the handle and snapping back into place the second you release your grip. It’s a fantastic design for preventing those little moments of forgetfulness from turning into big problems.
- Secure Locking Systems: Many models have a secondary lock that acts as a final failsafe. It completely immobilizes the blade trigger, making it impossible to expose the blade by accident. This is crucial for safe storage, especially if you have curious kids or pets around.
The best safety feature is the one you actually use—so consistently that it becomes pure muscle memory. Your goal is to get to the point where you retract the blade after every single cut without a second thought.
Safety Is Creative Freedom
It’s easy to think of safety features as restrictive, but with a tool this sharp, the opposite is true. A reliable safety lock doesn't slow you down; it frees you up.
When you have complete confidence that your blade is secure, you can stop worrying and focus entirely on the art of quilting. You can lose yourself in aligning your ruler perfectly, admiring your fabric choices, and planning that next beautiful block. Ultimately, a good rotary cutter is one that empowers you to work with both precision and peace of mind, creating a safe space where your creativity can truly flourish.
Why Your Mat and Ruler Are Part of the System
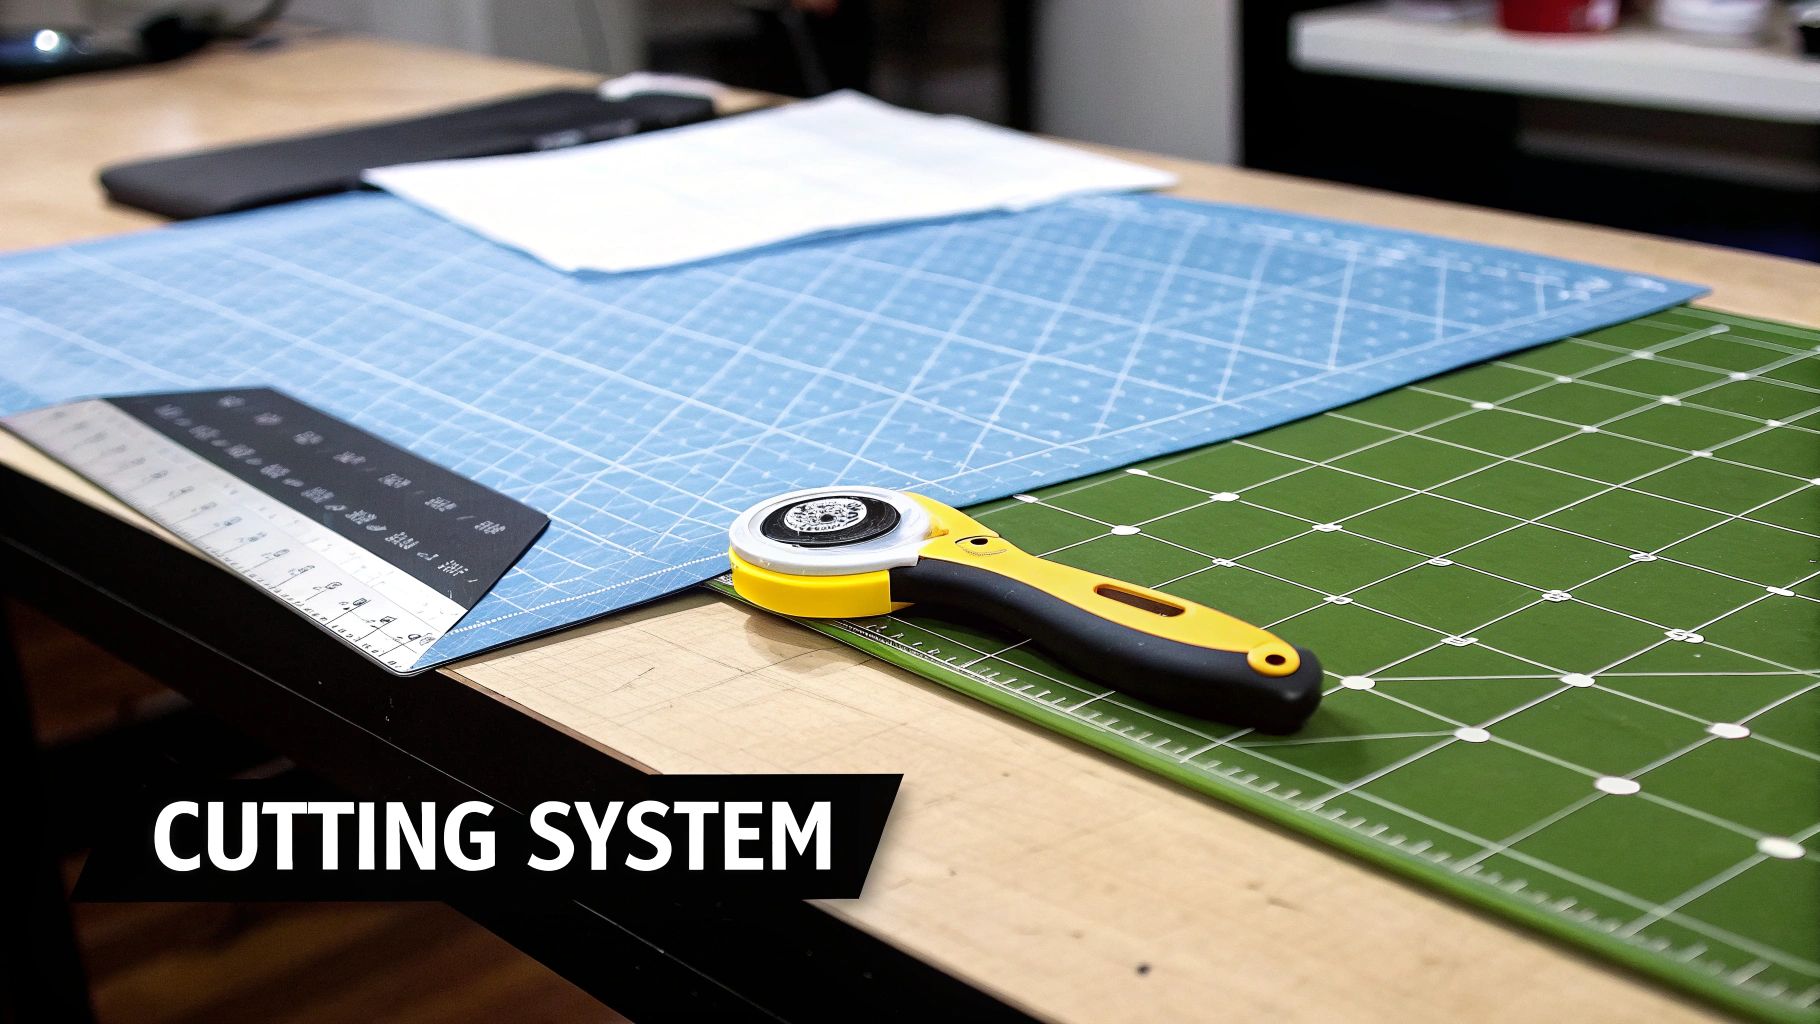
Even the most incredible, ergonomically designed rotary cutter is pretty much useless by itself. A good rotary cutter is really just one-third of the equation. To get those clean, accurate cuts every quilter dreams of, you need two other essential partners: a self-healing mat and a quality quilting ruler.
Think of it this way: your cutting mat is the foundation. It’s the stable, forgiving surface that protects your table and—more importantly—the razor-sharp edge of your blade. Try cutting on your dining table or a piece of cardboard, and you’ll dull a brand-new blade in a single pass.
The Self-Healing Mat: Your Blade’s Best Friend
A self-healing mat is a bit of a marvel. It's made from a unique composite material that separates just enough to let the blade pass through, then immediately closes back up. This prevents deep grooves from forming, keeping your cutting surface smooth for years. A smooth surface is absolutely critical for letting the blade glide without catching or skipping.
To keep your mat happy and flat:
- Store it flat. Please, never roll it or stand it on its side. Warping is almost impossible to fix.
- Clean it gently. A soft brush with cool water is usually all you need to get the lint and fibers out of the tiny cuts.
- Keep it cool. Direct sunlight or heat is the enemy of a flat mat. It can warp the material in a heartbeat.
The Ruler: Your Guide and Guard
If the mat is the foundation, your quilting ruler is the frame that ensures everything is straight and secure. A sturdy, thick acrylic ruler has two jobs, and both are non-negotiable. First, it’s your straightedge, guiding the cutter for perfectly straight lines every single time. Second, it’s a finger guard, keeping that wicked-sharp blade safely away from your other hand.
Your cutting accuracy is only as strong as the weakest link in this three-part system. A wobbly ruler or a worn-out mat will undermine even the best rotary cutter.
This idea isn't unique to quilting. The principle of a powerful cutter paired with a stable system is a big deal in other fields, too. For instance, the agricultural rotary cutter market, valued at USD 1.2 billion, relies on the same concept for massive-scale efficiency and precision. You can see the full breakdown in this agricultural rotary cutter report.
When you invest in a quality mat and the right rulers, you're not just buying accessories. You’re completing the system your rotary cutter needs to truly shine. For more on achieving this kind of precision, check out our guide to longarm quilting with rulers, which dives even deeper into control and accuracy.
Your Checklist for Choosing the Perfect Rotary Cutter
Alright, we've covered the ins and outs of blades, handles, and safety features. Now, let's pull all that information together into a simple checklist you can use when you're ready to buy.
Think of this as a "fitting session" for your new favorite tool. The best rotary cutter for you is deeply personal, and the right questions will point you straight to it, whether you're shopping in a local quilt shop or browsing online. The goal here isn't just to buy a cutter; it's to find the one that feels like an extension of your own hand.
Key Questions to Ask Yourself
Before you make a final decision, grab the cutter (if you can) and run through these essential checks. Your answers will tell you everything you need to know.
- How does it feel in your hand? Is the weight balanced, or does it feel clunky? Does the handle contour to your grip, or does it create awkward pressure points? You'll be holding this for a long time, so comfort is king.
- Is the safety mechanism second nature? Try engaging and disengaging the blade guard a few times. Can you do it easily with one hand, or do you have to fumble with it? It needs to feel both secure and effortless.
- How painless is a blade change? Imagine you're in the middle of a big project. Will changing a dull blade be a quick, tool-free swap, or a frustrating ordeal? Simpler is almost always better.
- Does it match your go-to projects? Make sure it’s a good fit for the blades you’ll use most. Will it handle your trusty 45mm blade for everyday piecing and the big 60mm for slicing through thick batting?
Your ideal cutter is the one that lets you forget you're even holding a tool. It should feel so natural that you can focus entirely on the precision of your cut, not on the cutter itself.
Tailoring Your Choice to Your Needs
Finally, be honest about how you'll be using it. The demands of a longarm studio are a world away from a cozy sewing corner at home.
- For the High-Volume Studio: If you’re cutting fabric for hours on end, look for a workhorse. Prioritize top-tier ergonomics—like a cushioned grip—and a robust build that can handle the marathon sessions.
- For the Versatile Hobbyist: Your best friend is flexibility. A cutter that lets you swap between different blade sizes without a fuss is perfect for someone who dabbles in everything from small pouches to king-sized quilts.
Asking these questions transforms the process from just buying another tool into making a smart, personal investment in your craft. This thoughtful approach, combined with other fundamental techniques of quilting, is what will truly set you up for success and make every project that much more enjoyable.
Your Rotary Cutter Questions, Answered
Even after you've found the right rotary cutter, a few questions are bound to pop up. It happens to all of us! Getting straight answers from someone who's been there helps you cut with confidence. Let's dig into some of the most common things quilters ask.
Think of this as the friendly advice you'd get at your local quilt guild.
How Often Should I Change My Blade?
Honestly, there's no set-in-stone rule, like "change it every three quilts." Instead, it's all about learning to feel when your blade is giving up. It's a lot like knowing when your favorite kitchen knife needs a good sharpening—you just know.
A fresh, sharp blade sings through the fabric with a clean swoosh. A dull one, on the other hand, starts to misbehave. Look for these tell-tale signs:
- It leaves “skips” or tiny threads behind. You'll see little uncut fibers connecting pieces that should be totally separate.
- You have to push harder. If you find yourself putting your shoulder into the cut, your blade is done.
- The fabric bunches or pulls. A dull blade drags the material instead of slicing cleanly through it.
The second you notice any of these, it’s time for a change. Forcing a dull blade is not only frustrating, it’s a recipe for a slip-up and a potential accident.
Can I Sharpen My Rotary Cutter Blades?
You'll see sharpeners for sale, but most seasoned quilters will tell you to just skip them. A brand-new blade is engineered to be perfectly flat and honed to an incredibly fine edge. That kind of precision is nearly impossible to recreate with a manual sharpener at home.
An imperfectly sharpened blade often develops tiny nicks or a slight wobble. This leads to snagged fabric and ragged cuts, which can ruin your carefully prepped materials. Considering how affordable replacement blades are, sticking with a fresh one is always the smarter, safer bet.
What Is the Best Rotary Cutter Size for a Beginner?
If you're new to quilting and just want to get started, the 45mm rotary cutter is your new best friend. It’s the undisputed workhorse of the quilting world for a reason—it’s incredibly versatile.
This size has enough heft to slice through four or even eight layers of cotton for strips and blocks, but it's still agile enough to handle basic curves. You’ll probably add other sizes to your toolkit down the road, like a big 60mm for power-cutting or a tiny 28mm for detailed work. But that 45mm cutter will easily handle over 90% of everything you need for your first several quilts. It’s the perfect place to start.
Ready to find the perfect quilting supplies to pair with your cutter? Quilt Batting offers premium batting and tools to bring your creative vision to life. Explore our collection and get everything you need delivered to your door.