

Longarm quilting with rulers is where the free spirit of artistry meets the steady hand of precision. It’s the secret to stitching perfectly straight lines, graceful curves, and intricate geometric patterns with a level of confidence you can feel. This technique gives your creativity a reliable guide, helping you turn every quilt into a true masterpiece.
Unlock Flawless Designs With Longarm Rulers
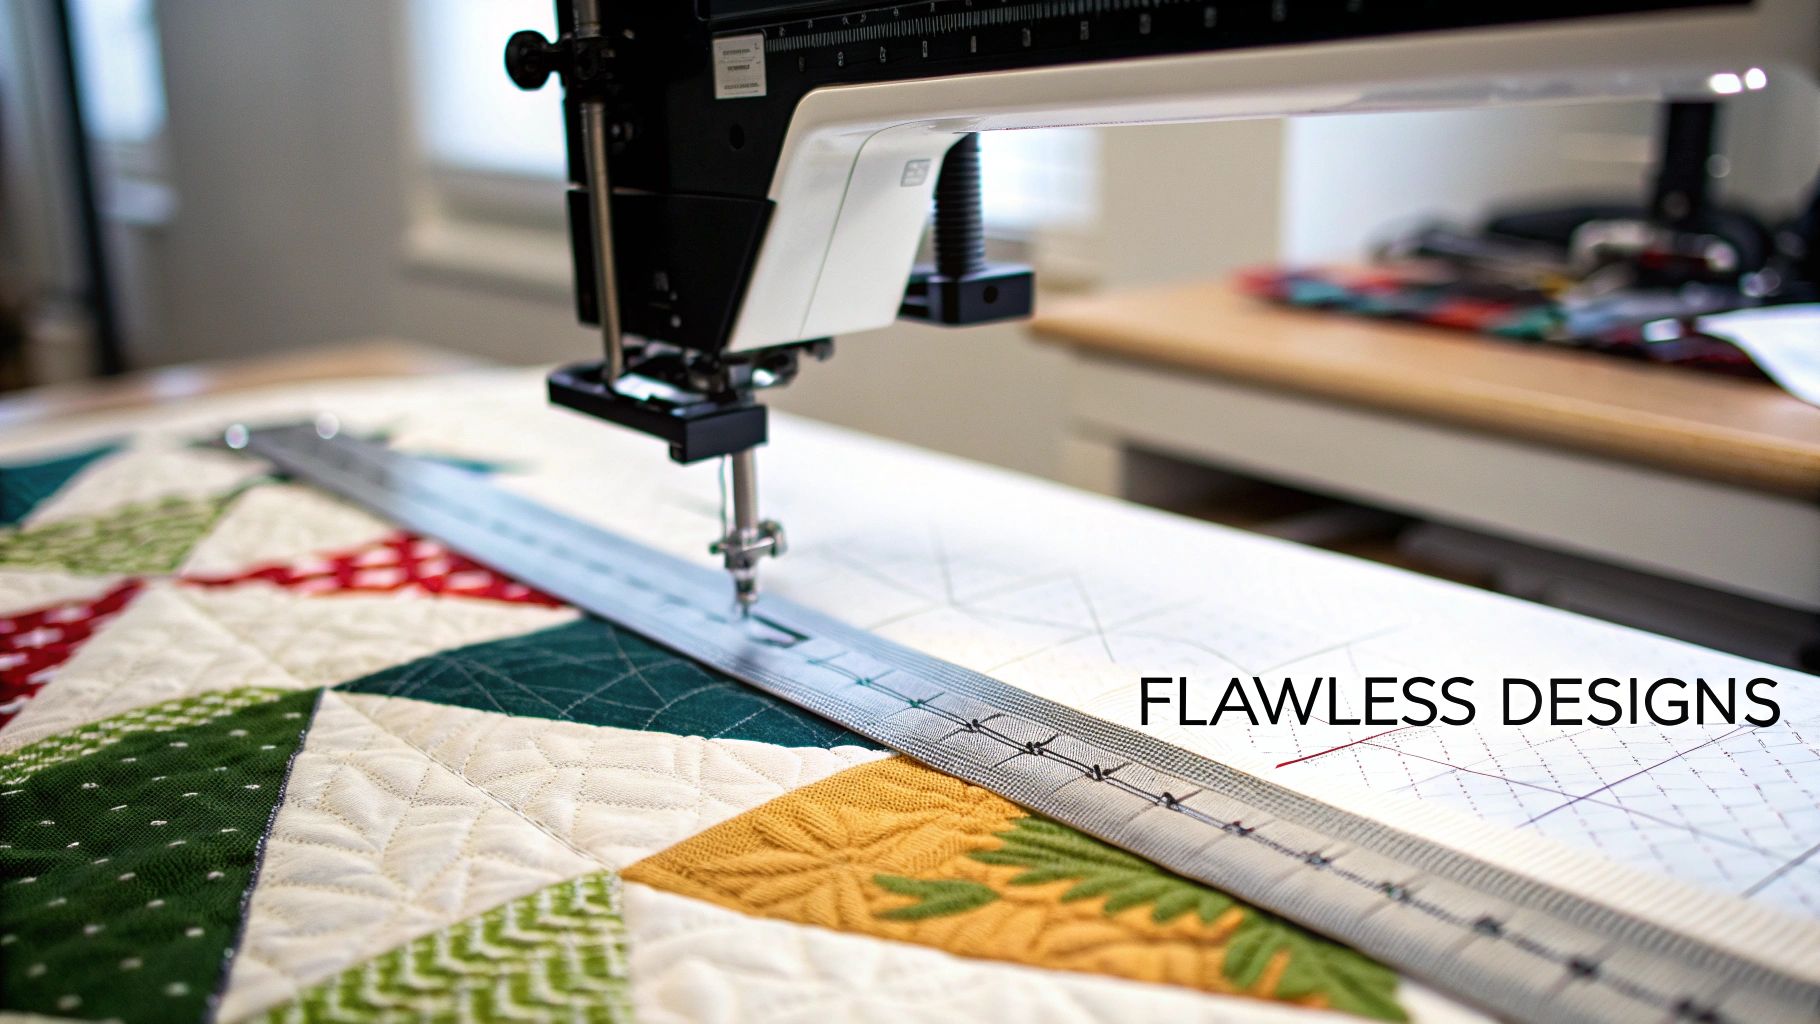
Picture this: you’re creating designs with the sharp, clean look of a computer-guided system, but you're still in complete, hands-on control. That's the magic of longarm quilting with rulers. By pairing special acrylic templates with a dedicated ruler foot, you essentially create a track to guide your machine exactly where you want it to go.
This isn't about boxing in your creativity—it's about elevating it. Using rulers lets you nail designs that are incredibly difficult, if not impossible, to achieve with free-motion quilting alone. The result is always clean, consistent, and professional, giving your quilts that polished, sophisticated finish we all strive for.
Why Ruler Work Is a Game-Changer
For so many quilters I've worked with, getting comfortable with rulers is the turning point that unlocks a whole new level of skill. It completely removes the guesswork from quilting foundational shapes, which frees you up to think about the bigger picture instead of stressing over every little wobble.
You’ll see the benefits right away:
- Pinpoint Precision: Finally get those perfectly straight lines for crisp crosshatching, flawless stitch-in-the-ditch, and bold geometric work.
- Smooth, Consistent Curves: Create beautiful arcs, circles, and scallops that flow seamlessly across your quilt.
- Effortless Repeatability: Replicate motifs in your blocks and borders with ease, creating a wonderfully cohesive design.
- Creative Fusion: Mix the structure of ruler work with the organic flow of free-motion quilting to build incredible depth and texture.
This technique has become incredibly popular, and it's a big reason why the quilting world continues to grow. In fact, the quilting market is expected to hit $4.5 billion in annualized revenue by 2025. Tools like longarm rulers are a huge part of that, making professional-quality finishing more achievable for everyone. If you're curious about industry trends, the Craft Industry Alliance is a fantastic resource.
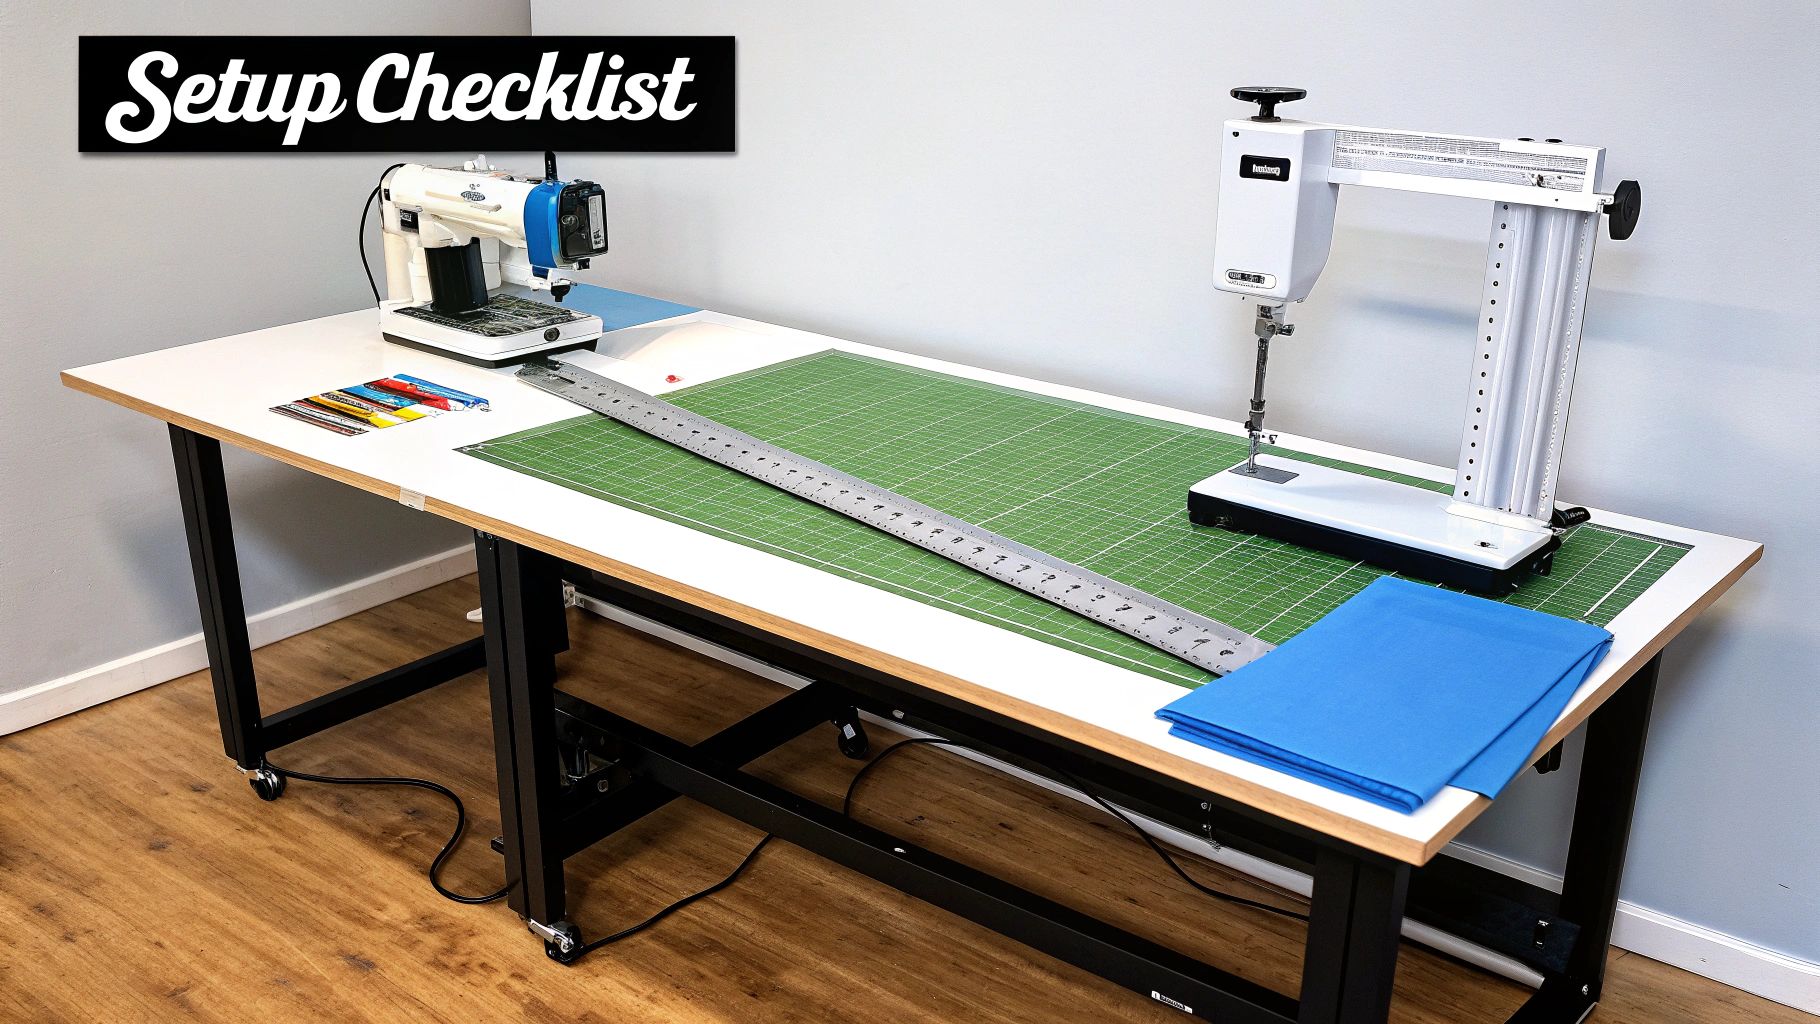
Getting Geared Up for Success
To get started, you really just need a few key pieces of equipment. This quick-glance table breaks down the absolute must-haves for your longarm ruler work toolkit.
Your Essential Longarm Ruler Work Toolkit
| Component | Primary Function | Why It's Critical |
|---|---|---|
| Longarm Quilting Machine | Your stitching powerhouse. | The machine's movement and stability are the foundation for all ruler work. |
| Ruler Foot | A specialized presser foot. | Its high collar acts as a safety wall, preventing the ruler from slipping under the needle. This is non-negotiable. |
| Longarm Rulers | Your acrylic design guides. | These templates provide the precise edge for your ruler foot to follow, ensuring perfect shapes. |
| Ruler Base/Extended Table | A flat surface around the needle. | This creates a stable, level platform for your rulers to rest on, preventing them from tipping. |
Once you have these essentials, you’re ready to dive in. You'll quickly see that the core idea is quite simple.
You're no longer just guiding the machine; you're tracing the edge of a template. I always tell my students to think of it as "tracing with thread" instead of "drawing with thread." That little mental shift is a game-changer for achieving clean, accurate lines.
Whether you're aiming for the simple elegance of straight lines or dreaming up complex, layered patterns, this method provides the structure you need. Our guide to mastering straight-line quilting techniques is an excellent starting point to build those fundamental skills and give you the confidence to tackle any project.
Getting Your Machine Ready for Ruler Work
Before you even think about laying a ruler on your quilt, let’s talk setup. This is where the magic really begins. Taking a few minutes to get your machine and workspace properly configured is the single best thing you can do to prevent headaches and frustration down the road. Think of it as building a solid foundation—it makes everything that comes after so much easier and safer.
The absolute first step, and it's a non-negotiable one, is to install the correct ruler foot. This isn't just a suggestion; it's a critical safety requirement. A proper ruler foot has a high collar, usually 1/4-inch tall, that acts as a guardrail. It's specifically designed to keep the thick edge of an acrylic ruler from slipping over or under the needle.
Trust me, this one little component is your best defense against a needle strike, which can be both dangerous and incredibly costly. Make sure it's installed correctly so it just skims the surface of your quilt sandwich without squishing the batting.
Creating a Stable, No-Wobble Surface
With your ruler foot securely in place, the next job is to create a perfectly flat and stable surface for your rulers to glide on. This is where a ruler base (sometimes called an extension table) is a game-changer. These accessories attach to the throat of your machine, effectively eliminating the drop-off and creating one big, level platform.
Without a base, your ruler can easily tip into the open space as you move the machine, which will wreck your stitch line and could cause the ruler to catch on the hopping foot or needle. A solid base ensures your rulers stay flat and move smoothly, giving you the precision and control you need.
If you're just starting out on your quilting journey, our guide on quilting tips for beginners offers more great advice for building those foundational skills.
Fine-Tuning Your Machine's Settings
Now that the physical setup is handled, it’s time to dial in your machine settings. Consistent, beautiful ruler work depends on getting these details right.
First things first: engage your stitch regulator. This amazing feature is your secret weapon for perfect stitches. It ensures that every single stitch is the exact same length, no matter how quickly or slowly you move the machine. For the deliberate, controlled pace of ruler work, this is absolutely essential.
Proper setup is what gives you the confidence to create those crisp, repeatable motifs. In fact, quilters who master this setup often report a massive drop in free-motion errors—some by as much as 70%. This level of precision is only possible when you’ve eliminated the variables.
Next, let's look at your needle and thread.
- Choose the Right Needle: I've found that a slightly larger needle works wonders. A 90/14 or 100/16 Topstitch needle has a larger eye, which means less friction and a lower chance of your thread shredding or breaking—a common issue with the starts and stops of ruler work.
- Check Your Tension: Always, always do a tension test on a scrap sandwich made from the same materials as your quilt. You're aiming for that perfect stitch where the top and bottom threads interlock right in the middle of the batting. Because ruler work creates such clean, defined lines, flawless tension is what gives you that professional finish.
I always tell quilters to think of their setup as a pre-flight checklist. A pilot would never take off without checking every system, and you shouldn't start quilting until your foot, base, and settings are dialed in. A five-minute check can save you hours of un-stitching.
Finally, do a quick sweep of your workspace. Make sure there are no stray pins, scissors, or seam rippers hiding on the quilt top that could get in the way of your ruler. A clean, clear path allows you to move fluidly and confidently, letting you focus on bringing your beautiful design to life.
Choosing Your First Set Of Quilting Rulers
Walking into a quilt show vendor hall and seeing a wall of longarm rulers can be both exciting and completely overwhelming. So many shapes, so many possibilities! Where do you even begin? My advice is always the same: start simple. You don't need a dozen fancy rulers to get started; you just need a few solid, versatile workhorses.
Before you buy anything, let's talk about the single most important rule of, well, rulers: thickness. For any longarm machine, you absolutely must use rulers that are 1/4-inch thick. This isn't just a suggestion—it's a critical safety feature. That quarter-inch height prevents the ruler from ever slipping under your hopping foot and crashing into the needle. Trust me, it's a mistake you only make once.
What Makes a Great Ruler?
Beyond that essential thickness, a few features separate a good ruler from a great one. Look for clearly etched lines that won't rub off after a few quilts. Printed lines can fade over time, but etched markings are there to stay. Those little 1/4-inch and 1/2-inch reference lines are also your best friend for echoing designs and creating perfectly spaced grids without ever having to pull out a marking pen.
Pay attention to how a ruler feels in your hand. It's tempting to grab a huge ruler for those long border lines, but they can be surprisingly clumsy to manage. I find that a smaller, hand-sized ruler gives me much better control and precision, especially for intricate work. You're looking for a comfortable, firm grip that lets you guide the machine smoothly, not fight with the ruler's size.
My best advice for beginners is to adopt a "less is more" mindset. You'll build so much more skill and muscle memory by mastering one or two basic shapes than you ever will by fumbling with a dozen different templates. Nail the basics first!
The Essential Starter Trio
If you're building your toolkit from scratch, I always point people toward three core rulers. This little trio can handle an incredible range of patterns, from modern geometrics to classic flowing designs.
Choosing your first few rulers is a big step, so let's break down the most common workhorses to see which ones might be the best fit for the kind of quilting you want to do.
Your First Three Longarm Rulers Compared
| Ruler Type | Best For | Key Patterns | Versatility Score (1-5) |
|---|---|---|---|
| Straight Edge (8"-12") | Beginners & Experts | Stitch-in-the-ditch, crosshatching, piano keys, geometric grids | 5 |
| Gentle Curve | Confident Beginners | Waves, scallops, curved crosshatching, clamshells, Baptist fans | 4 |
| Multi-Function Tool | Budget-Conscious Beginners | Combining straight lines and curves, creating small motifs, tight spaces | 4 |
Ultimately, a good straight edge is your non-negotiable first purchase. From there, think about whether you're drawn more to flowing, organic designs (grab the gentle curve) or want maximum bang for your buck (the multi-function tool is your winner).
With just these three, the design combinations are practically endless. This focused approach lets you really get a feel for longarm quilting with rulers before you start expanding your collection.
How Your Tools and Technique Come Together
Of course, the ruler is only one part of the equation. Modern machine features, especially stitch regulators, have been a game-changer for ruler work. It's estimated that 60% of longarm quilters now depend on them for consistent stitches. A regulator gives you the freedom to slow down and carefully guide the ruler without worrying about your stitch length going haywire. You can find more fascinating data about current quilting market trends on MarketSizeandTrends.com.
Don't forget about your batting, either! The loft can dramatically change the final look of your quilting. For the crisp, defined lines you get with ruler work, a lower loft batting really makes the stitching pop. We've put together a full guide on choosing low-loft batting for quilts that dives deep into why it's the perfect partner for ruler work. When you pair the right tools with the right materials and technique, you're setting yourself up for gorgeous, professional results every single time.
Putting Foundational Patterns Into Practice
All the theory in the world is great, but the real magic happens when your needle hits the fabric and a crisp, perfect design starts to form. This is where we put your new skills to the test with three foundational patterns. Getting these down will build the muscle memory and control you need to tackle just about any design you can dream up.
Ready to get stitching?
Mastering The Perfect Crosshatch Grid
Crosshatching is the quintessential ruler work pattern. It’s elegant, versatile, and the perfect place to start. The goal isn’t just to stitch a straight line; it’s to create a grid of perfectly parallel and evenly spaced lines.
First, find a stable reference line to work from, like a seam (stitch-in-the-ditch) or the edge of a block. Lay your straight ruler alongside it, keeping in mind that your needle will always stitch exactly 1/4-inch away from the ruler's edge. Guide your machine smoothly along the ruler to create your first line.
For the next line, let the ruler do the heavy lifting. Simply align the 1-inch (or whatever spacing you want) etched marking on your ruler directly over the line you just stitched. This little trick guarantees your spacing is perfect every single time—no marking pen required. Stitch your second line, and just keep repeating the process across the entire area.
Once you’ve finished all your lines in one direction, rotate your quilt (or just your ruler, if you’re comfortable) and do it all again to create the classic grid.
My number one tip for sharp crosshatching is to always start and stop with your needle down. This locks your position and prevents any tiny shifts when you pause to reposition your hands. It’s a small habit that makes a world of difference in your corners.
Creating Elegant Concentric Circles And Arcs
Moving from straight lines to curves can feel a little intimidating, but the principle is exactly the same. Instead of guiding the machine along a straight path, you're just pivoting it around a gentle curve. For this, you’ll need a good curved or circle ruler.
To quilt a perfect circle, you'll often pivot around a center point. Some specialty rulers even come with a pin that anchors them right to the fabric. But for more free-form arcs and echoed curves, your control comes from how you hold the ruler and move the machine.
Start by placing the concave or convex edge of your ruler where you want your arc. Press down firmly with your non-guiding hand, spreading your fingers wide to create a stable base. Now, gently guide the ruler foot along the edge with a smooth, sweeping motion. The real secret here is to move your body with the machine, not just your arms. It creates a much more fluid and natural-looking curve.
Want to create echoed or concentric arcs? Use the markings on your ruler just like you did for the crosshatching. Align the 1/2-inch or 1-inch line over your previously stitched curve and repeat the motion. It’s that simple.
This guide shows the basic types of rulers you'll be working with for patterns like these.
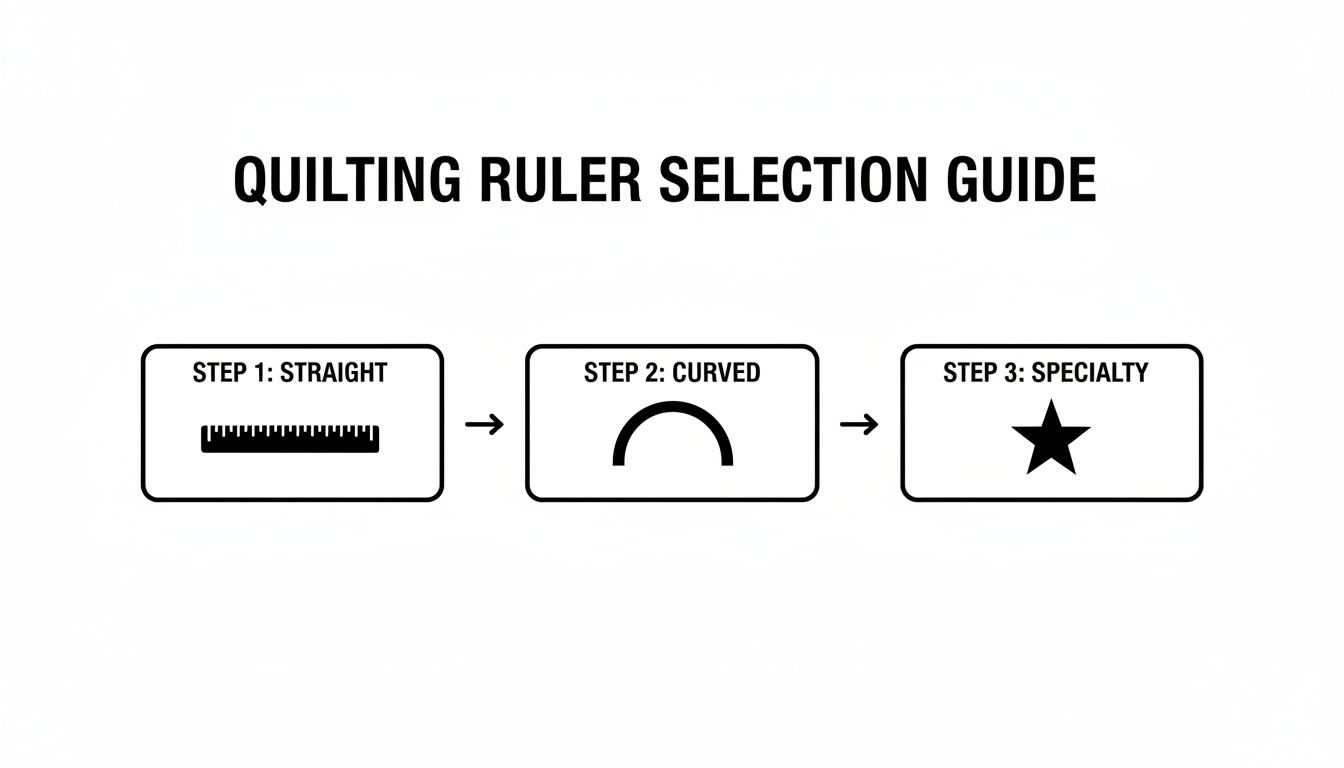
As you can see, mastering straight lines is the foundation before you jump into more complex curves and specialty shapes.
Stitching A Simple Clamshell Pattern
The clamshell is a beautiful, classic pattern that cleverly combines a straight line and a curve in one fluid motion. It’s a fantastic skill-builder because it forces you to practice transitioning between two different movements smoothly. You’ll typically use a ruler with a half-circle or arc shape for this.
- First, stitch the arc. Start by stitching the curved portion of your first clamshell.
- Travel to the next position. To move to the next clamshell in the row, you’ll travel stitch along what will become the "bottom" straight edge of the next shell. Some quilters do this by stitching in reverse, while others carefully follow a marked line.
- Stitch the second arc. Once you’re in position, stitch the second arc. The goal is to have the "valley" where two arcs meet sit perfectly on the center point of the arc in the row below it.
- Repeat and offset. Continue this across your first row. For the next row, you'll simply offset your starting point so the center of your new clamshells aligns with the meeting points of the row above.
This pattern might look complex, but it's really just one repeated motion. Before you start on your actual quilt, it's always smart to make sure your quilt sandwich is secure. For a deep dive, check out our guide on how to baste a quilt—a well-basted project is your best defense against fabric shifting during ruler work.
Practicing these three patterns on scrap fabric will build an incredible foundation for your ruler work journey. Don’t aim for perfection on day one. Instead, focus on smooth movements, consistent pressure, and letting the machine and the ruler do the work for you.
Working Through Those Common Ruler Work Headaches
So, you've got your setup dialed in and a beautiful set of new rulers, but things still go a little sideways sometimes. Welcome to quilting! Even the most seasoned pros hit a few bumps in the road. Think of these little frustrations less as failures and more as your machine trying to teach you something. Let's break down some of the most common issues and how to solve them.
One of the first things that trips up just about everyone is the dreaded ruler slip. You're in the zone, gliding along a perfect path, and then—bam!—the ruler scoots over, leaving a little jog in your stitch line. This almost always comes down to how you're holding it.
It feels like you should press down hard to keep the ruler from moving, right? But ironically, a death grip can actually cause the problem. Too much pressure pinches the quilt sandwich, making it harder for the machine to move freely and leading to the jerky motions that cause the ruler to slip.
How to Stop Rulers from Sliding
The trick is finding that sweet spot between a firm hold and a light touch. You need enough pressure to keep the ruler stable, but not so much that you're fighting the machine. I find it helps to spread my fingers wide across the ruler's surface to distribute the pressure evenly. Think of your hand as a gentle, guiding weight, not a C-clamp.
If your rulers still feel like they're on an ice rink, a couple of simple tools can be game-changers:
- Quilting Grips: These are tiny, clear adhesive rings or dots you stick on the back of your rulers. They add just the right amount of traction to keep the ruler planted without making it hard to reposition.
- Quilting Gloves: A good pair of gloves with grippy fingertips gives you amazing control. They let you hold the ruler securely with a much lighter, more relaxed touch.
My personal preference? It really depends on the job. For small rulers that I’m constantly turning and repositioning, I leave the back clean so it glides easily. But for those long, straight lines, a few well-placed grips are my secret weapon.
Solving Stitch and Thread Nightmares
There's nothing quite like the frustration of a trail of skipped stitches or a thread break right in the middle of a beautiful curve. It’s easy to get mad at the machine, but the fix is usually much simpler. More often than not, it's a needle, thread, or tension issue.
First, look at your needle. A dull, bent, or wrong-sized needle is the number one culprit behind stitch problems. When I'm doing precise longarm quilting with rulers, I make it a rule to start every single project with a fresh needle—usually a 90/14 or 100/16 Topstitch needle does the trick.
Next up is tension. Before you stitch on your actual quilt, do a quick test on a scrap piece of your quilt sandwich. If you’re seeing loops on the back, your top tension is too loose. If little knots of bobbin thread are popping up on the top, it’s too tight. A tiny turn of the dial can make a world of difference.
My best troubleshooting advice is this: only change one thing at a time. And always start with the easiest fix—re-threading your machine from top to bottom. You would be absolutely amazed how often the problem is just a thread that’s jumped out of a tension disk.
Straightening Out Those Wobbly Lines
You stitched what you thought was a straight line, but it looks a little...wavy. A wobbly line is rarely the ruler’s fault. It’s almost always about the relationship between your ruler foot and the edge of the ruler. The goal is to keep that foot nestled snugly against the ruler for the entire length of the line.
This is all about smooth, controlled motion. Avoid sudden starts and stops. On longer lines, I try to move my whole body with the machine, not just my arms, to create a more fluid motion. And don't forget to "walk" your hands! You can only effectively control the ruler within your hand's reach. Before you quilt past that point, stop with the needle down, reposition your hand further along the ruler, and then continue on your way.
A couple of other common snags you might run into:
- Quilting Off the Edge of the Ruler: It happens! If your machine jumps the track, don't panic. Stop right away, take a couple of backstitches to lock your thread, and then grab your seam ripper to gently pull out the rogue stitches. Just reposition your ruler and start again, overlapping your last few stitches to create a seamless fix.
- Getting Over Bulky Seams: Thick seams can feel like speed bumps, making your ruler rock and your stitches wobble. The best way to handle them is to slow way down as you approach. Apply gentle, steady pressure to keep the ruler flat and just ease the machine over the hump.
Every single one of these issues is a learning opportunity. When you solve them, you’re not just fixing a mistake—you’re building the muscle memory and quilter's intuition that will make every project after this one even better.
Your Top Longarm Ruler Work Questions, Answered
Once you get started with rulers, the questions start popping up. That's a great sign—it means you're really digging in and learning! I've put together answers to the most common questions I hear from quilters who are navigating this exciting new skill.
Think of this as your personal cheat sheet. Let's clear up these common sticking points so you can get back to your machine with total confidence.
What’s the Real Difference Between Longarm and Domestic Machine Rulers?
It all comes down to one critical thing: thickness. This isn’t just a minor detail; it’s a non-negotiable safety feature.
Longarm rulers are a solid 1/4-inch thick. That specific height is engineered to press right up against the high wall of a ruler foot, creating a physical barrier the foot simply can't jump over. This design makes it virtually impossible for the ruler to slip under the needle, preventing a needle strike that could damage your machine, your quilt, and even you.
On the other hand, rulers made for domestic machines are much thinner, usually just 1/8-inch. If you try to use one of those on a longarm, it's an accident waiting to happen. Before a ruler ever comes near your quilt, double-check that it’s the proper 1/4-inch thickness.
How Do I Control My Speed With a Stitch Regulator On?
This is a fantastic question because it gets at a common point of confusion. When your stitch regulator is on, you’re not in charge of speed anymore. Your new job is to focus on the smoothness of your movement.
The machine is doing the hard work for you. It senses how you're moving the machine head—fast, slow, or somewhere in between—and adjusts the needle speed on the fly to keep every single stitch perfectly even.
Your goal should be to glide the machine along the ruler's edge with a steady, consistent hand. Forget about speed and concentrate on fluid, deliberate motions. Avoid those jerky starts and stops. You bring the precision, and the machine will bring the perfect stitches.
Pro Tip: To really get a feel for this, practice on a scrap quilt sandwich with no thread in the needle. Just trace along a ruler. This builds the muscle memory for that smooth, flowing motion without any pressure. It’s all about the glide, not the gas pedal.
Can I Mix Ruler Work and Free-Motion Quilting Together?
Not only can you, you absolutely should! This is where the real magic happens. When you combine the crisp, perfect lines of rulers with the soft, organic flow of free-motion, you create quilts with incredible texture and visual punch.
Here’s how I like to think about it:
- Rulers build the skeleton. Use them to stitch in the ditch, create flawless grids, or lay down the perfect framework of arcs and scallops in your borders. They give your quilt structure.
- Free-motion brings it to life. Once that framework is in place, you can fill in those defined areas with your favorite free-motion designs. Think beautiful feathers flowing from a ruler-straight spine, or soft pebbles filling a perfectly quilted geometric block.
By combining the two, you get the best of both worlds. The result is a quilt that looks incredibly dynamic, complex, and professionally finished.
What Are the Most Versatile Rulers to Buy First?
You definitely don't need to buy every ruler on the market to get started. In fact, it’s much smarter to begin with a few versatile workhorses. This lets you master the core skills without getting overwhelmed or breaking the bank.
I always recommend new ruler-work quilters start with an "Essential Trio":
- A Good, Long Straight Edge: A ruler that’s at least 12 inches long is your go-to for everything. It's for stitch-in-the-ditch, crosshatching, piano keys, and countless geometric designs.
- A Set of Arcs or Circles: These are your secret weapon for creating beautiful, gentle curves. They make things like clamshells, Baptist fans, and echoing curved piecing a breeze.
- A Multi-Function Ruler: Look for a smaller, versatile ruler that combines a short straight edge with a few different curves. These are perfect for getting into tight corners and doing detailed work in smaller blocks.
With just these three tools in your arsenal, you'll have everything you need to tackle a huge variety of patterns and build a solid foundation in longarm quilting with rulers.
Here at Quilt Batting, we know that a great quilt starts with a great foundation. For ruler work that has that crisp, clean definition, you need the right batting. Our premium, low-loft batting is the perfect partner for your precise stitching. Explore our selection and find the perfect roll for your next masterpiece at https://quiltbatting.shop.