

So, you’ve got a pile of beloved T-shirts and a brilliant idea to turn them into a quilt. Fantastic! This is one of the most rewarding projects you can take on, creating a warm, cozy tapestry of your favorite memories.
The basic idea is simple enough: gather your shirts, stabilize the stretchy fabric with fusible interfacing, cut them into uniform blocks, and sew them all together. But the real magic—the secret to getting a quilt that looks polished and professional instead of lumpy and stretched—is all in that prep work. Getting the T-shirts to behave like regular quilting cotton is the game-changer.
Your First Steps to a Perfect Memory Quilt
A T-shirt quilt is so much more than just a blanket. It’s a mosaic of your life—concerts, marathons, family reunions, favorite teams. Every single block tells a story. We’re going to walk through this together, step by step, so you can turn that stack of tees into a durable, beautiful keepsake you'll treasure for years.
The journey from a messy pile of clothes to a finished quilt is a fun one. It all starts with choosing the right shirts and tools. Then comes the most critical part: preparing the fabric. I'll show you exactly how to tame that notoriously tricky T-shirt stretch before you even think about picking up your rotary cutter.
Understanding the Process
Don't let the idea of a big project intimidate you. We can break it down into a few manageable phases. You'll start with gathering your materials, then move into prepping and cutting, and finally, the fun part of piecing it all together. Each step builds on the one before it, so taking your time at the beginning really sets you up for a smooth finish.
This is the basic workflow you'll follow for the prep stage.
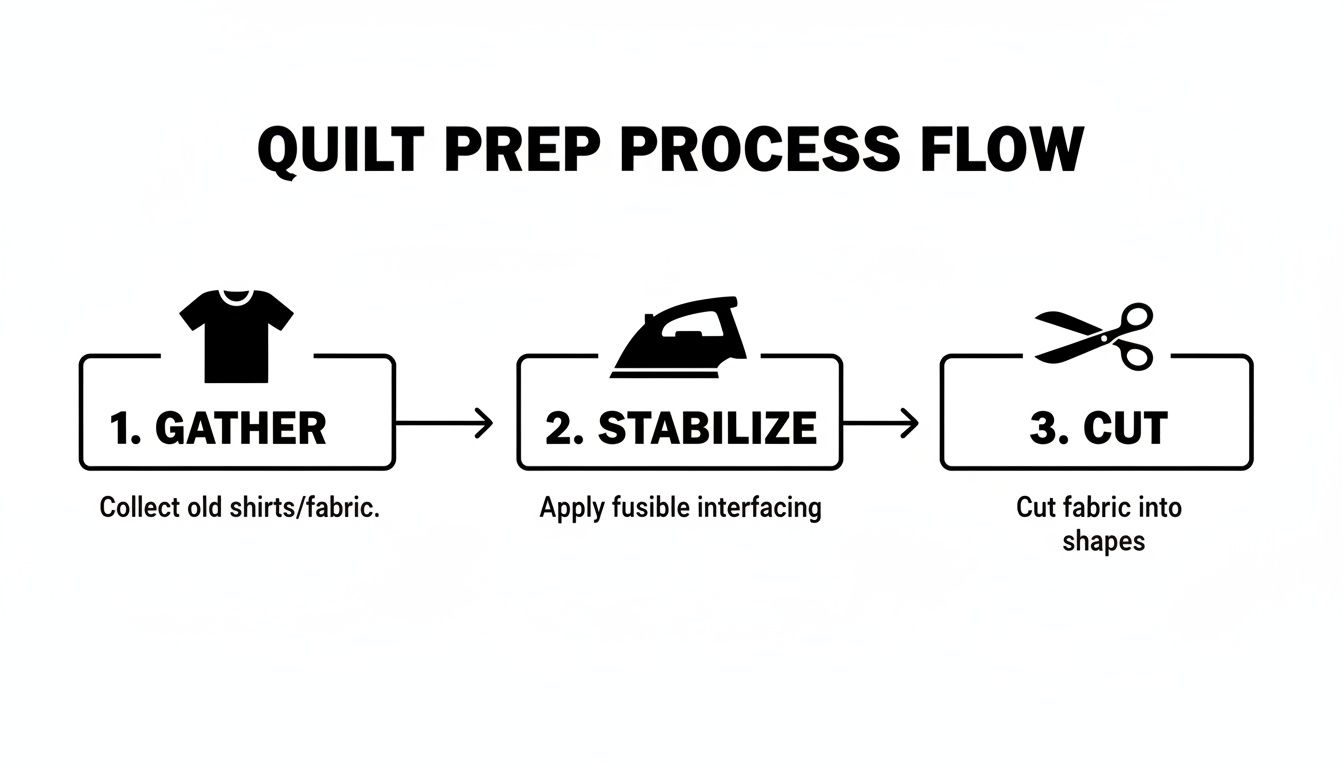
As you can see, gathering, stabilizing, and cutting aren't just suggestions—they are the foundation for a quilt that will last.
Why T-Shirt Quilts Are So Popular
If you're excited about making a memory quilt, you're in good company. These projects are a huge gateway for new quilters, and for good reason! They're personal, practical, and a fantastic way to upcycle. It’s a big part of why the U.S. quilting market is a $4.5 billion industry.
Here's the key fact to remember: T-shirt knits can stretch up to a whopping 50%. This is why fusible interfacing is your best friend—it makes the fabric stable enough to cut and sew accurately. As a general rule, you'll need around 20-30 shirts to get enough blocks for a good-sized throw or twin quilt.
Pro Tip: Don't be afraid to mix and match different types of shirts! As long as you stabilize them properly, you can combine thin cotton tees with thicker jerseys or even sweatshirts. That variety in texture is what gives a quilt character and visual interest.
To give you a clearer picture, here’s a quick snapshot of what a typical project might require.
T-Shirt Quilt Project Snapshot
| Component | Estimated Quantity | Pro Tip |
|---|---|---|
| T-Shirts | 20-30 (for a throw) | Wash and dry all shirts without fabric softener before you start. |
| Fusible Interfacing | 7-10 yards | Choose a lightweight, woven interfacing like Pellon SF101 for the best results. |
| Sashing/Border Fabric | 2-3 yards | Quilting cotton is ideal. Pick a color that makes your shirt logos pop! |
| Backing Fabric | 4 yards | Minky or flannel makes for an extra cozy back, but quilting cotton works great too. |
| Quilt Batting | Throw Size (60" x 72") | Cotton or an 80/20 cotton-poly blend offers great durability and drape. |
This table should help you build your shopping list and get a feel for the scope of the project.
Creating your first memory quilt is an incredibly satisfying and achievable goal. If you want to build up your confidence with some more foundational skills, you might find our other quilting tips for beginners helpful, too.
Getting Your T-Shirts Quilt-Ready
This is where the magic really begins. Every T-shirt holds a memory, and as you gather your favorites, you're essentially curating the story your quilt will tell. Our job now is to take that pile of well-loved, stretchy clothes and turn them into stable, manageable fabric blocks that are a dream to sew with.
Choosing the Right Shirts
Time to take a walk down memory lane. Go through your stack and pull out the shirts that really mean something. You're looking for graphics that are still in decent shape—vibrant, clear, and not too cracked or stiff. While a little bit of authentic wear and tear adds character, a graphic that's peeling off or feels like a sheet of plastic will be a nightmare to stitch through and won't hold up over time.
Don't feel like you have to stick to just standard cotton tees, either. I've successfully mixed in everything from slick polyester jerseys and race-day tech fabrics to lightweight sweatshirts. The great equalizer is the interfacing we'll apply later; it makes all these different materials behave in a consistent, predictable way.
- Mind the Graphics: Pick shirts with designs that will comfortably fit inside the block size you've planned for.
- Check for Deal-Breakers: A few small holes or a faint stain might be part of the story, but you'll probably want to skip anything with major, distracting damage.
- Always Grab Extras: I can't stress this enough—pull a few more shirts than you think you need. It gives you options during the layout phase and provides a backup in case one just doesn't cooperate.
The Critical First Step: Wash and Dry
Before you even think about picking up your scissors, every single shirt must go through the laundry. This isn't optional. Washing gets rid of any dirt or body oils and, more importantly, pre-shrinks the fabric so it doesn't surprise you later.
Here's a pro tip that makes a huge difference: skip the fabric softener and dryer sheets. These products work by coating the fabric fibers, and that coating can seriously interfere with the fusible interfacing's ability to get a good grip. You want your fabric perfectly clean and free of any residues for a strong, permanent bond.
Breaking Down the T-Shirts
Now it’s time to carefully deconstruct the shirts. The idea is to isolate the front and back panels, leaving as much fabric as possible around the graphic. This extra breathing room is a lifesaver when it comes to centering the design perfectly in your block later on.
It’s a simple process:
- Lay the shirt out flat and smooth it out.
- With sharp scissors or a rotary cutter, slice right up the side seams, from the bottom hem all the way to the armpit.
- Cut along the shoulder seams and around the collar to completely separate the front from the back.
You'll end up with two main pieces from each shirt. You can toss the sleeves and neckband or, if you're like me, save them for a future scrappy project. Working this way keeps your cutting area from getting cluttered and protects the precious graphics.
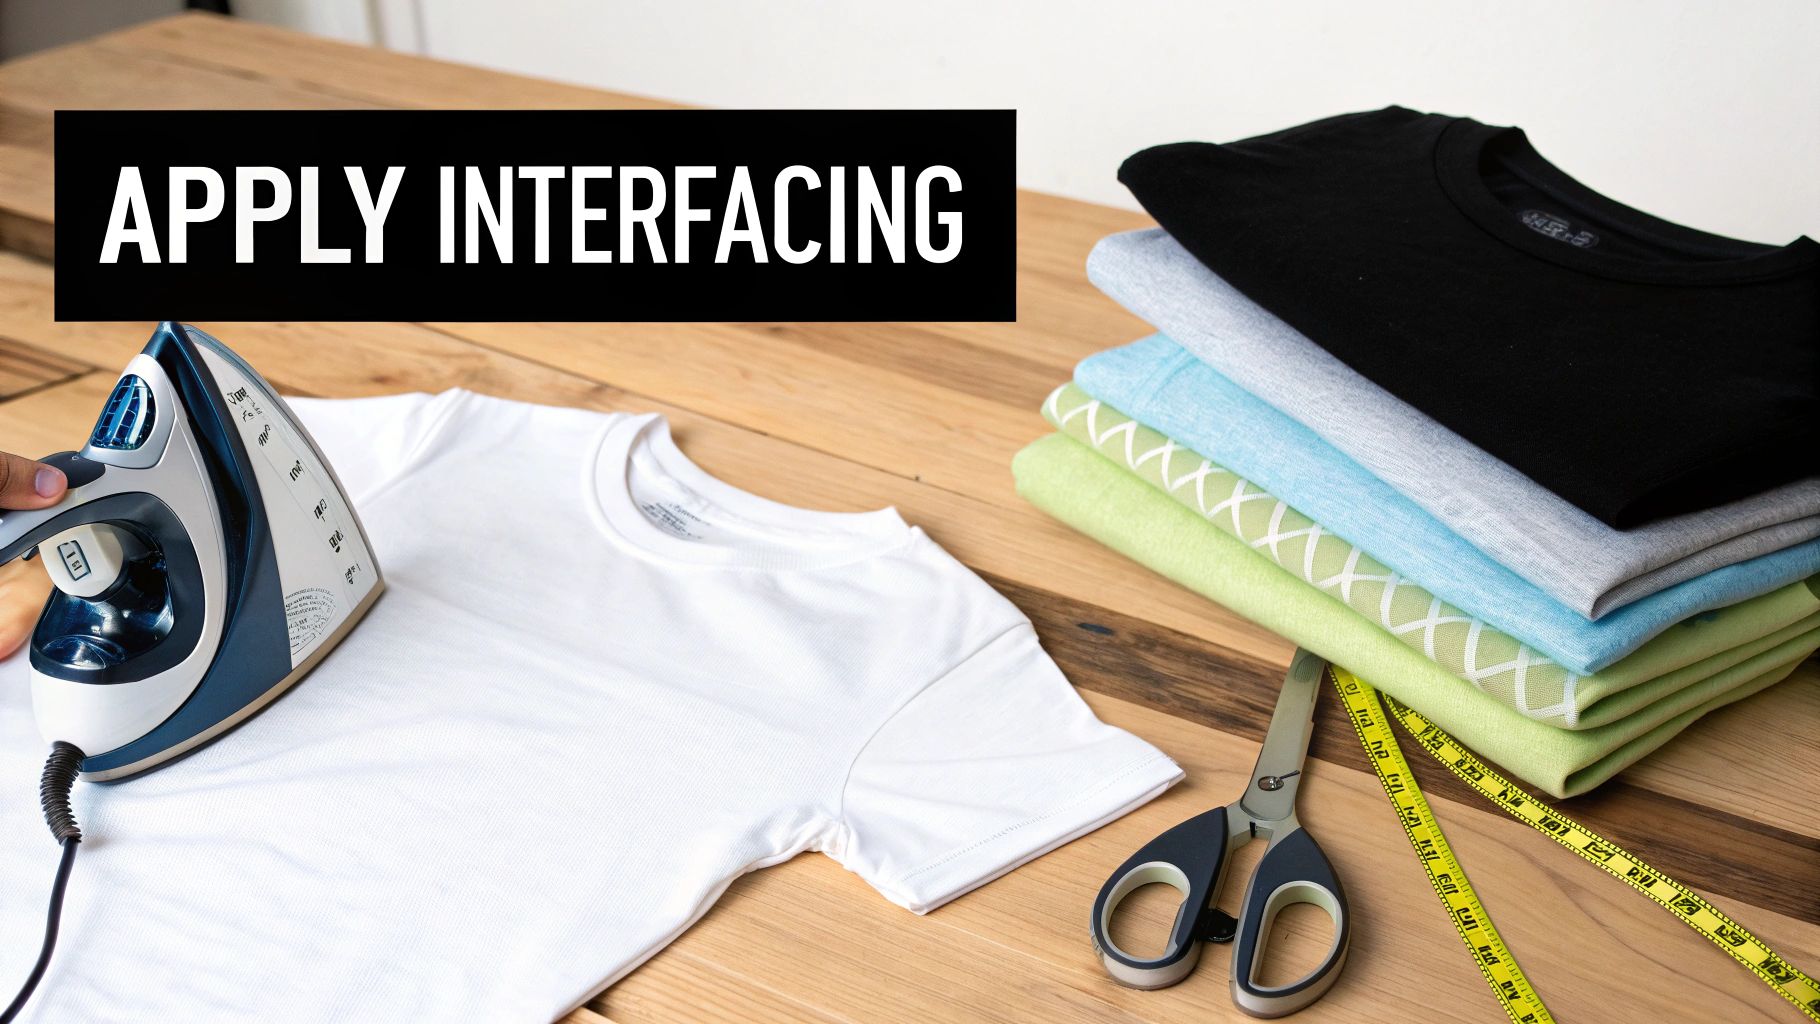
Your Secret Weapon: Fusible Interfacing
If there's one step that separates a beautiful, professional-looking T-shirt quilt from a wavy, lumpy mess, this is it. Knit fabric is meant to stretch—that's what makes it comfortable to wear, but it's a disaster for precision quilting. By applying a quality fusible interfacing, you completely remove that stretch and turn your T-shirt panel into a stable piece of fabric that handles just like quilting cotton.
The gold standard for this job is a woven fusible interfacing like Pellon SF101 Shape-Flex. It provides the perfect amount of stability without making the fabric stiff or bulky, ensuring your finished quilt will still have a soft, cozy drape.
Applying it is straightforward. Place the interfacing on your ironing board with the adhesive side (it feels rough, like fine sandpaper) facing up. Lay your T-shirt piece on top, graphic-side up. Following the manufacturer’s instructions, press with a hot, dry iron. Don't slide the iron around like you're ironing a dress shirt. Instead, press and hold it in one spot for 10-15 seconds before lifting and moving to the next overlapping spot. This gives the heat time to melt the adhesive and create a solid bond.
Let the fused piece cool down completely before you move it—this is crucial for setting the glue. Getting this part right ensures your blocks will be flat, your seams will line up perfectly, and your quilt top will be smooth and pucker-free. Trust me, the time you invest here pays off big time in the final result. If you're curious about the nitty-gritty, you can explore more about the different stabilizers for sewing projects to see why this type is the perfect choice.
Time to Design and Cut: Where the Magic Happens
Alright, you've done the prep work. Your shirts are all stabilized and ready to go. Now, we get to the fun part—transforming that stack of memories into the actual building blocks of your quilt. This is where your inner artist comes out.
Precision is the name of the game here. Taking your time to cut accurately will save you a world of headaches when it's time to sew everything together. Trust me on this one.
The beauty of a T-shirt quilt is its variety. You’ll have small pocket logos, massive concert graphics, and everything in between. Your job is to create a sense of order from this creative chaos, cutting each shirt to create a cohesive and beautiful final quilt top.
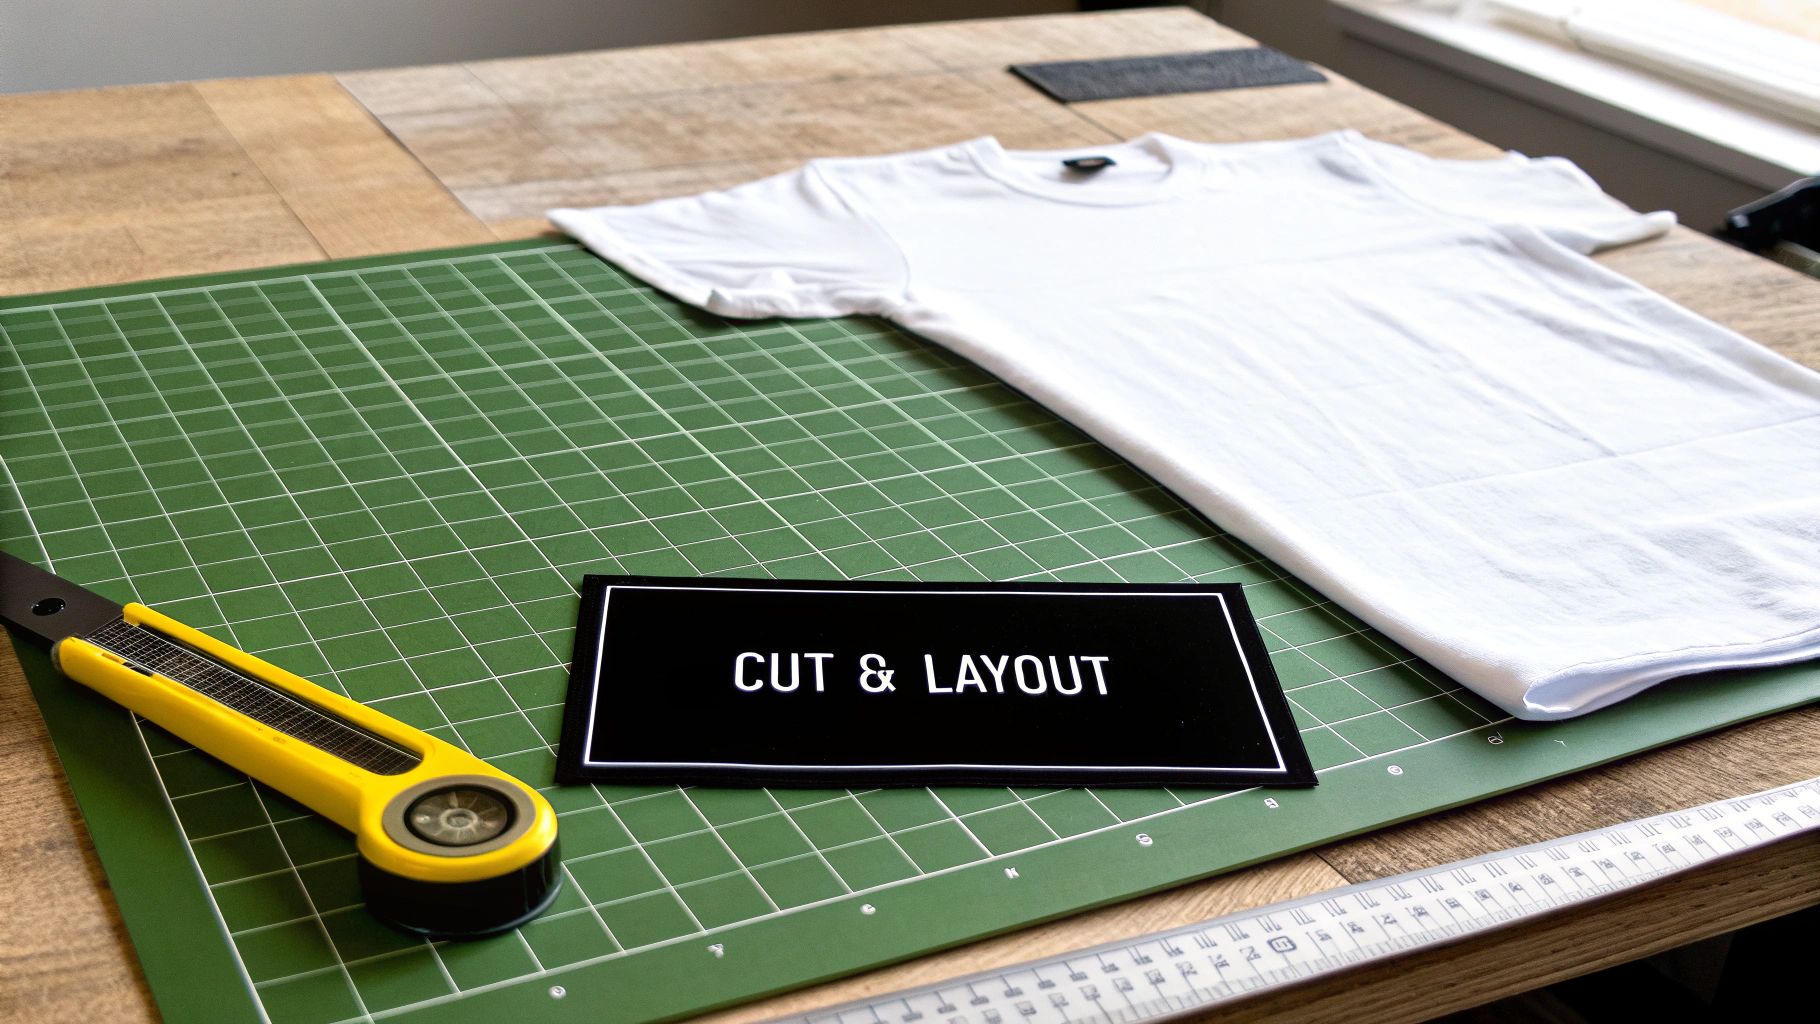
Making the Cut with Confidence
Put the scissors away for this step. Your best friends are a sharp rotary cutter, a big self-healing mat, and a clear acrylic ruler. This trio is the secret to getting perfectly straight, clean cuts every single time.
First, you'll need to decide on a standard block size. A 14x14 inch square is a fantastic starting point because it's generous enough to fit most T-shirt designs.
Lay one of your fused shirts flat on the cutting mat. Position your ruler over the graphic, paying close attention to centering the design. This is what quilters call "fussy cutting"—you’re intentionally framing the most important part of the graphic. Once you’re happy with the placement, press down firmly on the ruler with one hand and glide the rotary cutter along the edge.
What about those shirts with tiny logos? Go ahead and cut the full-size block anyway. The negative space around the small design creates a really cool, modern look and keeps your quilt layout consistent.
Arranging Your Quilt Blocks
With all your blocks cut, it’s time to play. This is easily the most rewarding part of the whole process. Clear a big space on the floor or a large table—some quilters even have dedicated design walls—and start laying out your blocks.
Don’t rush this! Move the squares around. Swap them. Try a few different combinations. Step back and squint. See how the colors and themes flow.
Here are a couple of common layout strategies to get you started:
- Classic Grid Layout: The most straightforward approach. All your blocks are arranged in neat rows and columns. It’s clean, timeless, and lets the T-shirts do the talking.
- Variable or Mosaic Layout: This one is a bit more advanced. You use different-sized blocks to perfectly frame each graphic. It results in a dynamic, puzzle-like quilt but requires some serious planning and math to make it all fit.
Once you land on an arrangement you love, snap a picture of it with your phone. This little trick is a lifesaver—it's your map for when you start sewing.
The Power of Sashing and Cornerstones
Want to take your quilt from good to great? The secret is sashing. Sashing refers to the strips of fabric you sew between the T-shirt blocks, which act like a frame for each one.
Sashing isn’t just for looks. It adds stability to the entire quilt top, gives you a little wiggle room if your blocks aren't perfectly uniform, and lets you make the quilt bigger without needing more T-shirts.
When you add sashing, you create little intersections where the fabric strips meet. You can add small squares of an accent fabric here, which we call cornerstones. They add a fantastic pop of detail and help you line up all your seams perfectly, giving the quilt that polished, professional finish.
The fabric you choose for your sashing is a huge design decision. A neutral like black, gray, or white will make the shirt graphics the star. Or, you could pick a bold color from one of the shirts to tie the whole design together. It's a simple addition that makes a massive impact.
Choosing the Right Batting for Your T-Shirt Quilt
The batting is the unsung hero of your quilt. It’s the cozy, fluffy layer tucked inside that provides all the warmth and weight. Think of it as the soul of the quilt. Choosing the right batting is a huge decision when you're making a t-shirt quilt, especially since they're already pretty hefty from all the t-shirt fabric and interfacing.
What you pick here will completely define the quilt's final drape, warmth, and feel. Let's walk through the best options so your quilt feels just as incredible as it looks.
Understanding Loft and Why It Matters
Before we get into the different materials, we need to talk about loft. In the quilting world, loft is just a simple word for the thickness or puffiness of the batting. For a t-shirt quilt, a low-loft batting is almost always your best bet.
Why? Because the quilt top itself is already thick and dense. If you add a high-loft batting, the finished quilt will be way too bulky, stiff, and just a pain to wrestle with on your sewing machine. A lower loft gives you that perfect gentle puffiness and warmth without adding unnecessary weight, letting the quilt drape softly like it’s meant to.
Comparing Popular Batting Types
You’ve got a few excellent choices for batting, and each one brings something different to the table. The right one for you really just depends on the final texture and warmth you're going for.
- 80/20 Cotton-Poly Blend: This is the workhorse of t-shirt quilts, and for good reason. Blends like Hobbs Heirloom give you the best of both worlds—the soft, natural feel of cotton combined with the strength and stability of polyester. It creates a beautiful drape and is tough enough to handle years of love and washing.
- 100% Cotton: If you want a more traditional, flatter look, 100% cotton is a fantastic choice. It gives your quilt that classic, vintage vibe that gets even softer and crinklier with every wash. That slight shrinkage is what creates the lovely, puckered texture so many quilters adore.
- Wool Batting: Don't sleep on wool! It’s surprisingly light but packs a serious punch when it comes to warmth, which is perfect for a quilt you plan to snuggle under on the couch. Wool is also incredibly resilient, so it resists creases and bounces right back into shape.
A Quilter's Insight: Honestly, my go-to for almost every t-shirt quilt I make is an 80/20 blend. It's just so reliable and easy to quilt through. It gives the finished project a substantial but not overly heavy feel that my clients always rave about. It’s the perfect middle ground.
To help you see the differences at a glance, I've put together a quick comparison of these common materials.
Batting Comparison for T-Shirt Quilts
This table breaks down the most common batting types to help you choose the right one for your project's specific needs.
| Batting Type | Best For | Loft & Feel | Quilting Distance |
|---|---|---|---|
| 80/20 Cotton-Poly Blend | All-purpose durability and soft drape | Low-to-medium loft, soft and stable | Up to 4 inches apart |
| 100% Cotton | A traditional, flatter, crinkled look | Low loft, gets softer over time | Up to 3.5 inches apart |
| Wool | Lightweight warmth and a luxurious feel | Medium loft, bouncy and resilient | Up to 4 inches apart |
This chart should help you visualize how each choice will affect not just the final look of your quilt, but the quilting process itself. If you really want to get into the nitty-gritty, our deep dive into the best batting for t-shirt quilts offers even more guidance.
The Advantage of Buying Batting by the Roll
Here’s a pro tip: when you're tackling a larger quilt, buying your batting by the roll is a total game-changer. It saves you from the headache of piecing smaller batting scraps together, which can leave annoying bulky seams inside your quilt. A single, continuous piece from a roll gives you a perfectly smooth and consistent foundation.
This is especially true for bigger projects. A standard queen-size t-shirt quilt (90" x 100") needs batting to cover about 65 square feet. But you’ll want 10-15% extra for breathing room, bringing you closer to 72-75 square feet. U.S. mills used a staggering 1.9 million bales of cotton in 2023/24, fueling the demand for reliable battings like Hobbs' 80/20, which is a top choice for its excellent loft retention after washing. You can find more insights on the quilting supply market on datainsightsmarket.com.
Ultimately, the batting you choose really sets the tone for your quilt's final character. By going with a low-loft option like an 80/20 blend or 100% cotton, you’re making sure your treasured memories are wrapped in a layer of comfort that will truly last a lifetime.
Bringing It All Together: Assembling and Finishing
This is where the magic really happens. You’ve done all the prep work—your t-shirt blocks are stabilized and cut, the layout is decided, and you’ve picked the perfect batting. Now it’s time to transform that pile of pieces into a finished quilt.
Seeing a quilt top come together is one of the most satisfying parts of the process. With a few pro tips, you can make sure everything goes smoothly and your seams line up beautifully.
Piecing Your Quilt Top
The secret to a sharp-looking quilt top is a consistent quarter-inch seam allowance. The good news? Your stabilized t-shirt blocks will behave just like regular quilting cotton, making it so much easier to get that perfect seam.
Want to speed things up? Chain piecing is your best friend. Instead of sewing two blocks, cutting the thread, and starting over, just feed the next pair through your machine right after the first. You’ll create a long chain of pieced blocks, which saves a surprising amount of time and thread.
- Start by sewing your blocks into pairs, then join those pairs to build out your rows.
- Pressing is critical here. I always press the seams in adjoining rows in opposite directions. This simple trick helps them "nest" together when you join the rows, giving you those perfect, crisp points where the corners meet.
- Once your rows are pieced and pressed, sew them together to complete the quilt top. Take it slow and steady on these long seams to keep everything straight and prevent warping.
Building the Perfect Quilt Sandwich
With your top complete, you're ready to make the "quilt sandwich." This is just what it sounds like: your backing, the batting in the middle, and your quilt top. The goal is to get all three layers perfectly smooth and secure before you start quilting.
Find a large, flat surface (a clean floor works great!) and lay down your backing fabric, wrong side up. I like to use painter's tape to pull it taut—not stretched, just smooth and wrinkle-free. Then, lay your batting over the backing, smoothing out any bumps. Finally, place your quilt top, right side up, over the batting.
A Pro Tip You Can't Skip: Always cut your backing and batting at least four inches larger on every side than your quilt top. This extra fabric is your safety net, giving you room to breathe during quilting and preventing the layers from shifting out of alignment.
Now, you need to baste it. Basting is just temporarily tacking the layers together. You can use curved safety pins every few inches or a temporary fabric spray adhesive. Trust me, proper basting is the number one way to prevent annoying puckers and folds on the back of your quilt. If you want to master this step, check out our detailed guide on how to properly baste a quilt for a deep dive.
Quilting on Your Home Machine
You absolutely do not need a giant longarm machine to quilt your t-shirt project. Your domestic sewing machine is more than capable, as long as you have one essential tool: a walking foot.
A walking foot is a game-changer. It has its own set of feed dogs that grip the top layer of fabric and move it at the same speed as the bottom layer. This synchronized motion is the key to preventing the layers from shifting and causing puckers.
For your first t-shirt quilt, you can't go wrong with simple straight-line quilting. It's clean, modern, and very effective.
- Stitching in the Ditch: This is my go-to for many t-shirt quilts. You simply quilt directly in the "ditch" of your seam lines. It's almost invisible and adds great texture without distracting from the shirt designs.
- Grid Quilting: Another great option is quilting a simple grid of vertical and horizontal lines across the quilt. This looks fantastic and provides plenty of stability.
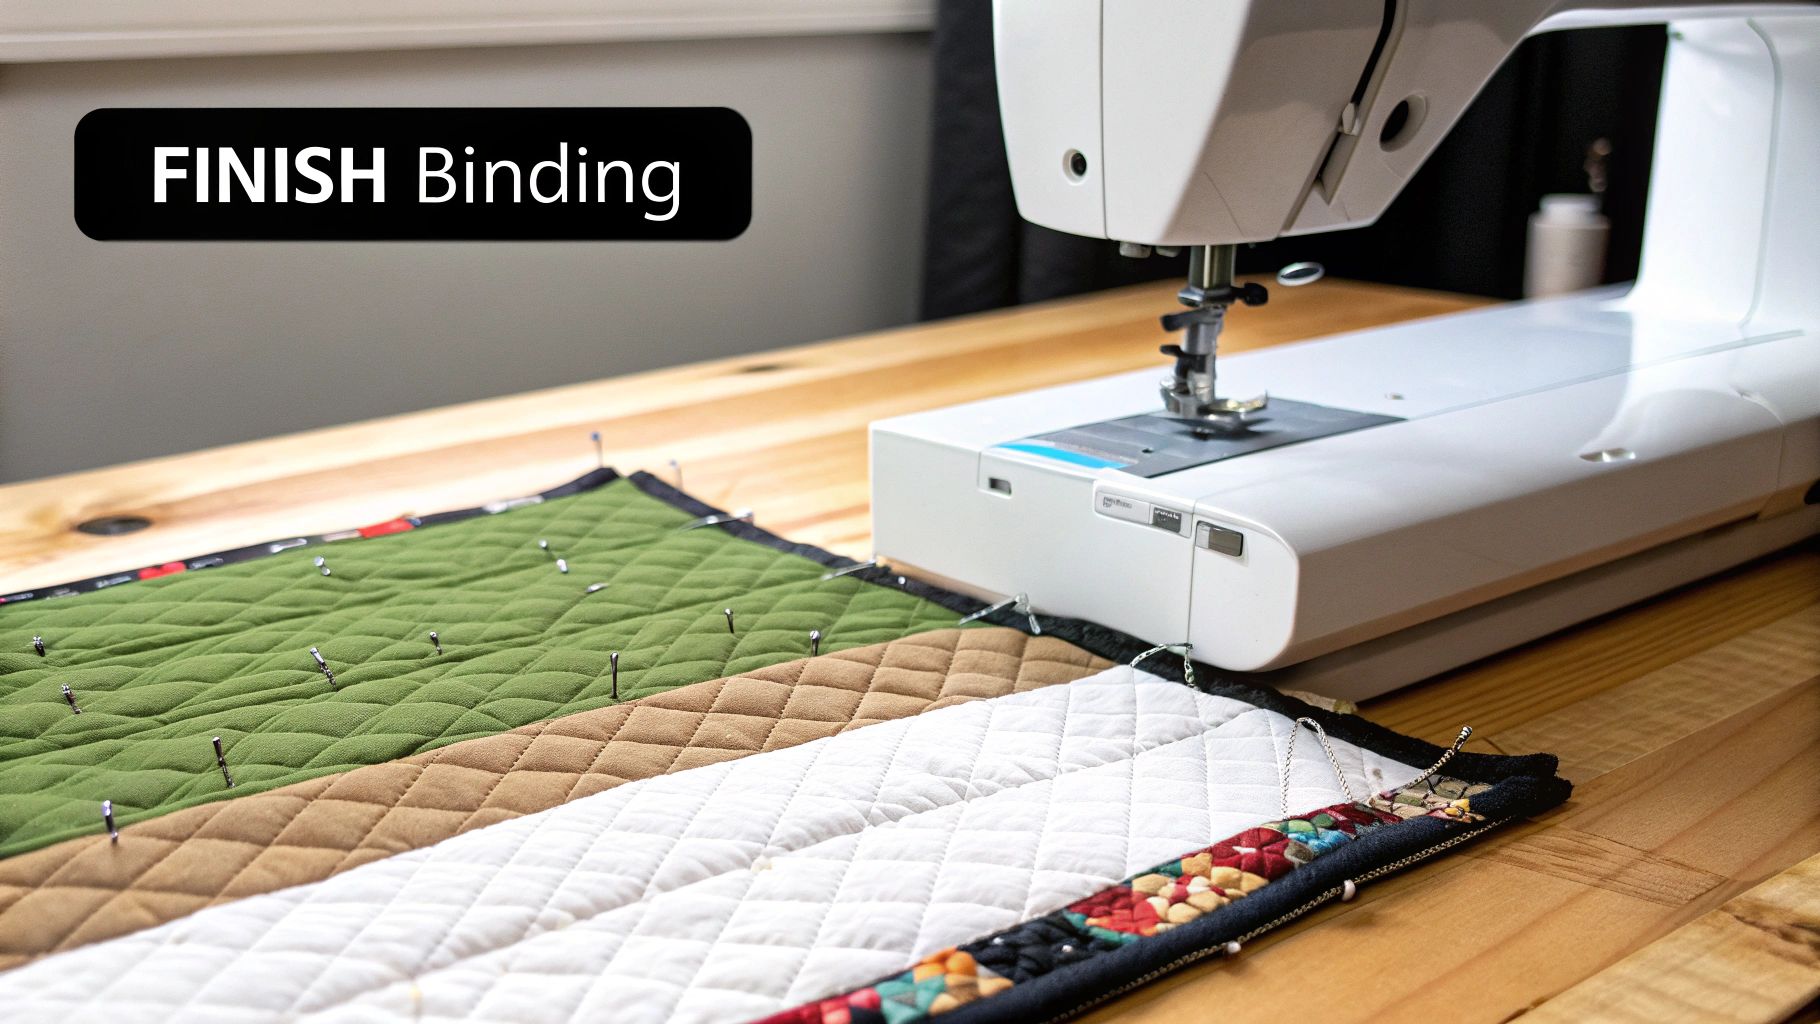
The Final Touch: Binding Your Quilt
The binding is the fabric frame that encloses the raw edges of your quilt, giving it a durable, polished finish. It's the last step, and it really makes the whole project look professional.
To start, cut 2.5-inch strips of quilting cotton. Sew them together end-to-end (I prefer a diagonal seam for less bulk) to create one continuous strip. Fold this long strip in half lengthwise and give it a good press to create your double-fold binding.
Next, you’ll sew the raw edge of the binding to the front of your quilt, mitering the corners as you go for a sharp, 90-degree turn. To finish, just wrap the folded edge of the binding around to the back of the quilt and stitch it down. You can do this by machine for a fast and super-durable finish, or by hand for a classic, invisible stitch.
And that's it! This final step officially completes your memory quilt. Now all that's left to do is snuggle up and enjoy it.
Answering Your Top T-Shirt Quilt Questions
Even with the best instructions, your first T-shirt quilt project can feel like it comes with a million little questions. Don't worry, you're not the first to wonder about the details! I’ve gathered some of the most common things quilters ask, along with the straightforward advice I’ve learned from years of making these special quilts.
Let's clear up any confusion so you can get back to what you love—stitching those memories together.
How Many T-Shirts Do I Really Need?
This is always the first question, and the honest answer is: it all depends on the quilt size and the block size you've chosen.
As a general rule of thumb, for a cozy throw-sized quilt (about 60" x 72") using 14-inch blocks, you'll want to have around 20-25 shirts. If you’re planning something bigger, like a queen-size quilt, you're probably looking at a collection of 30-40 shirts.
My best piece of advice? Always gather a few extra shirts before you even think about cutting. This gives you some much-needed wiggle room when you're playing with the layout. Plus, it’s a lifesaver if a graphic doesn't quite fit a block or you have a little cutting mishap—and trust me, it happens to all of us!
Do I Really Need to Use Interfacing on Every Shirt?
Yes. A thousand times, yes. This is the one step you absolutely, positively cannot skip. T-shirt knit is designed to stretch, which is a quilter’s worst nightmare when trying to sew precise seams.
Without a quality fusible interfacing like Pellon SF101, your blocks will warp, curl, and distort the second you start cutting and sewing. Your seam allowances will be all over the place, your points won’t line up, and the finished quilt top will look wavy and uneven. Stabilizing that knit is the non-negotiable secret to getting those crisp, professional-looking results.
Don't think of interfacing as an optional add-on; think of it as the foundation of your entire quilt. It’s the single most important step for transforming stretchy clothing into stable, reliable quilting fabric.
What Is the Best Batting for a T-Shirt Quilt?
The perfect batting needs to find that sweet spot between warmth and a beautiful drape, all without adding too much bulk. T-shirt quilts are already heavy from the get-go, so a low-to-medium loft batting is almost always your best bet.
I personally swear by an 80/20 cotton-poly blend like Hobbs Heirloom. It's incredibly stable, drapes like a dream, and stands up to years of use and washing. You’ll want to steer clear of high-loft polyester batting; it can make the quilt feel puffy and stiff, and it’s a real challenge to wrestle through a home sewing machine.
Can I Quilt This on My Regular Sewing Machine?
You sure can! You absolutely do not need a longarm machine to finish a T-shirt quilt. The key to making it work beautifully on your domestic machine is one simple attachment: a walking foot.
A walking foot is a quilter’s best friend. It has a set of feed dogs on the top that work with your machine's feed dogs to pull all three layers of the quilt sandwich—top, batting, and backing—through at the same rate. This little marvel prevents all that frustrating shifting, stretching, and puckering as you quilt.
You can achieve a fantastic finish right at home with some simple quilting designs:
- Stitch in the Ditch: Quilting right in the seam lines of your sashing is a clean, almost invisible way to secure everything together.
- Grid Quilting: A simple grid of straight lines across the quilt top adds a modern texture and provides excellent stability.
- Outline Quilting: You can also stitch just around the edges of some of the larger T-shirt graphics to make them pop.
With a walking foot and a little patience, you can get a polished, professional finish right in your own sewing room.
Ready to build your quilt on the best foundation? At Quilt Batting, we offer premium, bulk-friendly batting rolls from trusted brands like Hobbs and Pellon. Find the ideal batting to ensure your memory quilt is made to last at https://quiltbatting.shop.