

If you've ever felt the itch to start quilting, chances are you've come across the classic nine-patch. It’s built from a simple three-by-three grid of fabric squares, making it one of the most welcoming starting points for a beginner and an endlessly versatile block for seasoned quilters. The real charm of the nine-patch is its beautiful simplicity and the incredible designs you can create, from cozy traditional quilts to sharp, modern pieces.
This guide is your roadmap. We’ll cover everything you need to know to create a nine-patch quilt you’ll be proud of.
The Enduring Appeal of Nine Patch Quilts
The nine-patch block is so much more than just a pattern—it’s a piece of quilting history. For many of us, it was the very first block we learned to sew, and for good reason. The construction is refreshingly straightforward, relying on basic squares that magically come together to form a more complex design. That simplicity makes it an incredibly forgiving project when you're just finding your footing.
But its appeal doesn't stop there. For those of us who have been quilting for years, the nine-patch is a creative playground. It’s a fundamental building block that can be twisted and turned into countless other quilt designs. Just by playing with color, value, and where you place your fabrics, you can make stunning secondary patterns emerge—think dazzling stars, interlocking chains, and intricate lattices.
A Rich Historical Tapestry
The nine-patch is deeply woven into the fabric of American quilting history. You can trace its origins all the way back to the early 1800s, where it became a practical and popular choice for pioneer women making warm bedding from precious fabric scraps. Its popularity held strong right through World War II, with patterns popping up in newspapers and being shared from quilter to quilter across the country. You can dive deeper into its fascinating journey and discover its various regional names in this overview of nine patch quilt history on TortoiseCrafts.co.uk.
This history adds a special layer of meaning to any nine-patch quilt we make today. When you sit down to sew one, you're not just making a blanket; you're connecting with generations of quilters who used that same simple grid to create things of comfort and beauty.
Why Quilters Still Love This Timeless Block
So, why has this pattern stuck around for so long? It comes down to its incredible adaptability. A nine-patch quilt looks just as at home in a rustic farmhouse as it does in a sleek, modern apartment.
- Scrap-Busting Power: This is the ultimate scrap-friendly pattern. All those small, leftover pieces of fabric you can’t bear to throw away can find a new life in a vibrant, scrappy nine-patch.
- Speed and Efficiency: Once you get the hang of techniques like chain piecing (which we'll get into later), you can churn out these blocks incredibly fast.
- Foundation for Learning: Mastering the nine-patch teaches you the core skills of quilting: accurate cutting, a consistent seam allowance, and smart pressing. These are the skills you'll carry with you into every future project.
The true magic of the nine-patch is how it can be both simple and complex at the same time. It’s a testament to how the most basic design elements can create something truly spectacular.
Whether this is your very first quilt or your fiftieth, the nine-patch offers a rewarding and endlessly creative experience. If you’re looking to explore other essential designs, our guide on basic quilt patterns for beginners is a great place to find more inspiration.
Building the Perfect Nine Patch Block
This is where the real fun starts. You've got your beautiful stack of fabrics, and now it's time to turn them into the classic, interlocking squares that are the heart of your nine patch quilt. It's a satisfying rhythm of cutting, sewing, and pressing, and getting these fundamentals right will make all the difference in your finished quilt.
The nine patch block has been a quilter's favorite for centuries, and for good reason—it’s beautifully simple. That simple grid has been a canvas for incredible textile art since at least the early 1800s. In fact, the Smithsonian holds a stunning Nine Patch quilt from 1825-1850 made from thirty different roller-printed cottons, plus a mix of woven plaids and checks. It’s a perfect example of how even the most basic block can tell a rich story. You can get a closer look at this piece of history through the National Museum of American History's collection.
Precision Cutting: The First Step to a Great Block
If you want your quilt top to come together smoothly, it all starts with accurate cutting. Even a tiny error here can get magnified as you assemble the quilt, leading to mismatched points and wonky blocks. Your rotary cutter, a good self-healing mat, and a clear quilting ruler are your absolute best friends for this job.
The math is wonderfully straightforward. First, decide on the finished size of your block—that’s how big it will be after it’s all sewn together. Divide that number by three to find the finished size of each little square. Then, just add 1/2 inch to that measurement to account for your seam allowances (a quarter-inch on all four sides).
The Simple Formula: (Finished Block Size ÷ 3) + 1/2" = The Size You Need to Cut
So, if you're aiming for a finished 9-inch block, each of the nine squares will finish at 3 inches. Plug that into the formula: (9 ÷ 3) + 0.5 = 3.5 inches. You’ll cut nine 3.5-inch squares for every block you make.
To save you some time, I've put together a quick-reference chart for the most common block sizes quilters use.
Nine Patch Cutting Formulas for Common Block Sizes
| Finished Block Size | Cut Square Size (with 1/4" seam allowance) |
|---|---|
| 6 inches | 2.5 inches |
| 9 inches | 3.5 inches |
| 12 inches | 4.5 inches |
| 15 inches | 5.5 inches |
This little table is a great starting point and can be a real time-saver when you're planning your next project.
Assemble Your Blocks in Record Time with Chain Piecing
Once everything is cut, you can fly through the sewing process using a technique called chain piecing. Instead of sewing two squares, cutting the thread, and starting over, you just feed the next pair of squares right behind the first, creating a long "chain" of pieces.
This method is a game-changer for speed, but it also helps with accuracy. By sewing continuously, you get into a steady rhythm, which makes keeping a consistent 1/4-inch seam allowance much easier. And you wouldn't believe how much thread it saves!
Here’s how I chain piece nine patch blocks:
- Set Up Your Stacks: I like to lay out the squares for several blocks at once, so I can just grab and sew.
- Sew the First Seam: Take the first and second squares from the top row of your first block, place them right sides together, and sew. Don't snip the thread! Just guide the first two squares from the next block’s top row right under the needle. Keep doing this until you have a long chain of pairs.
- Add the Third Square: Once you're done, snip the threads between each pair. Now, chain piece the third square onto each of those units.
- Repeat for Rows Two and Three: Follow the exact same process for the middle and bottom rows.
Before you know it, you’ll have tidy stacks of perfectly sewn rows, ready for the next step. If you're looking for more tips like this, our guide on quilting tips for beginners is packed with helpful advice.
The Art of Pressing and Spinning Seams
How you press your seams is just as crucial as how you sew them. A well-pressed block lies flat, makes it a breeze to match up seams, and gives your entire quilt top a polished, professional look.
Quilters love to debate pressing seams open versus to the side, but for nine patch blocks, pressing to the side is the way to go. It allows you to "nest" your seams for perfect points.
- Pressing for Success: For a standard nine patch, press the seams in your top and bottom rows in one direction (say, outwards, away from the center). Then, press the seams in the middle row in the opposite direction (inwards, toward the center).
- Nesting for Perfect Points: When you go to sew the rows together, the seam allowances will fit snugly against each other. This little lock is what we call nesting seams, and it’s the secret to getting those corners to line up perfectly every single time.
Want to take it one step further? Try spinning your seams at the center. After you’ve sewn your three rows together, flip the block over. At the very center where all the seams meet, carefully pick out the last stitch or two holding the row seams together. This allows you to fan out the center seam allowances into a tiny pinwheel. Spinning the seams distributes the fabric bulk, creating a super flat center that is an absolute dream to quilt over.
Designing a Stunning Quilt Layout
You’ve done the work, and now you have a beautiful stack of perfectly pressed nine-patch blocks. This is where the real fun begins. You're shifting from builder to artist, and how you arrange these simple squares is what will give your quilt its unique personality.
The most direct path is a simple grid, sewing all your blocks side-by-side. This creates a timeless checkerboard that looks absolutely fantastic in a scrappy quilt, letting all those different fabrics sing. But trust me, that's just the starting point.
Creating Movement with Alternating Blocks
One of my favorite ways to make a design breathe is to alternate the pieced nine-patch blocks with solid, unpieced squares of fabric. This one little change introduces what we call "negative space," which gives your eyes a place to rest and makes those detailed nine-patch blocks truly stand out.
A solid block of your background fabric is a classic, no-fail choice for a clean, traditional vibe. But don't be afraid to play! Try a complementary color or even a low-volume print to give the quilt a more modern, textured feel.
Another fantastic option is the "snowball" block. You start with a solid square, sew smaller squares onto each corner, then fold them back and trim. The result is a unique block that adds a wonderful sense of secondary pattern and movement all across the quilt top.
My best advice? Audition your fabrics. Lay your nine-patch blocks out on a design wall (or just a clean floor!) and place different fabric squares between them. What looks one way as a small swatch can have a completely different impact on a larger scale.
The whole process of building a quilt top really boils down to a simple, repeatable flow. This visual breaks it down perfectly.
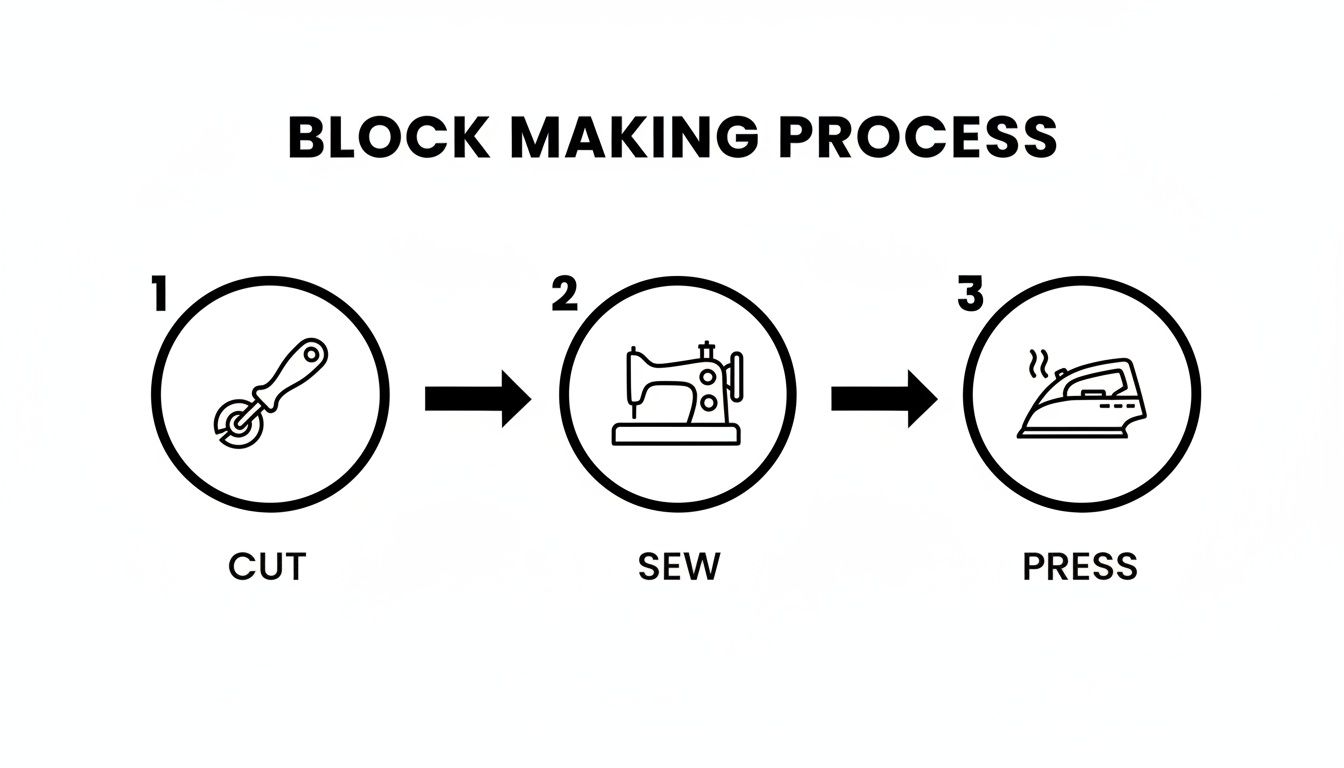
It really shows how getting the fundamentals right—precise cutting, consistent sewing, and flat pressing—is the foundation for every beautiful quilt.
Adding Structure with Sashing and Cornerstones
If you're aiming for a more defined, formal look, think about adding sashing. These are simply strips of fabric sewn between your blocks, creating a grid-like frame around each one. It’s a brilliant technique to:
- Unify a Scrappy Quilt: When you've used a wild assortment of fabrics, sashing in a single, consistent color pulls the whole design together. It’s like magic.
- Increase Quilt Size: Need your quilt to be bigger? Sashing is a visually stunning way to add size without sewing dozens more intricate blocks.
- Showcase Intricate Blocks: For those really special or detailed nine-patch blocks, sashing gives them their own spotlight so they don't get lost in the crowd.
To take it up another notch, add cornerstones. These are just small squares of fabric that sit at the intersections of your sashing strips. Using a punchy, contrasting color here creates a delightful secondary pattern of little dots or squares dancing across the quilt.
The Magic of Secondary Patterns
Honestly, the most exciting part of designing with nine-patch blocks is discovering the secondary patterns that emerge. This is where your strategic use of color and value becomes a superpower.
Picture a nine-patch where the four corner squares are dark and the rest are light. When you place these blocks together, those dark corners meet up and form a whole new, larger square. Suddenly, a "nine-patch star" appears right out of the grid! This is the amazing illusion you can create just by thinking about light versus dark.
- Diagonal Chains: If your blocks have a strong diagonal line of color, arranging them can create the look of interlocking chains running across the quilt.
- Irish Chain: This beloved classic is built entirely on this idea. It alternates a simple nine-patch with a solid square to create a gorgeous lattice effect.
Framing Your Masterpiece with Borders
Finally, no quilt top feels truly complete without borders. Think of them as the frame on a painting; they contain the design and give it that polished, professional finish. You can go for a single, simple border or get more creative with a series of multiple, pieced borders.
Calculating the fabric is easy, but here’s a pro tip: always measure your quilt top after it’s fully assembled. Measure through the center both vertically and horizontally, because the edges can sometimes get a little stretched during sewing. Once you have those core measurements, you can decide on border widths and plan your quilting. If you're looking for ideas, our guide to border quilting patterns has tons of inspiration to perfectly complement your design.
Picking the Perfect Batting for Your Quilt
The batting is truly the unsung hero of any quilt. It’s that hidden middle layer that gives your nine-patch creation its warmth, its drape, and its lovely texture. Think of it as the soul of your project—it defines how the quilt feels, how heavy it is, and even how your quilting stitches stand out.
Walking into a shop and seeing all the options, from paper-thin to cloud-like, can be a little overwhelming. But once you understand what makes each type special, you can confidently choose the perfect foundation for your vision. This choice is what turns a quilt into a light, airy coverlet or a snug, heirloom-worthy blanket.
Breaking Down the Most Common Batting Types
You'll almost always see two big names on the shelves: Hobbs and Pellon. Both make fantastic products, but the hands-down favorite for so many quilters is an 80/20 cotton/polyester blend. Honestly, it's my personal go-to for just about any bed quilt. It really does give you the best of both worlds.
The 80% cotton delivers that classic softness and breathability we love, while the 20% polyester gives it a little extra loft and durability, which also helps minimize shrinkage. It quilts like a dream whether you’re working by hand or on your machine, and it creates that slightly puckered, crinkly look after washing that just screams "cozy." Hobbs Tuscany 80/20 is a classic for a reason—it gives a reliable, beautiful finish every single time.
If you’re chasing a flatter, more traditional look, then 100% cotton batting is your best friend. This is an especially popular choice for longarm quilters. Many 100% cotton battings, like Pellon's Nature's Touch, come with a scrim—a super-thin, non-woven stabilizer that’s needle-punched right into the cotton. This scrim is a game-changer because it adds strength and keeps the batting from stretching or tearing on a longarm frame.
A batting with a scrim lets you quilt with more space between your stitching lines. You can get away with quilting up to 8-10 inches apart without worrying about the batting shifting or bunching up over time. This makes it a fantastic, secure choice for modern nine-patch quilts with more minimalist quilting.
Specialty Batting for Special Projects
Sometimes, a project calls for something a little different. Beyond the everyday cottons and blends, specialty battings can take your nine-patch quilt from great to absolutely perfect.
- Wool Batting: Looking for incredible loft and warmth without the weight? Wool is your answer. It has this wonderful, springy resilience that makes your quilting stitches pop right off the fabric. Wool is also naturally moisture-wicking, so it creates a quilt that’s incredibly warm but never feels stuffy.
- Black Batting: Have you ever finished a gorgeous quilt made with dark fabrics, only to see tiny white fibers poking through? That annoying phenomenon is called "bearding." For nine-patch quilts made with deep navies, rich burgundies, or black fabrics, using a black batting (either polyester or an 80/20 blend) is the solution. If any fibers happen to migrate, they’ll be completely invisible.
- Fusible Batting: This stuff is magic. It has a light, heat-activated adhesive on both sides. You just lay out your quilt sandwich and press it with an iron, and it sticks everything together—no pins, no spray! It's a huge time-saver for smaller projects like table runners, placemats, or wall hangings.
To make things a little easier, I’ve put together a quick comparison of some of the most popular options. If you want to dive even deeper, we have a detailed guide that explores more types of quilt batting you might run into.
Hobbs and Pellon Batting Comparison Guide
Choosing between trusted brands like Hobbs and Pellon often comes down to the specific feel and function you want for your quilt. This quick guide breaks down some of their most popular offerings to help you match the right batting to your next nine-patch project.
| Batting Type | Fiber Content | Loft | Best For |
|---|---|---|---|
| Hobbs Tuscany 80/20 | 80% Cotton / 20% Polyester | Low | All-purpose bed quilts, classic drape, hand or machine quilting |
| Pellon Nature's Touch Cotton with Scrim | 100% Cotton | Low | Longarm quilting, modern designs, traditional flat look |
| Hobbs Tuscany Wool | 100% Wool | Medium-High | Show quilts with defined stitches, warm yet lightweight quilts |
| Hobbs Heirloom Black 80/20 | 80% Cotton / 20% Polyester | Low | Quilts made with dark or black fabrics to prevent bearding |
Ultimately, both brands produce high-quality batting that will serve you well. Your choice will simply refine the final look and feel, so don't be afraid to experiment to find your personal favorite!
The Smartest Way to Buy Batting: By the Roll
If you know you'll be making more than a couple of quilts a year, buying batting by the roll is one of the smartest quilting investments you can make. The cost per yard drops significantly, and you get the added bonus of having a consistent, high-quality foundation for all your projects.
Batting rolls come in standard widths designed to fit common bed sizes, which means no more wrestling with piecing smaller batting packages together. The most common widths are:
- 96" (Queen): This is the workhorse size, perfect for most bed quilts you'll make.
- 108" (King): Gives you plenty of room for standard king-sized quilts.
- 120" (Extra-King): Ideal for those oversized quilts or for giving a longarmer plenty of extra to work with.
Having a roll ready to go in your sewing room means you can start a new project whenever inspiration strikes, without that last-minute run to the store. And for longarm studios or anyone quilting for others, buying by the roll is an absolute must. It streamlines your workflow, helps manage costs, and ensures every client's quilt gets the exact same quality treatment. You just unroll, cut what you need, and get quilting.
Bringing Your Quilt to Life: Finishing & Quilting

You’ve pieced a stunning quilt top and picked the perfect batting. Now for the magic. The final stage—quilting and finishing—is where you breathe life into your project, transforming flat layers of fabric into a cozy, textured heirloom. These are the techniques that give your nine patch a truly polished, professional look that will last for generations.
Finishing a quilt is a tradition in itself, a final act of creativity and care. It’s a practice that saw a massive revival during the Great Depression when quilting became a source of both necessity and community pride. The resourceful Nine Patch was a favorite, and huge events like the 1933 Sears national quilt competition saw an estimated 25,000 quilts entered, showcasing the nation’s incredible skill.
Depression-era quilts are famous for their detailed patterns and the explosion of pastel colors that became available after 1925—a beautiful mix of thrift and optimism. You can dive deeper into this fascinating period and its influence on designs like the Nine Patch at the Quilt Index.
Securing Your Quilt Sandwich: All About Basting
Before you make a single quilting stitch, you have to baste your quilt sandwich (the top, batting, and backing). This is the critical step that keeps the layers from shifting and puckering while you quilt. There are a few ways to tackle this, and each has its pros and cons.
- Pin Basting: This is the old-school, tried-and-true method using curved safety pins. It’s affordable and easy to adjust as you go, but I’ll admit it can be a little tedious on a big quilt. As a rule of thumb, I place a pin every 4-6 inches—about a hand's width apart—across the entire surface.
- Spray Basting: For a faster, pin-free process, temporary adhesive spray is a game-changer. You work in sections, spraying a light, even coat on the batting to stick it to the backing and then to the quilt top. It saves a ton of time, but definitely do this in a well-ventilated space.
- Longarm Loading: If you're sending your quilt to a longarmer (or have your own!), the process is totally different. The backing and top are loaded onto separate rollers, with the batting sandwiched in between. This keeps everything perfectly taut and smooth, which is absolutely essential for professional machine quilting.
The whole point of basting is to create a stable, secure foundation for your quilting. A well-basted quilt is a dream to work on. A poorly basted one? That’s how you get frustrating puckers and tucks on the back. Take your time here—it’s always worth it.
Choosing Your Quilting Design
The quilting stitches are what give your quilt its final texture and personality. With a nine patch, the possibilities are practically endless, from simple and clean to wonderfully intricate.
A great place to start is with stitch-in-the-ditch quilting. This is exactly what it sounds like: you stitch right in the "ditch" created by your seam lines. It’s a subtle technique that adds stability without stealing the spotlight from your beautiful piecing, letting your fabrics and patchwork shine.
For a little more texture, try some straight-line quilting. You could echo your seam lines a quarter-inch away or quilt a simple grid across the entire quilt. This adds a clean, modern vibe that works so well with the geometric nature of a nine patch.
And if you’re feeling adventurous, free-motion quilting is where you can really let your creativity fly. You can stipple the background to make your nine-patch blocks pop or quilt organic designs like swirls, leaves, or feathers. This is your chance to add a layer of pure artistry to your finished quilt.
The Perfect Finish: Machine Binding
Binding is the frame for your masterpiece. A crisp, clean binding gives your quilt that professional edge and protects its raw edges from wear and tear. While hand binding is lovely, machine binding is fast, incredibly durable, and much easier to master than you might think.
The secret to a beautiful binding is the perfect mitered corner. As you approach a corner, stop stitching a quarter-inch from the edge. Then, fold the binding strip straight up to create a 45-degree angle, and fold it back down along the next side of the quilt. This simple maneuver creates that perfect, sharp corner every single time.
Finally, don't forget the most personal touch: a quilt label. A simple label with your name, the date, and maybe the city where you made it transforms your quilt from a beautiful object into a piece of your family's history. It’s a small gift to the future generations who will one day treasure your work.
Let's Tackle Some Common Nine Patch Questions
No matter how many quilts you've made, a few questions always seem to pop up, even with a block as straightforward as the nine patch. Whether you're stuck on a particular step or just planning ahead, getting a clear answer from someone who's been there can save you a ton of frustration.
Let's walk through a few of the most common things I get asked about when it comes to making these classic quilts.
"How Do I Get All My Blocks to Be the Same Size?"
This is probably the number one struggle for quilters, and it's the secret to a quilt top that lays flat and goes together like a dream. It really boils down to three things.
First, your cutting has to be spot-on. A sharp rotary blade, a good mat, and a ruler you trust are your best friends here. Don't even start if your tools aren't up to the job.
Second, you absolutely must nail your 1/4-inch seam allowance. If you have a quarter-inch foot for your machine, use it. If not, find a guide or mark your machine so you can sew that perfect seam every single time. And finally, you have to square up your blocks. Once a nine patch is assembled, use a square ruler to trim it down to the exact unfinished size. This cleans up any wobbly bits and ensures every block is perfectly identical.
I know, squaring up feels like a chore. But trust me, it’s the single best thing you can do to make your final quilt assembly a joyful experience instead of a wrestling match.
"Can I Mix and Match Different Kinds of Fabric?"
Go for it! Mixing fabrics is a fantastic way to add texture and personality to a nine patch. Think of classic quilting cotton paired with soft, cozy flannel or even a bit of rustic linen. The key is knowing how to handle them together.
Here’s the deal: different fabrics behave differently. They shrink and stretch at their own rates. So, the golden rule is to pre-wash everything before you cut, especially when you're combining fabric types. Also, remember that a thicker fabric like flannel adds more bulk to your seams. I almost always press my seams open when working with heavier materials to keep the blocks from getting too lumpy.
"How Much Batting Do I Actually Need?"
Figuring out your batting needs is way easier than it sounds. Once your quilt top is finished, measure its final length and width. You’ll want your batting and your backing fabric to be bigger than your quilt top on all four sides.
I always recommend adding at least 4 inches to each side. For example, if your quilt top finishes at 60" x 80", you'll want a piece of batting that’s at least 68" x 88". That extra room is crucial—it accounts for any shifting while you quilt and gives you (or your longarmer) a nice margin to work with. This is exactly why buying batting on a roll is so convenient; you just cut what you need without having to piece smaller packages together.
At Quilt Batting, we know that what's inside your quilt matters just as much as the piecing on top. Check out our selection of high-quality Hobbs and Pellon batting, available by the roll, to give your next nine patch the beautiful finish it deserves.