

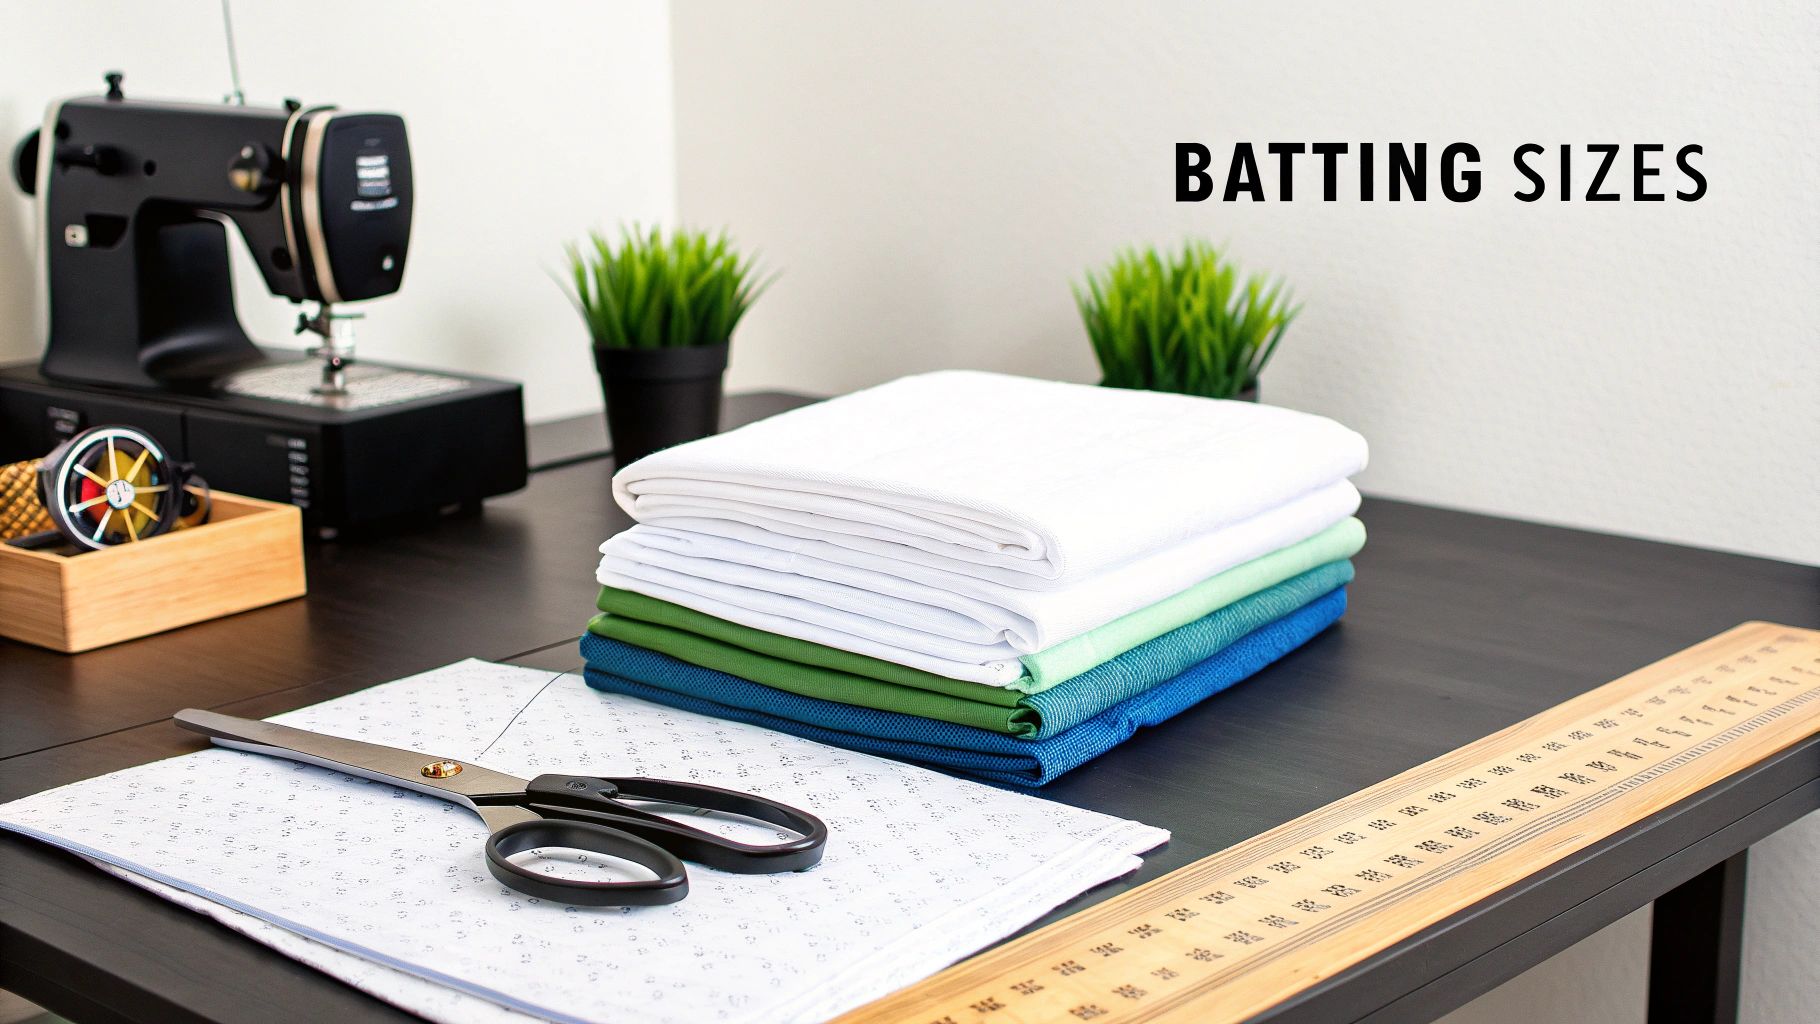
Picking the right quilt batting size can make or break your project. Get it right, and you're set up for success; get it wrong, and you're in for a world of frustration. Think of your batting as the frame for your quilt top—it needs to be bigger than the art it's holding.
Understanding Standard Quilt Batting Sizes
Here’s the golden rule every quilter lives by: your batting must always be larger than your quilt top. This isn't just a suggestion; it’s the essential safety net that prevents disaster. This extra material gives you a buffer to handle fabric shifting during quilting, potential shrinkage in the wash, and the final trimming process.
Without this extra margin, you risk the edges of your quilt top creeping past the batting. The result? Limp, flat borders that just don't have that lovely, pillowy finish we all strive for. This is especially important because of "quilt draw," which is the slight pulling-in effect that happens as you stitch all those layers together. Thankfully, pre-cut batting packages are designed specifically to account for this.
The Logic Behind Pre-Cut Sizes
You've probably seen them at the fabric store—batting neatly folded into packages labeled "Crib," "Queen," or "King." Manufacturers create these standard sizes to align with common quilt patterns and bed dimensions, making life much easier for us. A Twin-sized batting, for example, usually measures around 72 by 90 inches, which gives you plenty of room to work with for a standard twin mattress quilt. This standardization is a global practice, as you can see from trends in the global quilt batting industry on verifiedmarketreports.com.
To help you quickly find what you need, I've put together a chart that matches standard quilt types with their ideal pre-cut batting sizes.
Pro Tip: As a rule of thumb, always buy batting that is at least 4 to 8 inches larger than your finished quilt top on all sides. This gives you the wiggle room you need for quilting, squaring up, and getting that perfect, professional-looking edge.
This table is your new best friend for choosing the right pre-cut batting before you even think about threading your needle.
Quick Reference Chart for Standard Quilt Batting Sizes
This chart is a great starting point, matching common quilt projects with the packaged batting sizes you'll find in most stores.
| Quilt Size Name | Typical Quilt Top Dimensions (Inches) | Recommended Batting Size (Inches) |
|---|---|---|
| Baby / Crib | 36" x 52" | 45" x 60" |
| Lap / Throw | 50" x 65" | 60" x 60" or 72" x 90" |
| Twin | 70" x 90" | 72" x 90" |
| Full / Double | 80" x 90" | 81" x 96" |
| Queen | 90" x 108" | 90" x 108" or 96" x 108" |
| King | 110" x 108" | 120" x 120" |
Keep this guide handy, and you'll always have the right foundation for a beautifully finished quilt.
Calculating Your Needs from Batting Rolls
While those pre-cut batting packages are undeniably convenient, serious quilters and anyone tackling a big project quickly learn that buying batting from a roll is the way to go. It’s smarter, more economical, and gives you complete control. Think of it just like buying fabric off the bolt—you get exactly the length you need, which means less waste for your scrap bin and more money in your pocket.
Batting rolls come in a few standard widths, and knowing which one to grab is half the battle. You’ll most often see 48", 96", and 120" widths. The 48" roll is my go-to for smaller projects like baby quilts or table runners. The 96" width is a real workhorse, perfect for most twin and full-sized quilts. But for those gorgeous queen and king-sized quilts, the 120" roll is your best friend—it saves you from the headache of having to piece batting together.

The Simple Formula for Batting Yardage
Figuring out how much batting to buy isn't complicated, I promise. The main goal is to end up with a piece of batting that’s bigger than your quilt top on all four sides. This extra bit, or "overage," gives you a margin of error for shifting during quilting and for trimming everything up perfectly at the end. I always recommend a safety net of 4 inches on each side, which means you need to add a total of 8 inches to your quilt top's length and width.
Here’s how I break it down every time:
- Add Your Overage: Take your quilt top’s length and add 8 inches. Do the same for the width.
- Pick Your Roll Width: Your chosen roll width must be wider than your quilt top's width plus that 8-inch overage. If your quilt is 90" wide, a 96" roll won't cut it—you'll need the next size up.
- Convert to Yards: Take the final length you need (quilt length + 8 inches) and divide it by 36. That's it!
The Formula: (Your Quilt's Length in Inches + 8 Inches) ÷ 36 = Total Yards Needed
Let's walk through a real-world example so you can see it in action.
Calculating for a Queen Size Quilt
Let's say you've just finished a stunning queen-size quilt top that measures 92 inches wide by 100 inches long. It's time to get your batting.
First, let's figure out the width. Your quilt top is 92" wide, and you need that 8" overage, bringing the total width needed to 100" (92" + 8"). This means a 96" roll is too narrow. You'll need to buy from a 120-inch wide roll to have enough coverage.
Next, we calculate the length. Your quilt is 100" long. Add the 8" overage, and you get a total length of 108 inches.
Finally, we convert that length into yards. Since there are 36 inches in a yard, the math is simple: 108 inches ÷ 36 inches/yard = 3 yards.
So, for your beautiful 92" x 100" quilt, you'll go to the shop and ask for 3 yards of 120-inch wide batting. This gives you plenty of room to work, ensuring a perfect, stress-free finish. For more pro tips on buying off the bolt, check out our guide on quilt batting by the yard.
How to Prepare Your Batting for a Flawless Finish
Getting the right size batting is just the start. The real magic—the thing that separates a good quilt from a great one—is in the prep work. Think of it as the quilter's "mise en place." A little bit of careful preparation up front saves you a world of headaches later and sets the stage for a beautifully smooth, professional-looking quilt.
First things first, you need to understand why we always insist on adding extra batting. It's a non-negotiable rule in my book: give yourself a generous safety margin of at least 4 to 8 inches of batting on all four sides of your quilt top. This overage is your insurance policy against a couple of common quilting gremlins.
Why That Extra Margin is So Critical
The first culprit is something we call “quilt draw.” As you quilt, the tension from the stitches naturally pulls the three layers of your quilt sandwich inward. It's subtle, but it happens with every pass of the needle. Without that extra batting, your quilt top can easily end up wider than your batting, leaving you with sad, flat borders that have nothing to puff up into. The extra material gives everything room to shift and settle without wrecking your design.
Then there's the shrinkage factor. Most of us love working with natural fibers, and they have a tendency to shrink.
Batting made from materials like 100% cotton or wool will almost certainly shrink a little bit in that first wash. Your extra margin ensures the quilt keeps its intended shape and size, giving you that classic, crinkly, well-loved texture without any nasty surprises.
When you prepare your batting correctly, these little quirks of the quilting process start working for you instead of against you.
Handling and Piecing Batting Like a Pro
Once you've cut your batting to its oversized dimensions, it's all about handling it with care. Big pieces of batting can get stretched out of shape in a heartbeat if you're not careful. Always support its weight when you move it around, and lay it out on the biggest, flattest surface you can find for cutting. A long ruler and a sharp rotary cutter are your best friends for getting those edges perfectly straight before you even think about basting.
And once you’ve squared it up, learning how to baste a quilt properly is the crucial next step to lock those layers in place.
By the way, never throw away your scraps! You can easily piece smaller batting remnants together to use in other projects. It's a fantastic way to save money and reduce waste.
- Trim Your Edges: First, cut the edges of two batting scraps so they are perfectly straight and clean.
- Butt Them Together: Lay the two straight edges right next to each other. You want them to kiss, not overlap. Overlapping creates a lumpy ridge that will absolutely show through in your finished quilt.
- Join with a Zigzag Stitch: Use a wide zigzag stitch on your sewing machine to sew the two pieces together. This creates a strong seam that has enough flex to be practically invisible once it's all quilted.
This simple trick is my go-to for making batting for table runners, wall hangings, and baby quilts from pieces that would have otherwise ended up in the bin.
As more quilters use longarm machines, the industry has responded. There's a huge demand for specialty sizes, particularly battings that come in widths of 108 inches or more. In fact, this professional-grade segment has become a major part of the quilting world. If you're curious about these trends, you can read more about the market shifts in the quilting industry on precisionbusinessinsights.com.
A Comprehensive Quilt Batting Size Chart
Figuring out the right batting size can feel like a guessing game, but it doesn't have to be. To make your life easier, I've put together this detailed chart to help you match your quilt top dimensions with the perfect batting size. Think of it as your go-to quilter’s cheat sheet for buying with confidence.
Whether you're grabbing a pre-cut package off the shelf or having a piece cut from a roll, this guide will help you get exactly what you need. I've even included the most efficient roll widths to look for when buying by the yard—a little insider tip that makes a huge difference in reducing waste and saving money. The "Common Uses & Tips" column is packed with practical advice you can put to use on your very next project.
Complete Guide to Quilt and Batting Dimensions
Before we dive into the numbers, let’s quickly visualize the process. You start with your batting, add that crucial extra margin all the way around, and then you're ready to start quilting. It's a simple but vital workflow.

This little diagram is a great reminder of why starting with a batting that's larger than your quilt top is so important. That extra buffer is non-negotiable! If you want to get into the nitty-gritty of specific brand recommendations, you can also download this free Hobbs Batting recommendation chart for some expert-level specs.
Now, let's get to the chart you've been waiting for. Here’s everything you need to know, all in one place.
| Quilt Project Size | Average Quilt Top (Inches) | Recommended Pre-Cut Batting (Inches) | Ideal Roll Width (Inches) | Common Uses & Tips |
|---|---|---|---|---|
| Crib | 36" x 52" | 45" x 60" | 48" or 96" | Perfect for baby quilts and playmats. |
| Lap / Throw | 50" x 65" | 60" x 60" | 96" | An excellent size for charity quilts and couch throws. |
| Twin | 70" x 90" | 72" x 90" | 96" | Standard for single beds and dorm room quilts. |
| Full / Double | 80" x 90" | 81" x 96" | 96" | Ensure you have enough overhang for a double mattress. |
| Queen | 90" x 108" | 96" x 108" | 120" | A 120-inch roll is ideal to avoid piecing seams. |
| King | 110" x 108" | 120" x 120" | 120" | The 120-inch width provides ample margin for quilting. |
| California King | 104" x 112" | 120" x 120" | 120" | Specifically for longer, narrower California King beds. |
Keep this chart handy—bookmark it, print it, whatever you need to do! It's one of those resources you'll find yourself coming back to again and again as you plan out your beautiful quilts.
Batting Insights for Longarmers and Retailers
When you’re quilting for a living, whether as a longarmer or a shop owner, your approach to buying batting changes completely. It’s no longer about a single quilt; it’s about your workflow, your bottom line, and keeping your customers happy. Your needs are fundamentally different from a hobbyist's, and that calls for a smarter, more strategic way of thinking about inventory.
For longarmers, the name of the game is efficiency. You live in a world of wide-open spaces on that quilting frame, and your biggest time-suck is often anything that gets in the way of a smooth, continuous quilt pass. That’s why piecing batting seams isn't just an inconvenience—it's a workflow killer.
Optimizing for Longarm Quilting Efficiency
The undisputed champion in a professional longarm studio is the 120-inch wide batting roll. This isn't just a luxury; it's a foundational tool for your business. Having that generous width means you can handle virtually any quilt that comes through your door—from massive king-size beauties to custom wall hangings—without ever having to stop and piece batting together.
By eliminating seams, you’re not just saving time. You're ensuring a flawless, consistent surface for your quilting, which means better results and clients who will sing your praises.
Plus, buying by the full roll or bolt just makes financial sense. The cost per yard plummets when you buy in bulk, which directly pads your profit margin on every single job. For any longarmer working with a steady stream of quilts, this isn't just a good idea; it's a critical business practice.
Key Takeaway: For a longarm studio, a full roll of 120-inch batting is the single best investment you can make. It streamlines your process, improves final quality, and lowers your cost of goods sold.
Of course, you have to protect that investment. Always store your rolls horizontally on a sturdy rack, keeping them suspended off the floor. This simple step prevents gravity from creating nasty creases and flat spots that are a nightmare to quilt out, making sure your batting is always pristine and ready for the frame.
Smart Inventory for Retail Success
As a fabric shop owner, your mission is to be the go-to expert for every quilter who walks in. This means stocking a smart, curated inventory that offers both convenience and versatility. You'll have everyone from a beginner grabbing their first pre-cut package to a seasoned artist looking for a specific cut of batting.
To cater to everyone, you need a thoughtful mix. Keep popular pre-cut quilt batting sizes like Queen and King on hand, but also offer batting on the roll. Having a couple of key widths available by the yard, like 96-inch and 120-inch options, will cover the vast majority of projects your customers are dreaming up. For a closer look at the different types, our guide on cotton batting rolls is a great resource.
You can also set your shop apart by offering services that make your customers' lives easier. An in-store cutting service is a huge value-add, saving people time and hassle. Better yet, consider hosting small workshops or creating simple handouts that teach quilters how to calculate their own yardage. It builds incredible loyalty and positions your shop as an educational hub, turning one-time shoppers into customers for life.
Your Quilt Batting Questions, Answered
Even the most seasoned quilters have questions about batting. It’s one of those things where a little bit of know-how can save you a whole lot of headaches down the road. Let's dig into some of the most common questions I hear from fellow quilters.
What Happens If My Batting Is Too Small?
Cutting your batting too small is one of those mistakes you only make once. Trust me. If your batting isn't larger than your quilt top—with that crucial 4 to 8-inch safety margin—you're headed for frustration.
As you quilt, the layers naturally shift and the stitching pulls everything inward, making it shrink up a bit. Without that extra buffer, the edges of your quilt top can creep right off the batting. You end up with sad, flat borders that have none of that cozy, puffy definition we all love. It also robs you of the extra material needed to square up the quilt for binding, which is a non-negotiable step for a clean, professional finish.
While you can piece batting scraps together in a pinch, it's always, always better to start with a single, correctly-sized piece.
Can I Use Leftover Batting Scraps?
Absolutely! Don't you dare throw those leftover pieces away. Piecing batting scraps is a thrifty and smart practice for any quilter. It’s a fantastic way to minimize waste and whip up batting for smaller projects without buying new.
Here’s the right way to join them:
- Trim the edges of your scraps so they're perfectly straight and clean. A rotary cutter and ruler are your best friends here.
- Butt the edges together side-by-side. Make sure they don't overlap, as that will create a lumpy, noticeable ridge in your finished quilt.
- Use a wide zigzag stitch on your sewing machine to sew them together.
This simple technique creates a surprisingly strong and flexible seam that completely disappears once it's quilted. It’s perfect for creating custom batting for table runners, wall hangings, and baby quilts.
How Much Extra Batting Do I Need For A Longarm Quilter?
Sending a quilt top to a longarmer is a game-changer, but you have to prep it correctly. They need a much bigger safety margin than you would for quilting on your home machine because of how the quilt is loaded onto the rollers of their frame.
The rule of thumb is to provide batting and backing that are at least 4 to 6 inches larger than your quilt top on all four sides. That means your total batting piece should be 8 to 12 inches wider and longer than your pieced top.
So, if your quilt top measures 80" x 90", your batting needs to be at least 88" x 98". My best advice? Always, always check with your specific longarmer first. They all have their own preferences, and a quick conversation upfront guarantees a smooth process and a quilt you’ll be thrilled with.
At Quilt Batting, we're obsessed with providing the premium, consistently sized batting rolls that longarmers and home quilters rely on for flawless results. Explore our selection of Hobbs, Pellon, and other top-quality brands at https://quiltbatting.shop and find the perfect foundation for your next masterpiece.