

Thinking about making your first quilt can feel a little intimidating, but I promise it's simpler than it looks. You don't need years of experience—just the desire to create something beautiful. These quilt lessons for beginners are designed to cut through the confusion and guide you from the fabric store to your final stitch. We're going to turn that feeling of overwhelm into a fun, rewarding process.
You'll be amazed at how quickly you can transform a stack of fabric into a cozy, functional piece of art.
Your Quilting Adventure Awaits
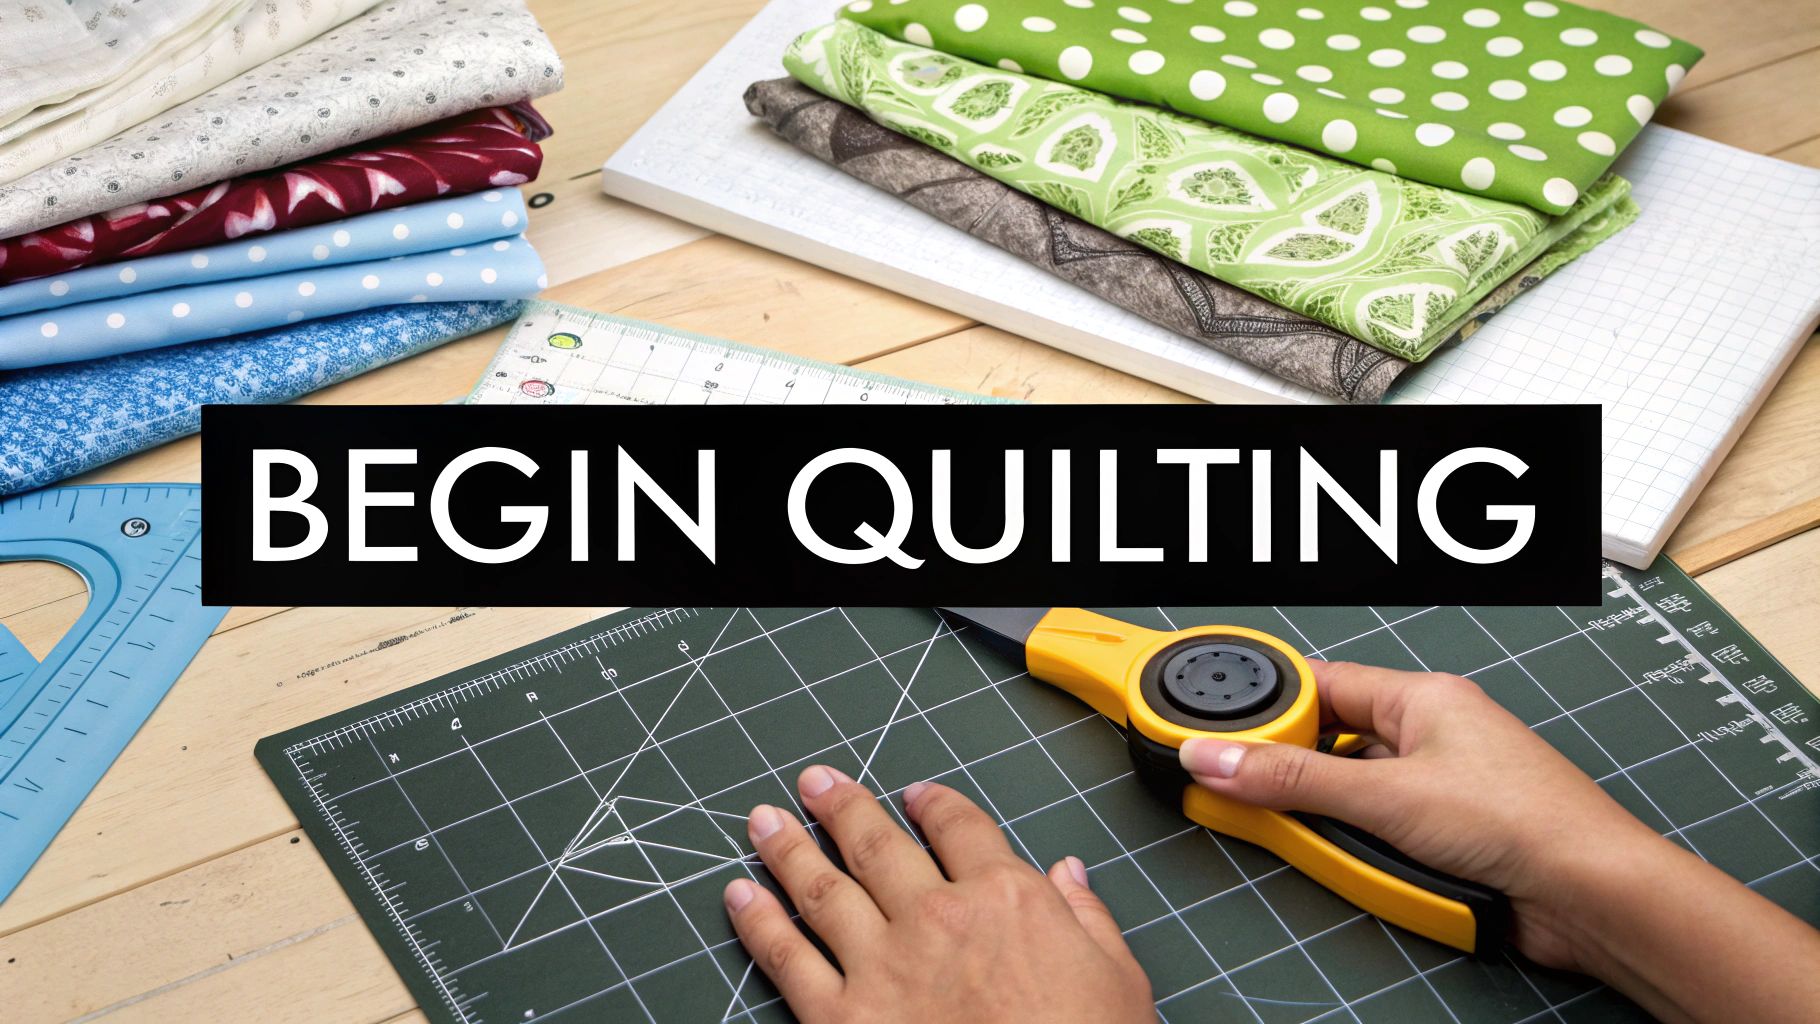
Stepping into the world of quilting is like opening a door to endless color, texture, and creativity. For a lot of people, the thought of making an entire quilt seems like a massive project reserved only for the pros. I'm here to tell you that’s just not true. Quilting is for everyone, and this guide will be your personal roadmap, making the whole journey clear, manageable, and genuinely fun.
We're going to break down every single step, so you feel confident and supported the whole way through. The goal is to build a solid foundation of skills that will carry you through not just this first project, but many more down the road.
Building Your Confidence From the Start
Confidence is everything when you're learning something new. Instead of overwhelming you with complicated patterns, we'll begin with the absolute essentials. You’ll learn the lingo, understand why each tool is important, and see for yourself how simple shapes combine to create stunning designs. Forget about perfection for now. Our goal is progress and enjoying the process.
And you're in good company! The quilting world has seen a huge surge in popularity, with the market revenue hitting an incredible $4.5 billion. What's really exciting for newcomers is that 18% of quilters are new to the craft, a huge jump from last year. This just goes to show how many people are looking for beginner-friendly resources, just like this one. You can read more about these quilting industry trends if you're curious.
This journey is about more than just sewing. It’s about the deep satisfaction of creating something warm and personal with your own two hands. Every stitch tells a story, and yours is just getting started.
What You Will Learn in These Lessons
I’ve structured this guide to build your skills logically so you never feel lost. Think of these quilt lessons for beginners as your complete resource, covering everything you need to know to get started right.
Here's a peek at what's ahead:
- Essential Tools and Materials: We’ll walk through the quilting aisle together, demystifying everything from rotary cutters to choosing the perfect batting.
- Fundamental Techniques: You'll master the core skills: cutting fabric accurately, piecing your blocks precisely, and pressing seams like a pro for that flat, polished finish.
- Step-by-Step Project Guidance: We will build a beautiful, beginner-friendly quilt from the first cut to the final binding stitch.
- Troubleshooting Common Mistakes: Every quilter makes mistakes! I’ll show you how to spot and fix common hiccups, building your problem-solving skills along the way.
By the time you're done, you won't just have a finished quilt. You'll have the skills and the confidence to dive right into your next project. Let's get started.
Gathering Your Essential Quilting Toolkit
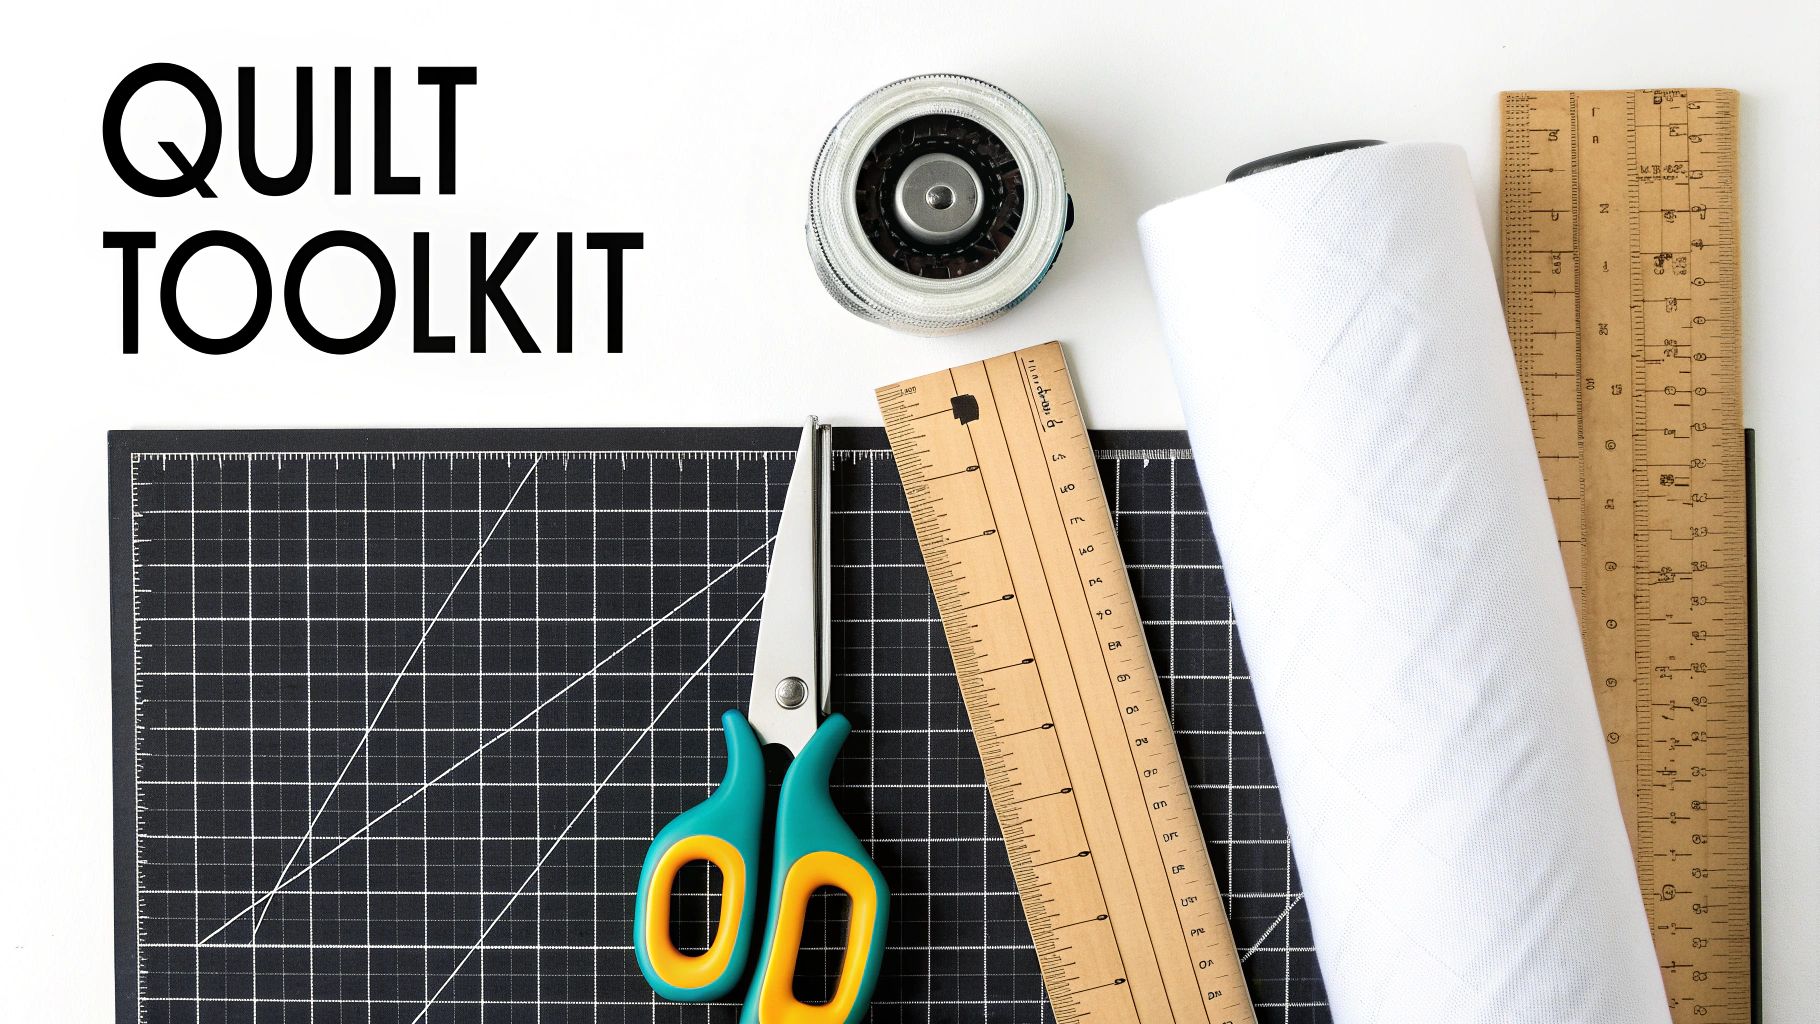
Before you even think about making that first cut, let’s talk about getting your hands on the right tools. Investing in a few quality supplies isn't just about making quilting easier—it’s about setting yourself up for success from the get-go. The right tools prevent the kind of frustration that can kill a new hobby before it even starts.
Think of these items as your creative partners. They are the foundation for every beautiful quilt you’ll eventually make, so it pays to understand the "why" behind each one. When you buy with confidence, you'll work with confidence.
Your Core Cutting and Measuring Trio
If there's one non-negotiable in quilting, it's the trio of a rotary cutter, a self-healing mat, and a clear acrylic ruler. This combination is your ticket to the straight, precise cuts that make a quilt look polished and professional. Ditch the idea of tracing with a pencil and hacking away with scissors—this system is a game-changer.
- Rotary Cutter: This little tool looks like a pizza cutter for fabric, and it slices through multiple layers with stunning accuracy. A 45mm blade is the perfect all-purpose size to start with.
- Self-Healing Cutting Mat: This is what protects your table and keeps your rotary blade sharp. Don't skimp on size! An 18" x 24" mat is a great starting point, giving you enough real estate to work without constantly shifting your fabric.
- Quilting Ruler: A clear ruler is your guide for the rotary cutter. The most versatile one you can own is a 6" x 24" ruler. It's perfect for cutting long strips from your yardage and squaring up finished blocks.
The secret to a beautiful quilt lies in precision from the very first step. An accurate cut leads to an accurate seam, which leads to perfectly matched points and a flat, flawless quilt top.
Getting comfortable with these tools is a cornerstone of any good beginner quilting course. For a deeper dive, check out our complete guide to quilting supplies for beginners.
Demystifying Quilt Batting
Alright, let's talk about the heart of your quilt: the batting. This is the fluffy middle layer that gives a quilt its warmth, weight, and texture. The batting you choose directly impacts how your finished quilt will look, feel, and drape. It’s so much more than just filler; it’s a crucial design element.
With the global quilt market projected to hit $1.15 billion by 2030, there's a huge interest in simple, high-quality materials. This is great for us! It means fantastic options like 100% cotton and wool are easier to find than ever.
Still, choosing the right batting can feel a bit overwhelming with terms like "loft" and "scrim" getting tossed around. Let’s make it simple.
- Loft: This is just a fancy word for thickness. Low-loft batting is thin, giving you a flat, traditional look. High-loft batting is thicker and puffier, creating a quilt that feels more like a comforter.
- Material: Cotton is a breathable classic. Polyester is durable and budget-friendly. Wool offers incredible warmth without the weight. But the true MVP for beginners is often an 80/20 cotton-poly blend. It gives you the best of both worlds: it’s stable, soft, and a dream to quilt.
A little guidance goes a long way when you're standing in front of a wall of batting options. This table breaks down the most common types to help you pick the perfect one for that first project.
Choosing Your First Quilt Batting
| Batting Type | Best For Beginners Because... | Common Loft | Recommended Project |
|---|---|---|---|
| 100% Cotton | It's stable, has a lovely drape, and "clings" to the fabric, making basting easier. It creates that classic, crinkly "antique" look after washing. | Low | Lap quilts, wall hangings, and baby quilts. |
| 80/20 Cotton/Poly Blend | This is the go-to workhorse. It offers cotton's softness with a bit of polyester's stability and loft, all while resisting wrinkles. It's very forgiving. | Low to Medium | Any first project! It's incredibly versatile for bed quilts, throws, and table runners. |
| 100% Polyester | It's lightweight, resists shrinking, and can have a higher loft for a puffier look. It's also often the most budget-friendly choice. | Low to High | Tied quilts, kid's quilts, or any project where you want a bit more puff without the weight. |
Ultimately, the 80/20 blend is a fantastic, can't-go-wrong choice for your first few quilts. It's easy to handle and gives consistently beautiful results.
Making Smart Batting Purchases
Once you get hooked on quilting (and trust me, you will!), buying your batting by the roll is one of the smartest moves you can make. While grabbing a pre-packaged batt is fine for your first project, a roll saves you a ton of money over time and means you're always ready for the next creative spark.
Rolls typically come in standard widths like 96" or 120". This allows you to cut the exact size you need for anything from a small wall hanging to a massive king-sized quilt with very little waste. For anyone serious about this craft, investing in a roll of quality batting is a decision you'll thank yourself for later.
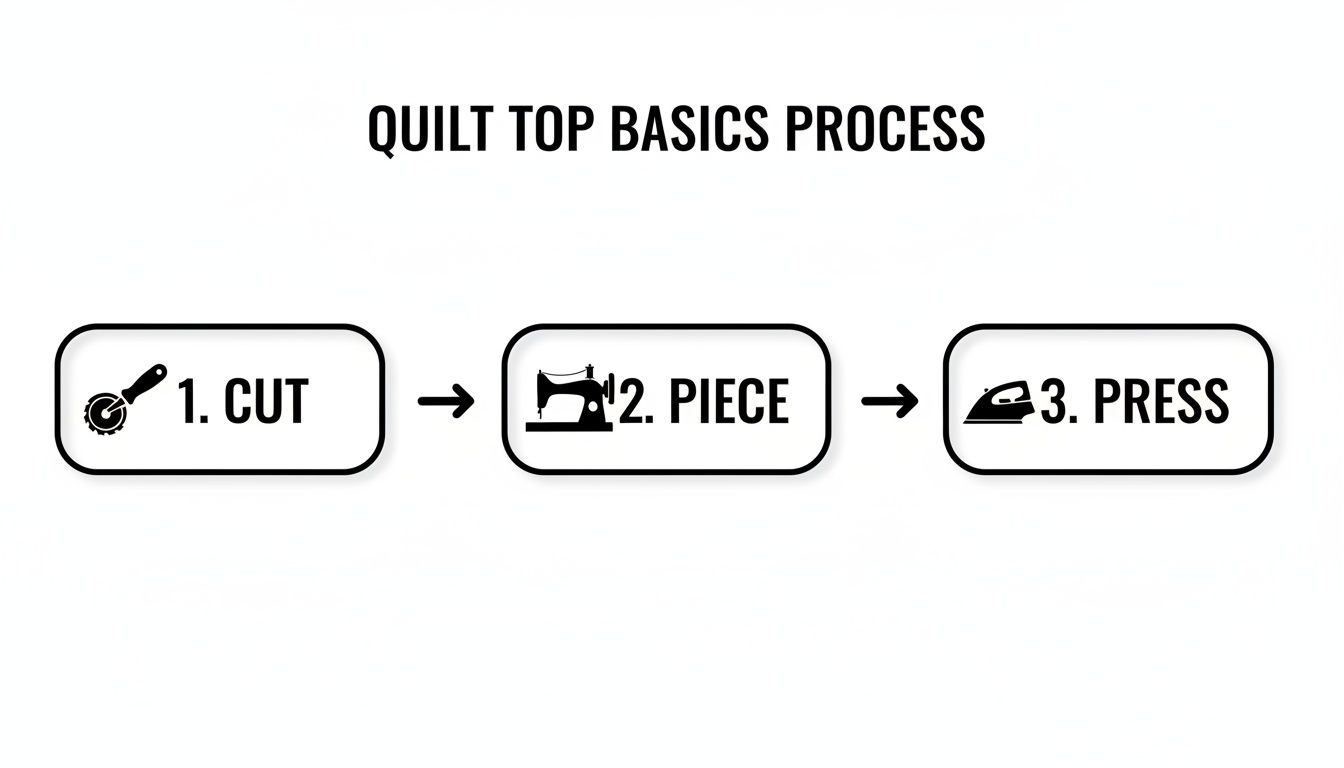
Putting It All Together: Building Your First Quilt Top
Alright, this is where the real fun begins. You've gathered your tools, picked out your fabric, and now it's time to actually build your quilt top. The skills you're about to learn are the absolute bedrock of quilting. Once you get these down, every quilt you make from here on out will be a joy to create.
We're going to start with the single most important step in the entire process: cutting your fabric. From there, we'll move right into piecing your first blocks, and I'll show you the little tricks that make sure your quilt top lies beautifully flat and all your points line up just right.
The Art of the Accurate Cut
Think of cutting your fabric like laying the foundation for a house. If it’s not perfectly square and precise, everything you build on top of it is going to be a little crooked. This is exactly why we use a rotary cutter, mat, and ruler—they give us a level of precision that scissors just can't touch. An error as tiny as 1/16th of an inch might not seem like a big deal, but it can compound across an entire quilt, leading to blocks that don't fit and a top that just won't lie flat.
The secret to a perfect cut is all about control. Always plant your ruler firmly on the fabric. Use the lines on the ruler for measurement, not just the edge of the fabric itself. Spread your fingers wide on the ruler to keep it steady, and make sure they're well away from the edge. When you push the rotary cutter, make it one smooth, even motion away from your body.
A sharp blade is your best friend. Seriously. If you feel yourself pressing hard, if the blade is skipping threads, or if you hear a slight "pulling" sound, it’s time for a new one. A fresh blade will glide through fabric like a hot knife through butter, and it’s a whole lot safer, too.
Piecing Your First Blocks
Now that you have a neat stack of precisely cut fabric, it's time to head to the sewing machine. "Piecing" is simply the quilter's term for sewing these shapes together to form quilt blocks. For our first project, we'll stick with a simple but super versatile design that will teach you all the core skills you need to get going.
A classic Nine-Patch block is a fantastic place to start. It uses simple squares and teaches you how to sew straight, press your seams properly, and nest them together for perfect points. You could also try other beginner-friendly designs, like the ones in this free Fence Rail quilt pattern, which is an amazing project for practicing your straight-line sewing.
The most critical skill you'll learn in piecing is sewing a consistent quarter-inch seam allowance. This is the gold standard for almost every quilting pattern out there.
Here’s how to nail it every time:
- Use a Quarter-Inch Foot: Most sewing machines come with one. It has a little guide on the right side that you can run your fabric edge against—it does the work for you!
- Test and Measure: Before you even touch your project pieces, grab two scraps. Sew them together, press the seam, and get your ruler out. Measure the seam allowance. Is it exactly 1/4 inch? If not, adjust your needle position until it is.
Trust me, taking a few minutes to perfect this now will save you hours of headaches down the road.
Why We Press, Not Iron
This might sound like a tiny, nit-picky detail, but it makes a world of difference. In quilting, we press our seams; we don't iron them. Ironing is that back-and-forth, sliding motion you use on a wrinkled shirt. That same motion will stretch and distort your carefully pieced blocks in a heartbeat. Pressing is a simple, deliberate up-and-down motion.
Here’s the technique:
- Set the Seam: Before you open your two pieces of fabric, place your hot, dry iron right on top of the stitch line for a couple of seconds. This helps the thread meld into the fabric fibers, making for a flatter, more stable seam.
- Press to the Dark Side: Now, gently open the two fabric pieces. On the back, press the seam allowance so it’s laying underneath the darker of the two fabrics. This simple trick prevents the darker color from "shadowing" through to the lighter side.
- Lift and Place: Keep doing this for all your seams. Lift the iron completely off the fabric, move it to the next spot, and place it down again. No dragging!
This small change in how you use your iron is the key to preventing wavy seams and distorted blocks. It’s what keeps your quilt top beautifully flat.
Your First Practice Block: The Nine-Patch
Let's put all this into practice by making a classic Nine-Patch block. It's exactly what it sounds like: nine squares of fabric arranged in a three-by-three grid. This block is a true cornerstone of quilting and the perfect way to practice your cutting, piecing, and pressing.
First, you'll cut nine squares of fabric—let's go with five squares of a light color and four of a dark color. Arrange them in a simple checkerboard pattern.
You'll start by sewing the squares into three separate rows of three. Once your rows are sewn, it's time to press. Here’s a little pro tip that guarantees your points will match up perfectly:
- On the top and bottom rows, press the seams outward, so they point away from the center square.
- On the middle row, press the seams inward, so they point toward the center square.
When you do this, you create opposing seams. As you line up your rows to sew them together, you'll feel the seams "nest" or lock right into place. It’s a wonderfully tactile trick that guarantees your intersecting points will line up flawlessly. Once the rows are joined, give the whole block one final press, and you’re done! You've just created a beautiful, accurate quilt block.
Assembling Your Quilt and Bringing It to Life
You've done the hard work of cutting, piecing, and pressing. That beautiful patchwork sitting in front of you? That's your quilt top, and it's a huge milestone! Now for the really exciting part—transforming that flat piece of fabric into a real, three-dimensional quilt. It’s time to build the "quilt sandwich."
This is simply the process of layering your backing fabric, the fluffy batting, and your finished quilt top. We’ll carefully secure these layers together in a process called basting, making sure nothing shifts or bunches up during the final quilting steps.
Think of it this way: quilting is just a series of manageable steps. You’ve already mastered the first few.
You're now ready for the next exciting stage.
Creating a Perfect Quilt Sandwich
The whole goal here is to get three perfectly smooth layers with absolutely no wrinkles or puckers. You'll need a large, clean patch of floor or a couple of tables pushed together. Critically, your backing fabric and batting need to be at least 4 inches larger on all sides than your quilt top. This extra fabric is your safety net, giving you wiggle room during the quilting process.
Start by laying your backing fabric down, wrong side up, and smooth it out like you mean it. I like to use painter's tape to secure the corners and edges to the floor, pulling it taut without actually stretching the fabric. Next, center your batting on top of the backing and smooth it out. Finally, gently place your quilt top, right side up, centered over the batting.
Take your time with this. A well-made quilt sandwich is the secret to avoiding frustrating puckers on the back of your quilt later on. Smoothness is your number one priority.
The Great Basting Debate: Pin Basting vs. Spray Basting
Once your sandwich is layered, you have to hold it all together for quilting. This is called basting, and there are two main camps for beginners.
Pin Basting
This is the classic method, using special curved safety pins. You’ll start from the center and work your way out, placing a pin every 4-5 inches (about a fist's width apart) through all three layers. The curve in the pins makes them so much easier to open and close without shifting your fabric.
- Pros: It’s cheap, the pins are reusable, and you can make small adjustments as you go.
- Cons: It can be a real workout for your hands and knees, and it takes time.
Spray Basting
This modern approach uses a temporary spray adhesive made just for fabric. You work in sections, folding back half of the quilt top, lightly spraying the batting, and then carefully smoothing the top back into place. You repeat this for all the layers.
- Pros: It’s incredibly fast and gives you a wonderfully smooth, pucker-free surface to work with.
- Cons: You absolutely need a well-ventilated space, and the spray is a recurring cost.
Honestly, many new quilters find spray basting to be a total game-changer. If you're curious, our detailed guide explains exactly how to baste a quilt using adhesive spray for a flawless finish.
Simple Straight-Line Quilting with a Walking Foot
With your quilt basted, you're finally ready to quilt! This is the stitching that goes through all three layers, locking them together for good and adding that lovely texture. The easiest and most effective technique for your first project is straight-line quilting.
You don't need a specialized machine for this. While the global market for quilting machines just hit $850 million, your trusty domestic sewing machine is more than capable. With a growing number of new quilters—about 18% of the community—quilt lessons for beginners are rightly focusing on accessible skills just like this one.
The one tool you can't skip is a walking foot. This special presser foot has its own set of feed dogs on the bottom that grip the top layer of your quilt. It moves the top fabric through the machine at the exact same rate as the bottom layer, which is the magic trick to preventing those dreaded puckers.
A great place to start is by quilting "in the ditch," which just means stitching directly in the seam lines of your pieced blocks. This helps stabilize the whole quilt and conveniently hides your stitches. From there, you can add more lines, maybe echoing the seams a quarter-inch away on either side. A slightly longer stitch length, around 3.0 to 3.5 mm, usually looks best.
Don't be intimidated by the bulk of the quilt. Just roll up the side you're not working on and let it rest in your lap or on a table next to you. Always work from the center of the quilt out to the edges to help push any extra fabric outward. And remember, it doesn’t have to be perfect! Those consistent, straight-ish lines will look absolutely fantastic and give your quilt that wonderful, crinkly texture after its first wash.
Adding the Perfect Finishing Touch with Binding
You’ve made it to the final, thrilling step! The binding is what frames your quilt, giving it a durable, polished edge that truly completes your work. I know a lot of beginners see this as the most intimidating part, but trust me, it’s just another series of simple, manageable steps.
This is the moment all your hard work comes together. Think of the binding as the finishing touch that says, "I made this, and I'm proud of it." We'll tackle this process together, focusing on a clean, machine-stitched finish that looks fantastic and stands up to years of love and use.
Calculating and Preparing Your Binding
First things first, let's figure out how much fabric you'll need. The math is simple, and getting it right now will save you a headache later.
Start by measuring the perimeter of your quilt—just add up the lengths of all four sides. For a 40" x 50" quilt, that's a perimeter of 180 inches (40 + 50 + 40 + 50). Here’s a pro tip: always add an extra 10 to 12 inches to that number. This gives you plenty of wiggle room for joining the ends and turning those corners without any stress. So, for our example quilt, we're aiming for about 192 inches of binding.
The go-to width for binding strips among most quilters is 2.5 inches. It's the sweet spot—wide enough to easily fold over the quilt edge and secure, but not so wide that it looks clunky.
So, how many strips do you need to cut?
- First, measure the width of your fabric (WOF), which is usually around 42 inches once you've trimmed off the selvages.
- Divide your total required length (192 inches) by the usable width of your fabric (42 inches).
- 192 ÷ 42 = 4.57. Since you can't cut a partial strip, you'll always round up. For this project, you'll need to cut 5 strips.
Once your 2.5-inch strips are cut, you'll join them together on a diagonal to create one long, continuous piece. A diagonal seam distributes the bulk, which makes for a much smoother, flatter finish around the edge of your quilt.
Attaching Your Binding to the Quilt
Time to head back to the sewing machine! You'll want to use your walking foot again for this part to make sure all those layers—top, batting, backing, and now binding—feed through evenly.
You're going to sew the raw edge of your binding to the raw edge of the quilt top. Find a spot in the middle of one side to begin, leaving about an 8-inch tail of unsewn binding at the start. Using a quarter-inch seam allowance, stitch along the edge until you're a quarter-inch away from the first corner. Backstitch here and snip your threads.
The real magic of binding happens at the corners. Getting that crisp, 45-degree fold for a mitered corner is what gives your quilt a truly professional look. It might feel a bit fiddly at first, but after a couple of tries, it becomes second nature.
To create that perfect miter, fold the binding strip up and away from the quilt, creating a diagonal line. Then, fold it back down along the next side you're about to sew, making sure the raw edges are all lined up again. Begin sewing right from the top edge of this new side. Repeat this little dance for all four corners.
Finishing the Binding by Machine
After you’ve stitched the binding all the way around the front of your quilt, you'll wrap the folded edge around to the back and secure it. For a quilt that's going to be loved, used, and washed often, stitching it down by machine is a fantastic, durable choice.
Use clips or pins to hold the folded binding in place on the back. To secure it, you'll stitch from the front of the quilt, running your needle "in the ditch"—that's the little seam where the binding meets the quilt top. As you stitch along this line, it cleverly catches the binding on the back, securing it neatly.
While machine finishing is fast and strong, some quilters absolutely love the meditative process and invisible finish of hand sewing. If that sounds like you, you might enjoy learning more about binding a quilt by hand. For a first project, though, a machine-stitched binding is the perfect way to confidently cross the finish line.
Common Questions from New Quilters
Jumping into your first quilt is a blast, but it's totally normal for a few questions to pop up. Don't worry, we've all been there. Think of this as your personal troubleshooting guide for the little hiccups every new quilter faces.
Feeling a little stuck is part of the process. Every single expert quilter started out asking these exact same questions, so you're in good company.
Why Is My Quilt Top Wavy?
Ah, the wavy quilt top. This is almost always a simple fix related to your iron. It's a classic sign that you're "ironing" your pieces instead of "pressing" them. When you iron a dress shirt, you slide the iron back and forth, right? That same motion will stretch and distort your carefully cut fabric blocks.
The secret is to press. It's a simple up-and-down motion. Just place the hot iron on your seam, let it sit for a beat, and lift it straight up before moving to the next spot. Another pro tip: always try to press your seams toward the darker fabric. This little habit keeps those dark colors from peeking through your lighter pieces.
Should I Pre-Wash My Fabric?
This is probably one of the biggest debates in the quilting community! The short answer is yes, you probably should. The main reasons are to pre-shrink the fabric (especially 100% cotton, which loves to shrink) and to rinse out any excess dye that could bleed later on.
It’s an extra step, I know, but think of it as cheap insurance for all your hard work. Pre-washing means you won't have to worry about your finished quilt shrinking weirdly or a rogue red fabric bleeding all over your beautiful whites. Just give it a good press after it's dry to get it perfectly flat and ready for cutting.
What Is the Best Batting for a Beginner?
Walking into the batting aisle can feel overwhelming, but for your first few projects, there's an easy choice. I always recommend an 80/20 cotton-polyester blend for newcomers. It’s incredibly forgiving and gives you the best of both worlds.
With an 80/20 blend, you get the soft, natural drape of cotton, but the polyester gives it stability and helps it resist wrinkles. This blend is a dream to work with and lets you place your quilting lines up to 4 inches apart, so you have plenty of creative freedom without the batting shifting around.
What Is the Biggest Beginner Mistake?
If I had to pick just one, it would be a combination of inaccurate cutting and an inconsistent seam allowance. It happens so easily. A tiny error, maybe just 1/16th of an inch, doesn't seem like a big deal on one piece. But that tiny mistake gets multiplied over and over across dozens or even hundreds of pieces.
That’s what leads to those really frustrating moments when your blocks don't line up, your points are cut off, and your quilt top just won't lie flat.
So, how do you prevent this from happening?
- Keep your rotary blade sharp. A dull blade will snag and pull your fabric, messing up your cuts.
- Measure with your ruler, not your mat. The lines on your acrylic ruler are far more accurate. Use them for every single cut.
- Test your quarter-inch seam. Before you start piecing your quilt, sew two little scraps together and get your ruler out. Is that seam exactly 1/4 inch? If not, adjust and test again.
Taking a few extra minutes to be precise at the beginning is the single best thing you can do for your quilt. These habits are what separate a frustrating project from a fantastic one.
At Quilt Batting, we know that starting with the right materials can make or break your first quilting experience. Explore our selection of beginner-friendly 80/20 blends and other essential supplies to get your project started on the right foot.