

The quilting designs you choose are what truly give a quilt its soul. They’re the final, artistic layer that transforms a patchwork top from a simple cover into a textured story. From the classic elegance of feathers to the clean, modern look of a simple grid, these stitched patterns are where your quilt finds its voice.
Falling in Love with Hand Quilting All Over Again
In our fast-paced world, the slow, rhythmic dance of a needle through fabric feels like a small act of rebellion. There's a profound satisfaction in hand quilting that goes beyond just joining layers together. It’s a chance to pour your own personality, warmth, and patience directly into the fibers of your work. Think of this guide as a conversation with a friend who’s been there, ready to help you choose and execute the perfect designs to make your quilt top sing.
This beautiful craft is a direct link to generations of makers, yet it offers complete freedom for your own creative expression. And it's not just a niche hobby; the global quilt market hit a value of USD 695.84 million in 2024 and is still climbing. A big reason for that growth is the timeless appeal of hand-stitched artistry. It's clear that the unique, soft texture created by a human hand is something people still crave. For a deeper look into these trends, the latest quilting market research offers some fascinating insights.
The real beauty of a hand-quilted piece is in its perfect imperfections. Every single stitch tells a story of time and care, a testament to the hands that made it. That’s the kind of human touch a machine just can’t copy.
Why Bother with Hand Quilting?
Let's be honest, machine quilting is fast. But choosing to hand quilt is about falling in love with the process, not just the finished product. It’s a creative and incredibly calming practice that offers some pretty special rewards.
- A Softer, Cuddlier Quilt: Hand stitches create a gentle puff and a much softer drape compared to the tighter, stiffer finish of machine quilting.
- Total Artistic Freedom: You're in complete control. Every curve, every point, every tiny detail is guided by your hand, allowing for an organic flow that’s tough to replicate with a machine.
- A Meditative Escape: The simple, repetitive motion of the needle and thread is wonderfully relaxing. It's a perfect way to quiet a busy mind and just be present with your creation.
We're going to walk through this together, just like you're sitting in my studio. We’ll cover everything from picking the right motifs—be it flowing feathers or minimalist Sashiko-inspired lines—to the nuts and bolts of marking your fabric and getting that perfect, even stitch. My goal is to pass on the little secrets that turn a nice project into a cherished heirloom, one stitch at a time.
Finding the Perfect Hand Quilting Design
Choosing the right hand quilting design is where your quilt’s unique personality truly comes to life. This isn't just about picking a pretty pattern; it’s about finding a design that works with your patchwork, not against it. You're aiming for a beautiful partnership between the pieced top and the stitched lines.
Think of how elegant, swirling feathers can elevate the classic grace of a wedding ring quilt. On the other hand, clean, straight lines can lend a sharp, modern edge to a bold geometric top. Your quilting design is that final artistic touch that pulls the entire piece together.
Matching Designs to Your Quilt Top
Sometimes, the simplest approach is the most effective. Simple echo quilting—stitching lines that just follow the shape of your pieced blocks—is a fantastic way to make your work pop with texture and definition. It’s perfect for drawing attention to intricate piecing without overwhelming it.
If your quilt top is more minimalist, you might try something different. Sashiko-inspired stitches, with their beautiful geometric simplicity and often-contrasting thread, can create a calming, serene feel on a modern quilt made with solid fabrics. The real key is to step back and think about the overall mood you want to create.
The right design doesn't compete with your quilt top; it supports it. Think of the piecing as the melody and the quilting as the harmony that makes the music complete.
This kind of thoughtful artistry is exactly why quilting continues to capture our hearts. In fact, the global quilt market hit an impressive US$ 5.32 billion in 2024 and is still growing, largely thanks to a renewed appreciation for authentic, handmade goods. We’re seeing a huge resurgence in timeless patterns like clamshells and elaborate florals as people look for meaningful, tactile art for their homes. You can dig deeper into the numbers by reviewing the latest quilt industry analysis.
If you're feeling a bit stuck, this decision tree can be a great starting point for figuring out what style speaks to you.
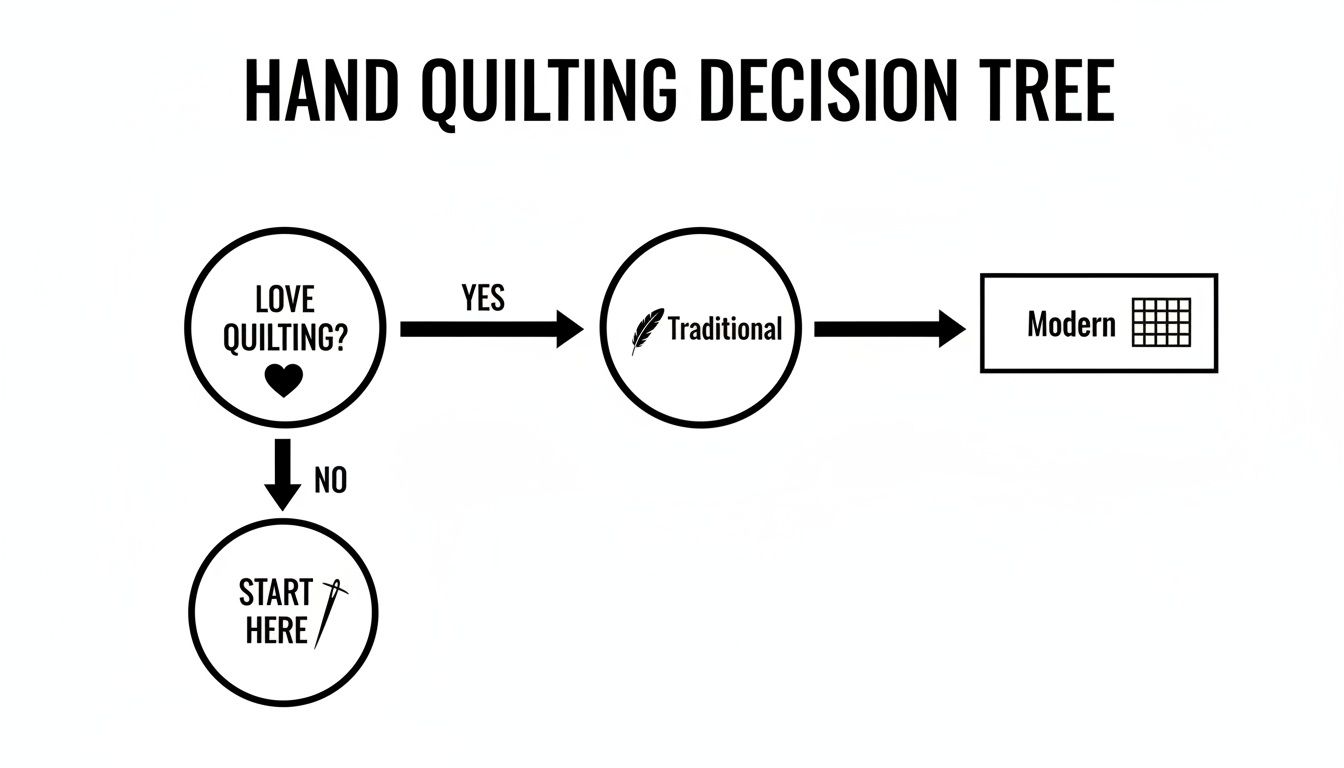
As you can see, there’s a path for every quilter, whether you're drawn to the intricate beauty of traditional designs or the clean impact of modern lines.
To help you visualize how different designs work with different projects, here’s a quick comparison of some popular styles.
Matching Hand Quilting Designs to Your Project
| Design Style | Best For | Skill Level | Visual Effect |
|---|---|---|---|
| Echo/Outline Quilting | Highlighting specific blocks, intricate piecing, or appliqué. | Beginner | Adds definition and texture without competing with the fabric. |
| Grid/Crosshatch | Modern quilts, backgrounds, and filling large negative spaces. | Beginner | Creates a clean, geometric look. Very versatile. |
| Feathers & Wreaths | Traditional quilts, borders, and as a "showstopper" motif. | Intermediate/Advanced | Elegant, classic, and adds a sense of graceful movement. |
| Meander/Stipple | Filling background space for an all-over texture. | Beginner/Intermediate | Casual, organic texture. Great for hiding imperfections. |
| Sashiko-Style | Modern minimalist quilts, often on solid fabrics. | Beginner | Creates a bold, graphic statement, especially with contrast thread. |
Ultimately, the best design is one that feels right for your quilt and that you'll enjoy stitching.
Scaling Motifs for Perfect Proportions
Getting the scale of your design right is one of the most crucial skills you'll develop. It's all about balance. A large, bold design can easily overwhelm a small, delicate block, while a tiny, intricate pattern might get completely lost in a large patch of open space.
Here are a few things I always consider when thinking about scale:
- Block Size: Got a tiny 4-inch block? A single, simplified motif is probably your best bet. But on a 12-inch block, you have plenty of room for more complex patterns or even a cluster of smaller ones.
- Negative Space: Those large areas of solid fabric are a quilter's playground! This is the perfect spot for a show-stopping feather wreath or a dense, all-over meander to add incredible texture.
- Border Width: Remember, the quilt border is the frame for your artwork. The design should be scaled to fit it perfectly. For more inspiration, check out our guide on selecting stunning border quilting patterns.
Let's say you've fallen in love with a complex feather design but you're working on a mini-quilt. Just simplify it! Use a single feather spine with fewer plumes. Or maybe you’re quilting a king-sized bed quilt with a simple grid. To make it more manageable and give it a bolder, modern look, consider making that grid larger—maybe 4-inch squares instead of 1-inch. This kind of adaptability is what makes your hand quilting designs feel intentional and perfectly suited to every single project.
Getting Your Quilt Ready for Hand Stitching
The secret to a beautifully hand-quilted piece isn't just in the stitching itself—it starts long before your needle ever meets the fabric. Honestly, good preparation is what makes the whole process a joy instead of a chore. It's about gathering a few trusted tools and getting your quilt layers perfectly secured so they can become a single, cohesive canvas for your designs.
Before a single quilting stitch is made, your quilt top, batting, and backing need to be layered up and held together. We call this basting, and it's non-negotiable. It's the only way to stop the layers from shifting around, which causes those dreaded puckers and tucks on the back. A securely basted quilt is your foundation for smooth, even stitches. If you need a refresher, we've got a fantastic guide that covers how to baste a quilt from start to finish.
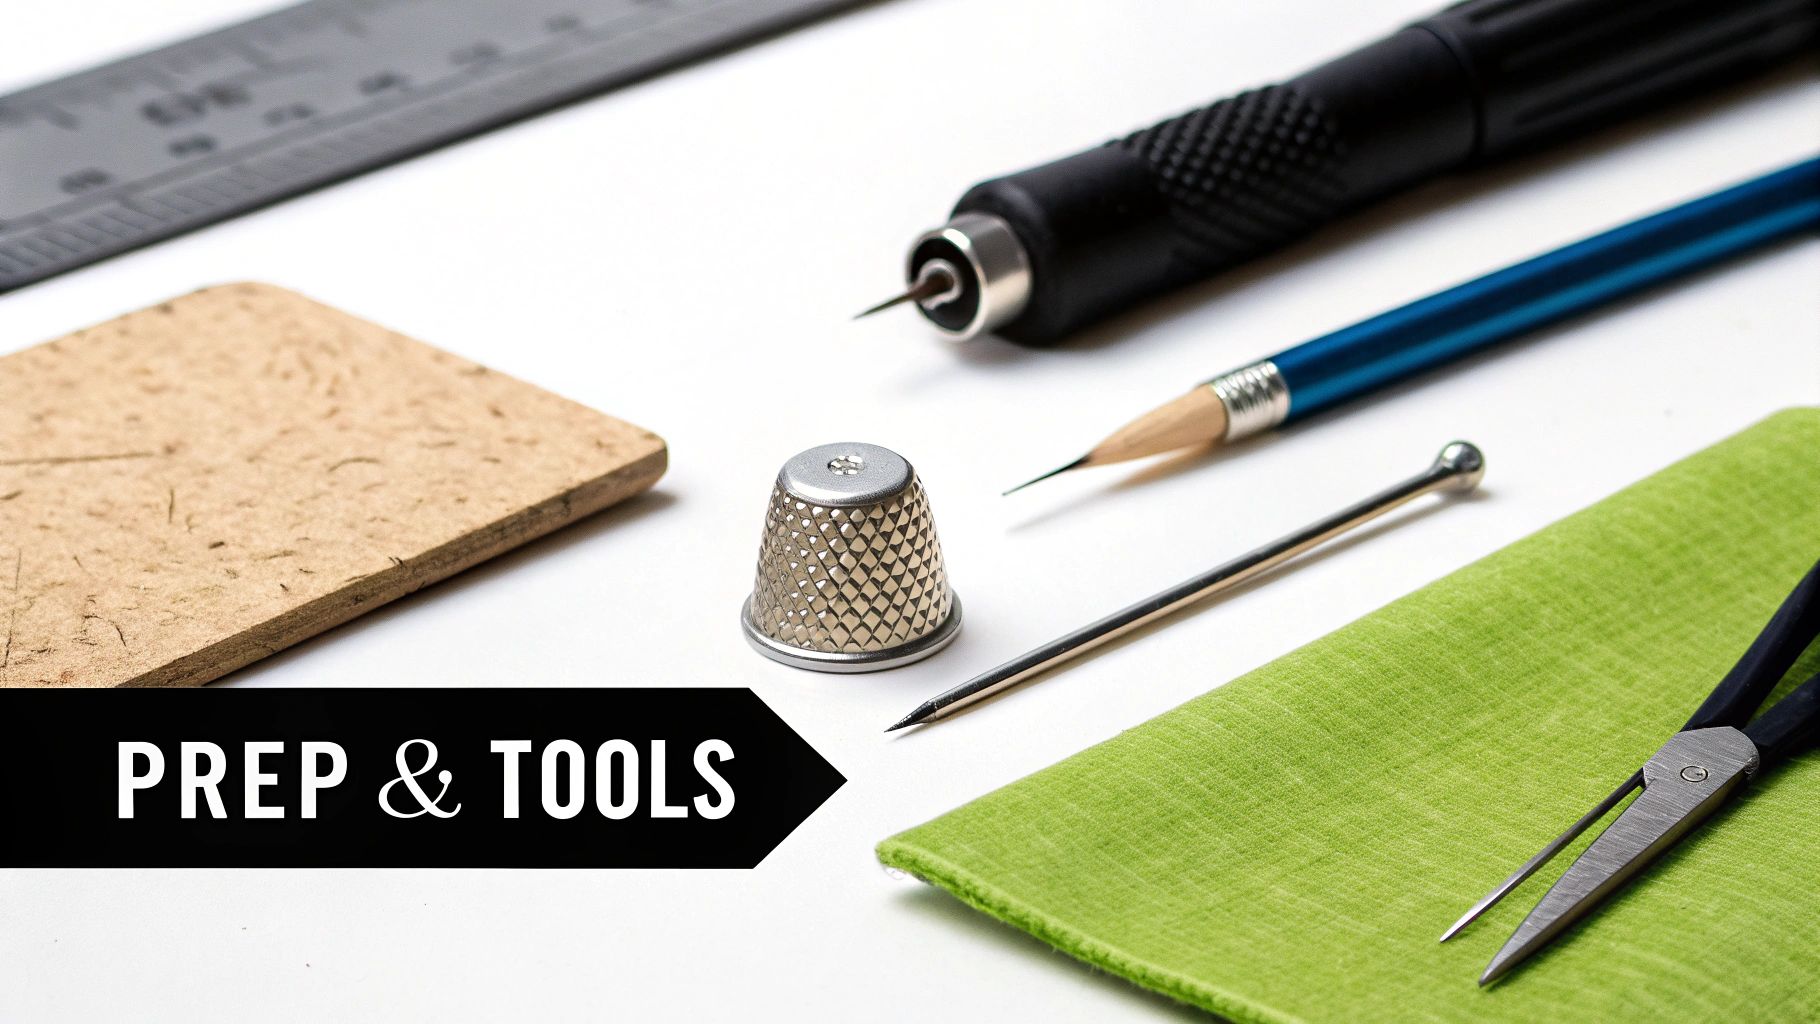
Your Go-To Hand Quilting Toolkit
You don't need every gadget in the shop to get started. In fact, a few simple, high-quality tools are all you really need to execute just about any hand quilting design.
- Needles: Look for needles specifically for hand quilting, often called "betweens." They're shorter and tougher than other needles, which gives you much better control for making those tiny, even stitches we all strive for. A size 8 or 9 is a great starting point—they're a good compromise between strength and a small eye.
- Thimble: I can't stress this enough: use a thimble! It saves your finger from getting sore and gives you the power to push the needle through all three layers without a struggle. Some people love comfortable leather thimbles, while others prefer the solid protection of a metal one. Find what works for you.
- Thread: Grab a thread that's actually made for hand quilting. It usually has a glaze or coating that helps it glide through the fabric and, most importantly, keeps it from tangling into a frustrating knot. A 28-weight cotton or a Perle cotton #8 are both excellent choices that will make your stitches pop.
- Marking Tools: You'll need a way to mark your design onto the fabric. For simple lines, a hera marker is brilliant because it just creates a crease line with no ink. For more complex patterns, you might opt for a water-soluble or air-erasable pen. My one piece of advice? Always test your marking tool on a scrap of your project fabric first.
Getting Your Design onto the Fabric
So you've chosen a beautiful design. Now, how do you get it from the paper to your quilt top? The best method really depends on the pattern's complexity and your own workflow.
For intricate or custom designs, a lightbox is a quilter's best friend. You just pop your printed pattern on the box, lay your quilt top over it, and the light shines right through so you can trace the lines. If you're working with classic, repeating motifs like feathers or cables, pre-made stencils will save you a massive amount of time. A pounce pad and chalk or a simple marking pen is all you need to transfer the design quickly and consistently.
The trick is to make your guide lines just dark enough for you to see, but light enough to disappear easily when you're done. Your stitches should be the star of the show, not the markings underneath.
How Batting and Thread Shape Your Final Look
Never underestimate how much your materials influence the finished quilt. The batting, in particular, plays a huge role in the final texture. A thin, 100% cotton batting will give you that classic, flat, antique look with a beautiful drape. But if you want your stitches to sink in and create a puffy, high-loft texture, a wool batting is the way to go.
Thread choice is just as important. You can use a thread that matches your fabric to create a subtle, textural effect. Or, you can make the thread a key part of the design itself. A bold, contrasting color of perle cotton, for example, can turn a simple running stitch into a powerful graphic statement. These are the little decisions that truly make a hand-quilted project yours.
Getting That Perfect Hand-Quilting Stitch
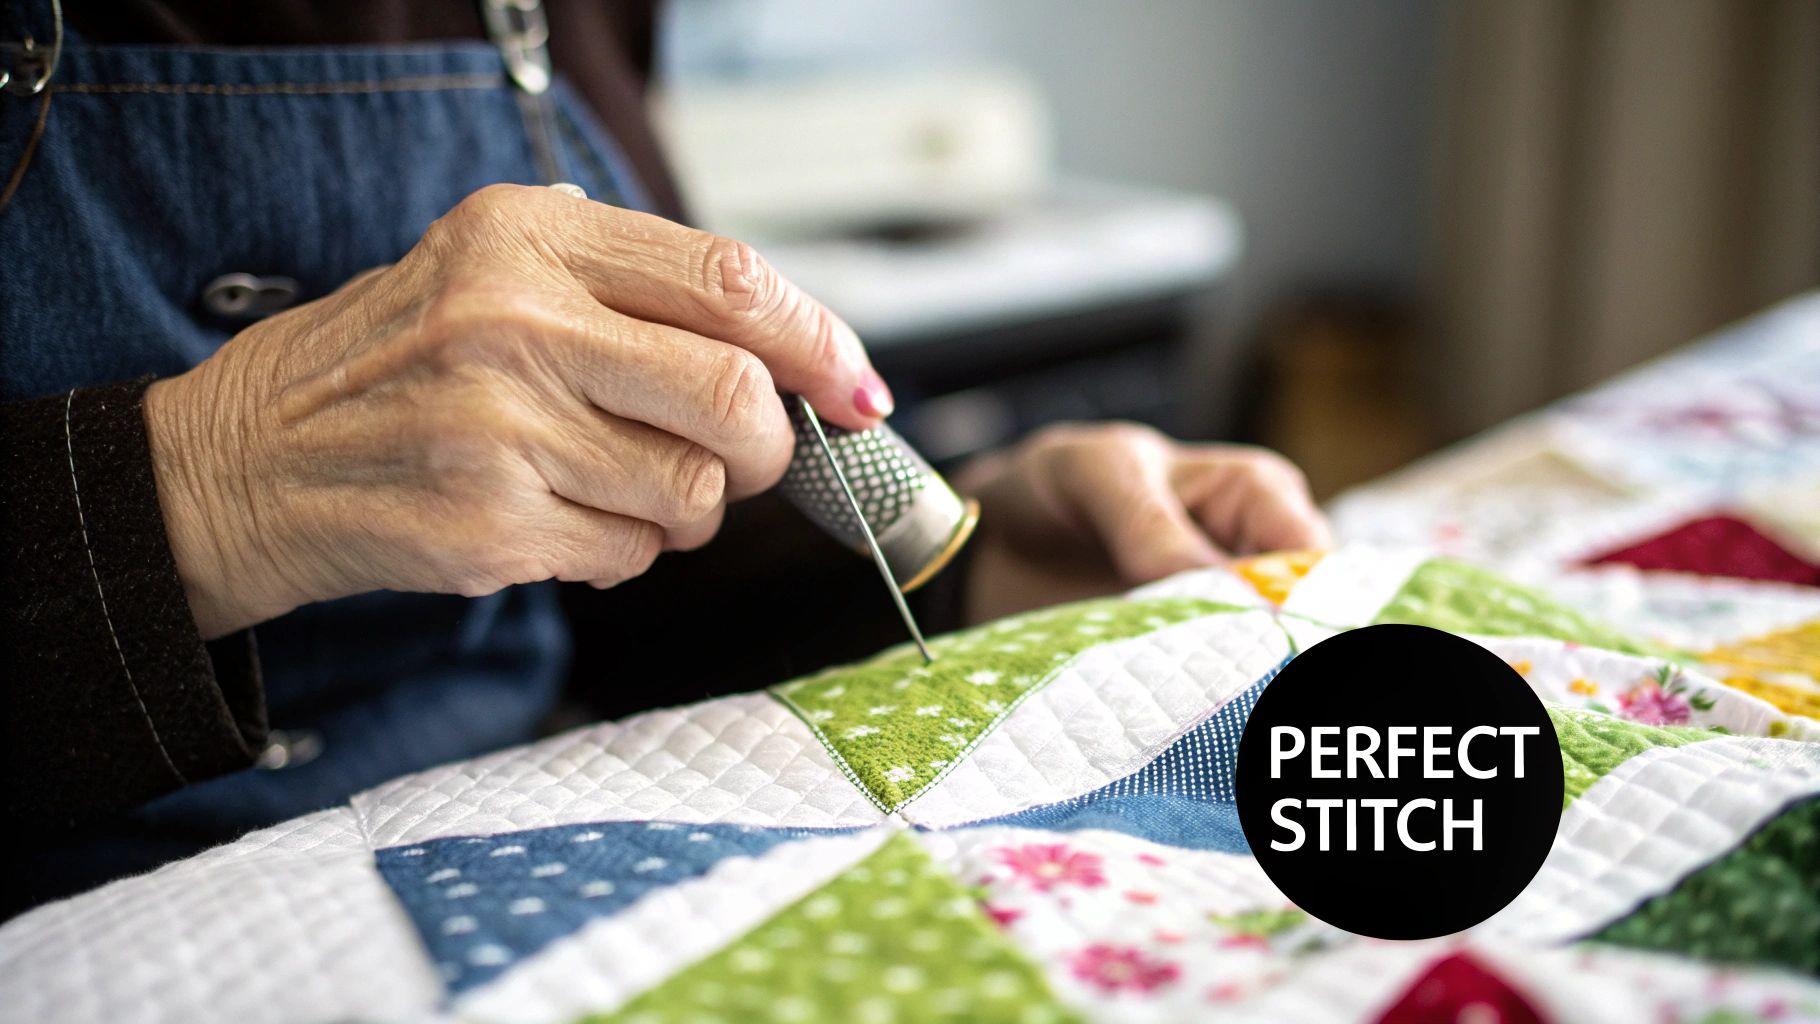
The perfect, even hand-quilting stitch isn't magic; it’s all about finding a rhythm. This is where the quiet artistry of the craft really shines, turning a simple line of thread into the texture that gives your quilt its soul. Let's forget the frustration and break down the simple techniques that lead to strong, beautiful stitches.
The secret to efficient hand quilting lies in the rocking motion. Instead of pushing the needle through one painstaking stitch at a time, you use your thimble-clad finger to gently rock the needle up and down through the fabric. This lets you load several stitches onto the needle before you pull the thread all the way through. It's not just faster—it’s the key to getting that beautifully consistent stitch length.
Starting and Stopping Like a Pro
A clean finish starts with a clean beginning. The quilter’s knot is your best friend here. It’s small enough to hide but strong enough to anchor your thread securely within the quilt's layers.
Here's how to do it:
- Make the Knot: Wrap the thread around the eye of your needle two or three times. Pinch those wraps with your fingers and slide them all the way down to the end of the thread, pulling tight to form a tiny, neat knot.
- Bury the Knot: Insert your needle into the quilt top about an inch away from where you want your first stitch to begin. Guide the needle through the top fabric and batting—but not through the backing—and bring it up right on your marked design line.
- Pop It: Give the thread a firm but gentle tug. You'll hear or feel a tiny "pop" as the knot pulls through the top fabric and buries itself in the batting. It’s now completely hidden and secure.
When you're ready to end a line of stitching, you just reverse the process. Make a small knot close to the fabric, take one last tiny stitch, and pop that knot into the batting before snipping your thread close to the surface. Your starts and stops will be totally invisible.
The most satisfying part of getting this down is watching your thread tails just disappear. It’s a little detail that makes the back of your quilt look nearly as polished as the front, taking your work from a simple project to a true heirloom.
Navigating Common Stitching Hurdles
Even seasoned quilters run into tricky spots. Stitching across a bulky seam where multiple points meet can feel like trying to push a needle through concrete. When you get to these areas, just slow down. You might need to shorten your stitch length and tackle them one at a time instead of loading several onto your needle.
Tension is another big one. If you pull your thread too tight, the fabric will pucker, creating little unwanted hills and valleys across your quilt top. But if your stitches are too loose, they can snag and won't create that beautiful texture you're after. The goal is a "just right" tension, where the stitch sits snugly on the fabric without distorting it at all. This is a foundational skill, and you can find more great advice in these quilting tips for beginners.
The artistry of traditional hand quilting designs is the heart of a massive global industry. In fact, the quilt market was valued at USD 5,289.93 million in 2024 and is expected to keep growing. This really highlights the enduring love for skilled handwork and the iconic patterns that turn simple fabric and thread into treasured art. You can learn more about the market dynamics in this comprehensive quilt market report.
Ultimately, don't forget that your thimble is your greatest ally. It protects your finger and gives you the leverage needed to push through tough spots, helping you maintain control and develop that smooth, comfortable rhythm that makes hand quilting such a relaxing and rewarding process.
Tackling Common Hand Quilting Problems
Every hand quilter, whether you've been at it for a week or a decade, runs into a few snags. It's just part of the process. But don't think of these moments as setbacks; they're your chance to really hone your craft. From stitches that just won't behave to hands that are screaming for a break, let’s walk through some real solutions to the things that drive quilters crazy.
One of the biggest culprits of frustration is puckered fabric. You spend all this time making beautiful stitches, only to have the fabric ripple around them. This almost always boils down to two things: how you basted your quilt and how tight you’re pulling your thread.
If your quilt layers aren't secured tightly enough, they're going to shift while you work. That’s a recipe for puckers. As a rule of thumb, make sure your basting pins or stitches are no more than a hand's width apart over the entire quilt.
Tension is the other piece of the puzzle. It’s tempting to pull each stitch super tight to make sure it’s secure, but that’s what causes the fabric to bunch up. You're aiming for a snug stitch that rests beautifully on the surface, not one that's yanking the fabric into a dimple. It just takes a little practice to find that sweet spot.
Keeping Your Stitches and Hands Happy
Do your stitches look a little… uneven? Maybe some are short and some are long? Welcome to the club. This is completely normal, especially when you're starting out.
The secret isn't obsessing over tiny stitches right away. It's about consistency. A quilting hoop or a frame is your best friend here. It keeps the fabric taut, giving you the control you need to master that gentle rocking motion that produces those lovely, even stitches.
And let's be real, hand quilting can be tough on the body. If hand cramps are cutting your quilting sessions short, take a look at your posture and your grip.
- Loosen Up: Are you strangling that poor needle? Relax your hand and let the needle rest lightly in your fingers.
- Use That Thimble: The thimble is there for a reason! Let it do the heavy lifting of pushing the needle through the layers. This saves your fingers and wrist from a world of hurt.
- Take a Break! Seriously. Set a timer for every 30-45 minutes. Get up, stretch your hands, roll your shoulders, and look at something across the room. Good ergonomics are as crucial as your stitch quality.
I hear people say all the time that some fabrics are impossible to hand quilt. While a high-thread-count backing might put up more of a fight than standard quilting cotton, it's rarely a lost cause. The right sharp needle, a trusty thimble, and good technique can get you through almost anything.
Troubleshooting Your Tools
Sometimes, the problem isn’t you—it’s your gear. If your thread is a tangled, knotty mess, you might not be using a thread specifically designed for hand quilting. Those often have a glaze or coating that helps them glide through fabric without tying themselves in knots.
Your batting choice also makes a huge difference. A dense, needle-punched batting is going to feel like you're stitching through cardboard compared to a lofty wool or a soft cotton blend. To help you figure out what works for you, we’ve put together a whole guide on the best batting for hand quilting.
Finally, what do you do when your carefully marked lines decide they want to become a permanent part of the quilt? This is why you always test your marking tool on a scrap of your project fabric. Some inks react to the heat of an iron and set forever. If you’ve got a stubborn line, a special fabric eraser or a quilt-safe spot cleaner might save the day.
By tackling these little issues as they pop up, you'll find your rhythm and make the whole hand quilting journey that much more rewarding.
Your Hand Quilting Questions Answered
No matter how many quilts you’ve made, new questions always seem to pop up. Let’s tackle some of the most common ones I hear from quilters so you can get back to your project with total confidence.
What Is the Best Thread for Hand Quilting?
You really can't go wrong with a good 100% cotton thread. My personal favorites are a sturdy 28-weight or a beautiful, high-sheen perle cotton that really makes your stitches pop.
But here's the real pro tip: always look for thread specifically labeled for hand quilting. It has a special glaze or coating that makes all the difference. This little detail helps it glide through the layers like a dream and saves you from the headache of constant tangles and knots.
How Do I Keep My Stitches Small and Even?
Let me let you in on a little secret: consistency matters way more than size. Seriously. Focus on getting your stitches even, and the smaller size will naturally follow as you build muscle memory. The best way to do this is to just practice that classic "rocking motion" on a scrap quilt sandwich.
A good thimble is non-negotiable—it gives you the leverage you need to push the needle through without killing your fingers. Also, using a quilting hoop or frame to keep the fabric taut is a massive help. It gives you the control you need to create those beautifully uniform stitches.
Remember, nobody starts out making microscopic stitches. The goal is to find a comfortable rhythm that creates a line of quilting you’re proud of. Your unique stitch is your signature, and it’s what makes your quilt yours.
Can I Combine Machine and Hand Quilting?
Absolutely! I do it all the time. This hybrid approach is a fantastic way to blend efficiency with artistry. A common technique is to "stitch in the ditch" by machine along all your main seam lines. This quickly stabilizes the whole quilt top.
Once the foundation is secure, you can come back in and add all the beautiful, decorative hand quilting as the star of the show. It’s truly the best of both worlds—you get the speed of the machine and the soulful texture of hand stitching.
Do I Really Need a Quilting Hoop or Frame?
While you can technically quilt without one, I wouldn't recommend it. A hoop or frame does one crucial job: it keeps your quilt layers tight and smooth.
That tension is what prevents puckering and helps you achieve beautiful, even stitch tension on both the front and the back. For most projects, a simple lap hoop is perfect. If you find yourself tackling bigger quilts, investing in a floor frame might be a game-changer.
Ready to find the perfect foundation for your next project? At Quilt Batting, we offer premium batting by the roll, from cozy wool to versatile 80/20 blends, to help bring your hand quilting designs to life. Find your perfect match on our website.