

Every quilter, crafter, and sewing entrepreneur knows the feeling: a growing mountain of fabric scraps too beautiful to discard but too small for a main project. This isn't waste; it's a treasure chest of untapped potential waiting to be unlocked. Instead of letting those colorful remnants gather dust, what if you could transform them into stunning, functional, and even profitable creations? This is your definitive guide to finally conquering that pile.
This comprehensive listicle moves beyond the obvious, offering a deep dive into practical and inspiring projects that definitively answer the question, what to do with scraps of fabric? You'll discover how to turn the smallest remnants into everything from charming home décor like potholders and coasters to intricate art quilts and sellable patchwork totes. We're not just providing ideas; we're giving you actionable mini-instructions, material lists, and pro tips for batching your work for maximum efficiency.
You will learn exactly how to pair your unique scrap collection with the right high-quality materials, such as specific batting types, to ensure your finished items are not only beautiful but also durable and professional-grade. This is about more than just clearing clutter. It’s about transforming perceived leftovers into valuable assets for your home, your hobby, or your small business. Prepare to see your scrap bin not as a problem to be solved, but as an endless source of inspiration and opportunity.
1. Patchwork Quilts from Fabric Scraps
The most timeless answer to "what to do with scraps of fabric" is to create a patchwork quilt. This foundational craft transforms even the smallest remnants into a functional work of art, giving new life to fabrics that might otherwise be discarded. By stitching together various pieces, you create a unique quilt top that tells a story through color, pattern, and texture.
This approach is perfect for quilters who want to create heirloom-quality items with deep personal meaning. A scrap quilt is more than just a blanket; it’s a mosaic of memories from past projects.
How to Get Started
Creating a scrap quilt involves sewing small fabric pieces together to form a larger "fabric" or quilt top. This pieced top is then layered with batting and a backing fabric to create the final quilt sandwich. Popular and accessible patterns for beginners include simple squares, half-square triangles, or easy-to-assemble blocks like the classic Nine-Patch.
Pro Tip: Don't feel pressured to tackle a king-sized quilt right away. Start with a smaller project like a baby quilt or a lap quilt to master the technique and see quick, rewarding results from your scrap bin.
Actionable Tips for Success
- Sort Before You Sew: Organize your scraps by color, value (light, medium, dark), or size. This pre-planning step saves immense time and helps create a more cohesive design.
- Precision is Key: Use a rotary cutter, acrylic ruler, and a self-healing mat for accurate cuts. Consistent sizing is crucial for your patchwork pieces to fit together perfectly.
- Choose Your Batting Wisely: The right batting is essential for a durable and beautiful quilt. When working with numerous seams in a patchwork top, select a high-quality batting that resists bearding (fibers migrating through the fabric). To ensure your creation lasts, you can explore the different types and learn more about what is quilt batting and how to choose the best one.
For a visual guide on turning tiny scraps into a beautiful, modern quilt block, check out this tutorial:
2. Fabric Scrap Bunting and Garland Decorations
Another delightful answer to "what to do with scraps of fabric" is to create festive bunting and garlands. This simple, high-impact project turns mismatched remnants into charming, reusable decorations for parties, holidays, or everyday home decor. By stitching colorful fabric flags onto a strip of bias tape or twine, you can add a touch of handmade cheer to any space.
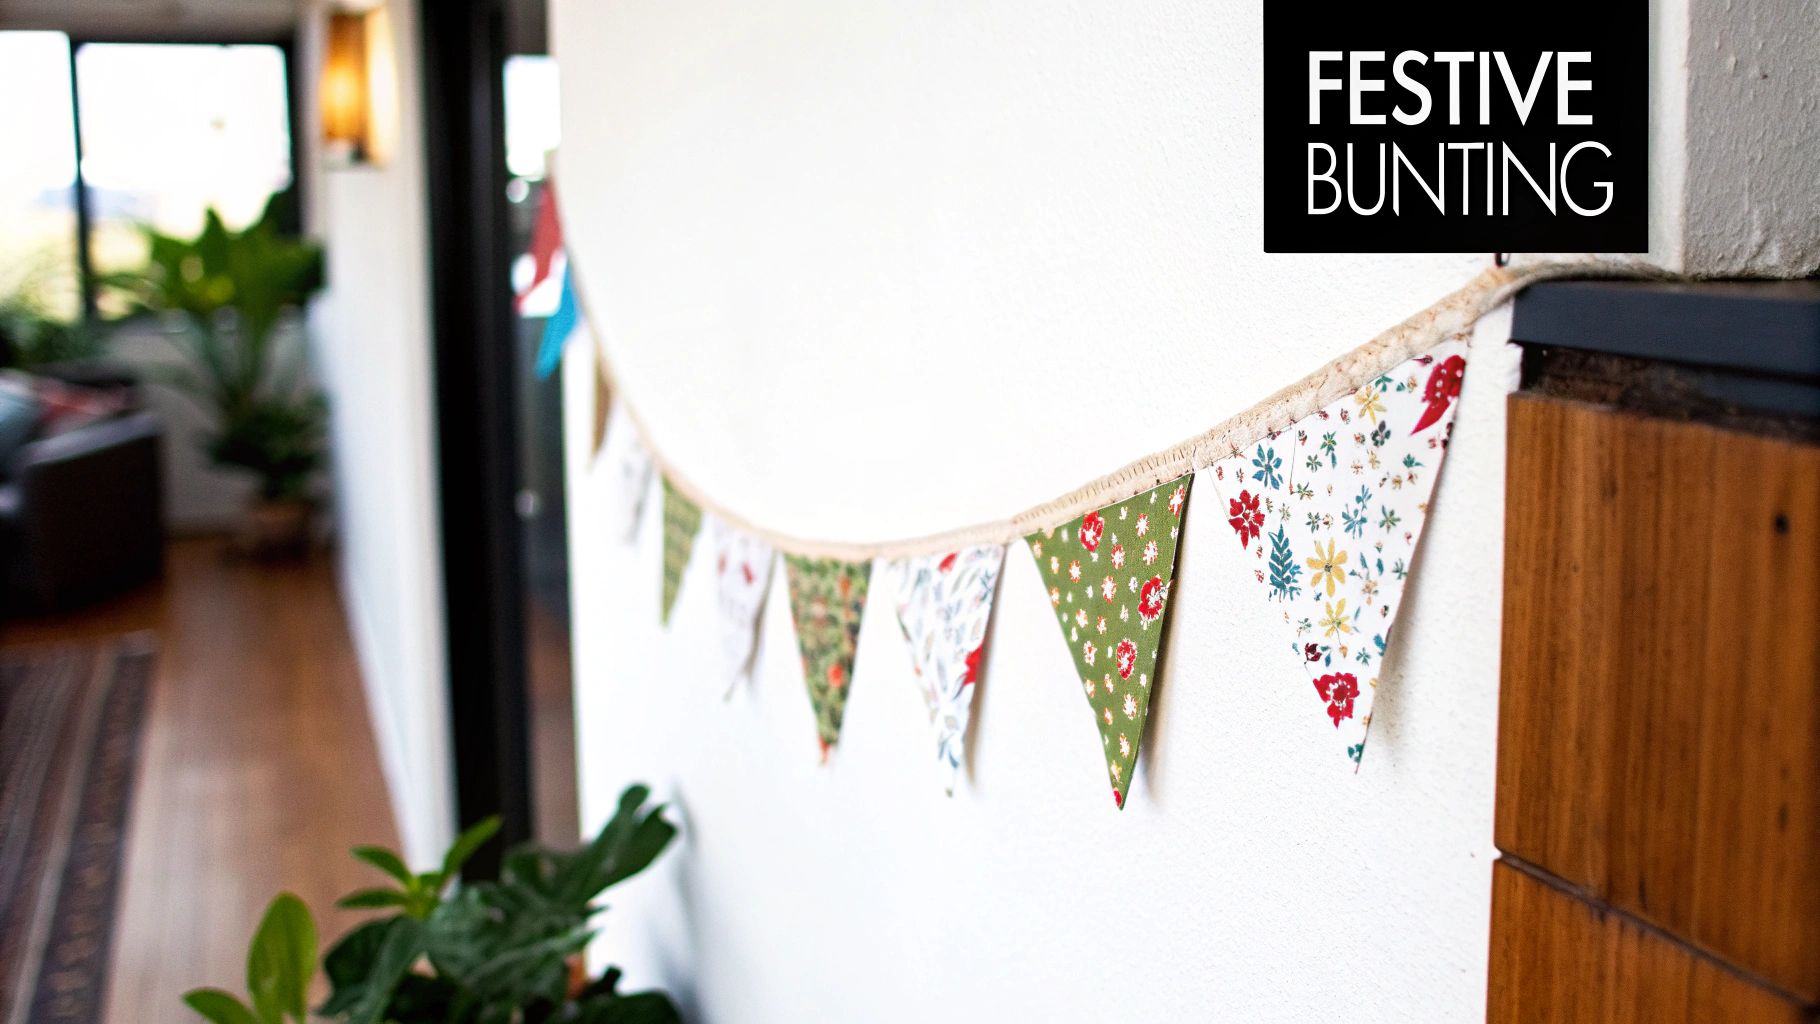
This approach is perfect for using up awkwardly shaped or smaller scraps that aren't quite big enough for quilting blocks. Bunting is a fantastic beginner-friendly project that offers a quick and satisfying creative outlet, allowing you to craft personalized decor for specific events like baby showers, seasonal celebrations, or birthday parties.
How to Get Started
Creating fabric bunting involves cutting your scraps into uniform shapes, typically triangles or flags, and sewing them onto a long strip of fabric or ribbon. You can make single-layer flags with pinked edges for a rustic look or sew two triangles right-sides together and turn them for a more polished, finished appearance. The flags are then evenly spaced and stitched securely to a length of double-fold bias tape.
Pro Tip: To create a no-sew version, cut single-layer triangles with pinking shears to prevent fraying and attach them to a piece of twine or ribbon using hot glue. This is a great way to involve kids in the crafting process.
Actionable Tips for Success
- Create a Consistent Template: Use a piece of cardboard or a quilting ruler to create a triangle template. This ensures all your flags are a uniform size and shape, giving your finished bunting a professional look.
- Press for Precision: Before attaching the flags to your binding tape, press them flat with an iron. Also, press the binding tape in half to create a crisp crease, making it easier to encase the raw edges of your flags.
- Secure Your Stitches: When sewing the flags to the binding, be sure to backstitch at the beginning and end of each flag. This small step adds durability, especially if the bunting will be used outdoors or handled frequently.
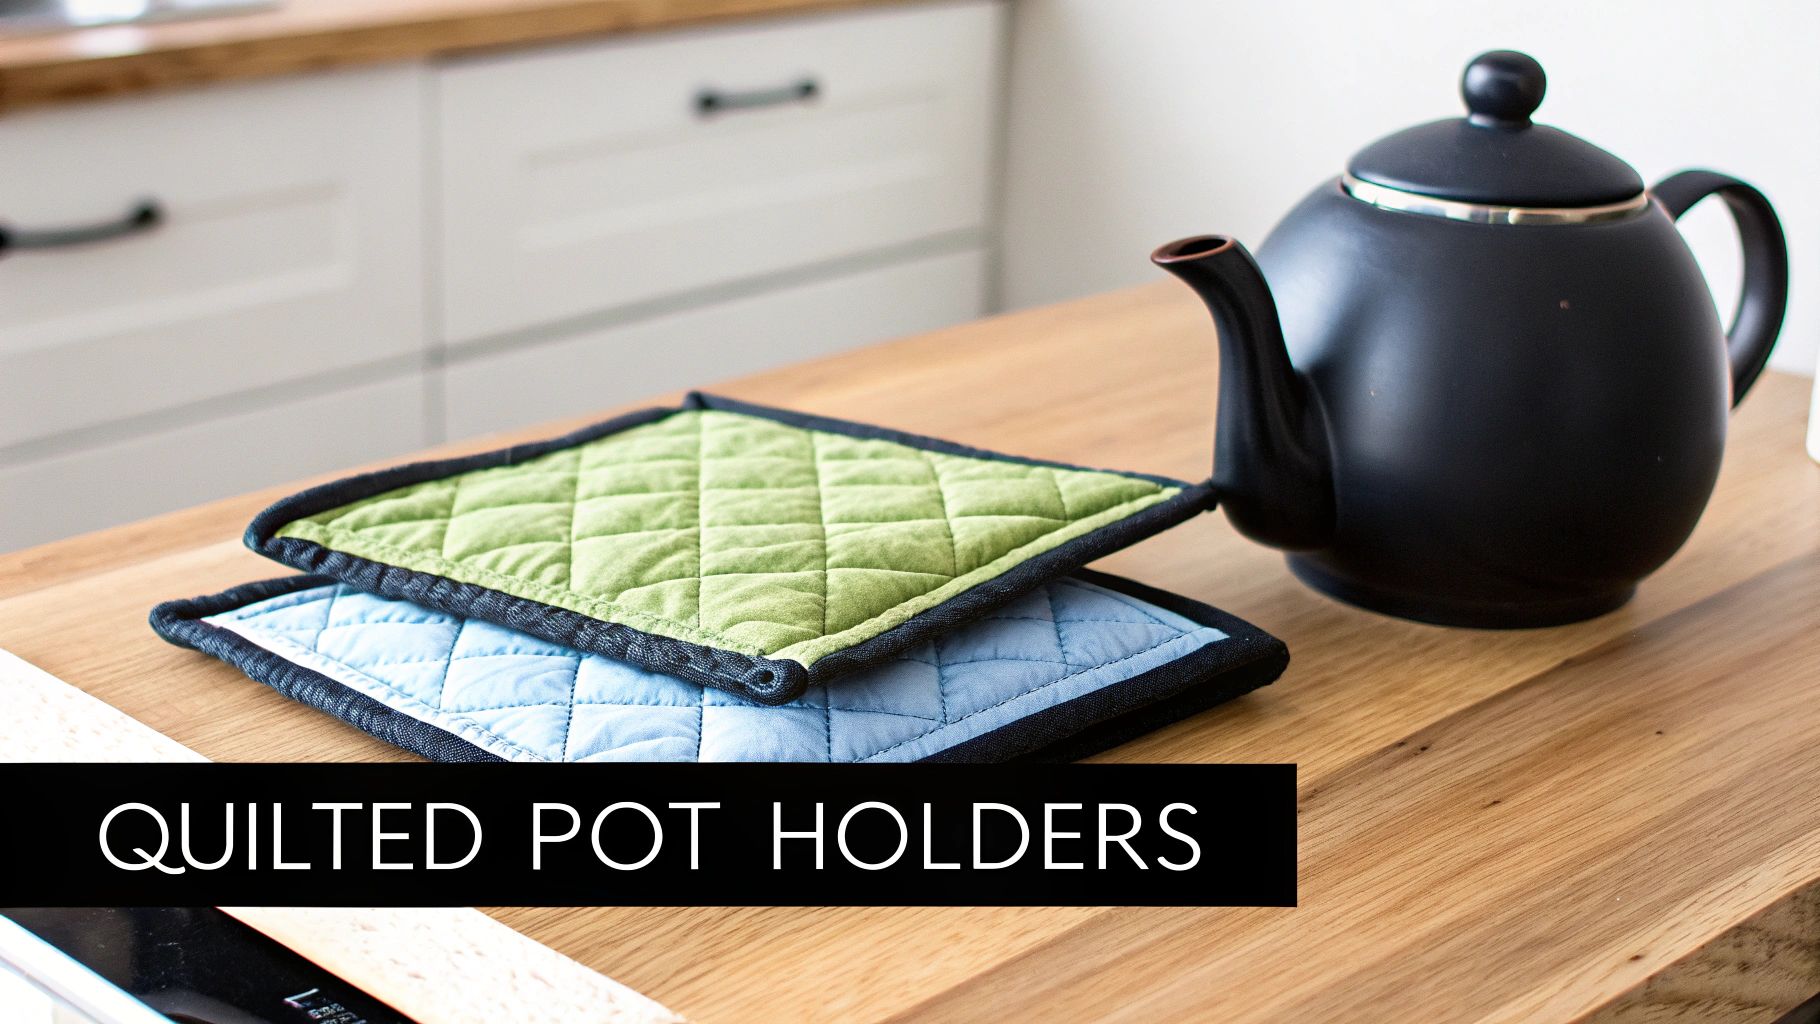
3. Fabric Scrap Pot Holders and Trivets
One of the most practical and satisfying answers to "what to do with scraps of fabric" is creating custom pot holders and trivets. These essential kitchen accessories transform small, colorful remnants into functional items that protect your hands and surfaces from heat, all while adding a handmade touch to your kitchen decor. They are quick to make, infinitely customizable, and excellent for using up odd-shaped fabric pieces.
This approach is perfect for crafters looking for a fast and rewarding project that yields a useful, giftable item. A set of matching pot holders or trivets is a thoughtful and practical present for housewarmings, holidays, or simply to brighten up your own space.
How to Get Started
Making a pot holder involves creating a mini quilt sandwich. You'll layer a decorative pieced top made from your scraps, insulating batting in the middle, and a backing fabric. The key to their function is the batting, which must be heat-resistant to provide proper protection. These small projects are also a great way to practice free-motion quilting or straight-line quilting techniques on a manageable scale.
Pro Tip: Create a small hanging loop from a folded fabric scrap and sandwich it into a corner before you sew on the binding. This simple addition makes your pot holders easy to store and display.
Actionable Tips for Success
- Choose the Right Materials: Stick to 100% cotton fabric, thread, and batting, as synthetic fibers like polyester can melt when exposed to high heat. This is a critical safety consideration.
- Double Up on Batting: For maximum heat resistance, use at least two layers of a quality insulated batting like Insul-Bright or a dense cotton batting. Learn more about the best batting for potholders and what to look for.
- Quilt Densely: Stitching your layers together with lines no more than 1-2 inches apart prevents the batting from shifting or bunching during use and washing, ensuring your pot holder remains effective and durable.
- Finish with a Strong Binding: Use a durable, neatly applied binding to encase the raw edges. Double-fold bias tape is an excellent choice as it holds up well to frequent use and laundering.
4. Fabric Scrap Coasters and Table Linens
One of the most practical and satisfying answers to "what to do with scraps of fabric" is creating custom coasters and table linens. This project turns even modest-sized scraps into functional items that protect furniture and add a personalized, handmade touch to any home. From simple coasters to elaborate placemats, these small-scale creations are perfect for using up precious remnants you couldn’t bear to toss.
This approach is ideal for crafters seeking quick, giftable projects or small business owners looking to create popular, easy-to-ship products. A set of matching coasters or placemats can instantly elevate a dining space or make a thoughtful, bespoke gift.
How to Get Started
Creating a scrap fabric coaster involves making a mini quilt sandwich: a top fabric (your scrap), a layer of batting, and a backing fabric. These layers are sewn together and the edges are finished, often with a simple topstitch or a decorative binding. You can use a single pretty scrap for the top or piece together even smaller bits for a miniature patchwork design.
Pro Tip: Make these in batches for efficiency. Cut several sets of squares at once, chain piece them during sewing, and you can produce a full set of coasters in under an hour. This is a great way to quickly reduce your scrap pile.
Actionable Tips for Success
- Choose the Right Batting: Use a thin, low-loft batting like cotton or a cotton blend. This provides just enough protection and absorption without making the coaster so thick that a glass becomes unstable on top of it.
- Precise Cutting is Essential: Use a rotary cutter and an acrylic ruler to cut your fabric and batting into perfectly uniform squares or circles. For a standard coaster, a 4.5-inch or 5-inch square is a great starting size.
- Create Cohesive Sets: Group your scraps by color, theme, or fabric collection to create attractive sets of four, six, or eight. This makes them more appealing as gifts or for sale.
- Secure with Quilting: A simple "X" quilted from corner to corner, or a few straight lines, is enough to secure the layers and prevent the batting from shifting during washing.
5. Appliqué Wall Hangings and Art Quilts
Elevate your fabric scraps from mere leftovers to fine art by creating appliqué wall hangings and art quilts. This highly expressive technique involves layering smaller pieces of fabric onto a background to form images or abstract designs. It’s an ideal solution for what to do with scraps of fabric when you want to create a stunning decorative piece rather than a purely functional item.
This approach is perfect for quilters who see themselves as artists, using fabric as their paint and thread as their brush. An art quilt allows you to explore storytelling, abstract concepts, or detailed representational scenes, making it a powerful medium for personal expression and a striking addition to any home's decor.
How to Get Started
Creating an appliqué art quilt begins with a background fabric and a collection of scraps. The design is often sketched out first, then fabric pieces are cut to shape, arranged on the background, and secured in place before being stitched down. The final piece is then layered with batting and backing and quilted to add texture, depth, and dimension. Common styles include floral motifs, intricate landscapes, or modern geometric compositions.
Pro Tip: Don’t be afraid of raw-edge appliqué for a more modern, textural look. Leaving the edges of your scrap pieces unfinished and allowing them to fray slightly can add incredible artistic detail and character to your finished wall hanging.
Actionable Tips for Success
- Plan with Fusible Webbing: Use a fusible webbing product to temporarily adhere your appliqué pieces to the background fabric. This holds them securely in place while you stitch, ensuring a clean and precise result. To master this technique, you can explore the different types and learn more about using fusible interfacing for quilting.
- Choose the Right Batting: For a wall hanging that lies flat and hangs beautifully, opt for a low-loft batting. Cotton or cotton-blend battings are excellent choices as they provide stability without adding excessive bulk.
- Add a Hanging Sleeve: For professional presentation, sew a fabric tube or "sleeve" to the back of your finished art quilt. This allows you to easily insert a dowel or rod for secure and even hanging.
6. Stuffed Toys and Plushies from Fabric Scraps
Transforming your fabric remnants into soft, cuddly toys is a heartwarming solution for what to do with scraps of fabric. This creative project turns leftover pieces into cherished gifts for children, playful toys for pets, or unique decorative plushies. By combining scraps of different colors, textures, and patterns, you can craft truly one-of-a-kind characters.
This approach is ideal for crafters who enjoy character design and detailed work. Handmade toys carry a special charm and personal touch, making them meaningful presents and popular items for small businesses or craft fairs. They are a fantastic way to use up irregularly shaped or smaller pieces that don't fit into standard patchwork.
How to Get Started
Making a stuffed toy involves cutting fabric pieces according to a pattern, sewing them together while leaving a small opening, and then turning the creation right-side out. The toy is then filled firmly with a soft stuffing like polyester fiberfill before the opening is stitched closed. You can find countless free and paid patterns online for everything from simple geometric monsters to elaborate animal figures.
Pro Tip: Start with a simple shape like a whale, a cloud, or a monster pillow. These patterns often have fewer complex curves and are forgiving for beginners, allowing you to focus on achieving neat seams and even stuffing.
Actionable Tips for Success
- Prioritize Safety First: If making toys for young children, always pre-wash fabrics to remove any residual chemicals. Embroider facial features like eyes and noses instead of using small buttons or plastic parts, which can be choking hazards.
- Reinforce for Durability: Use a short stitch length and consider double-stitching seams, especially on toys intended for lots of play. This "safety seam" adds strength and prevents the stuffing from poking through over time.
- Choose the Right Stuffing: Select a high-quality, hypoallergenic stuffing material that is washable and resilient. Proper stuffing technique is key; use small tufts of fiberfill at a time to avoid lumps and ensure your plushie is firm but cuddly.
7. Fabric Scrap Patchwork Bags and Totes
One of the most practical and stylish solutions for what to do with scraps of fabric is to create stunning patchwork bags and totes. This project transforms your colorful remnants into a wearable, functional accessory. By piecing together scraps, you create unique fabric panels that can be sewn into everything from sturdy market totes to small cosmetic pouches.
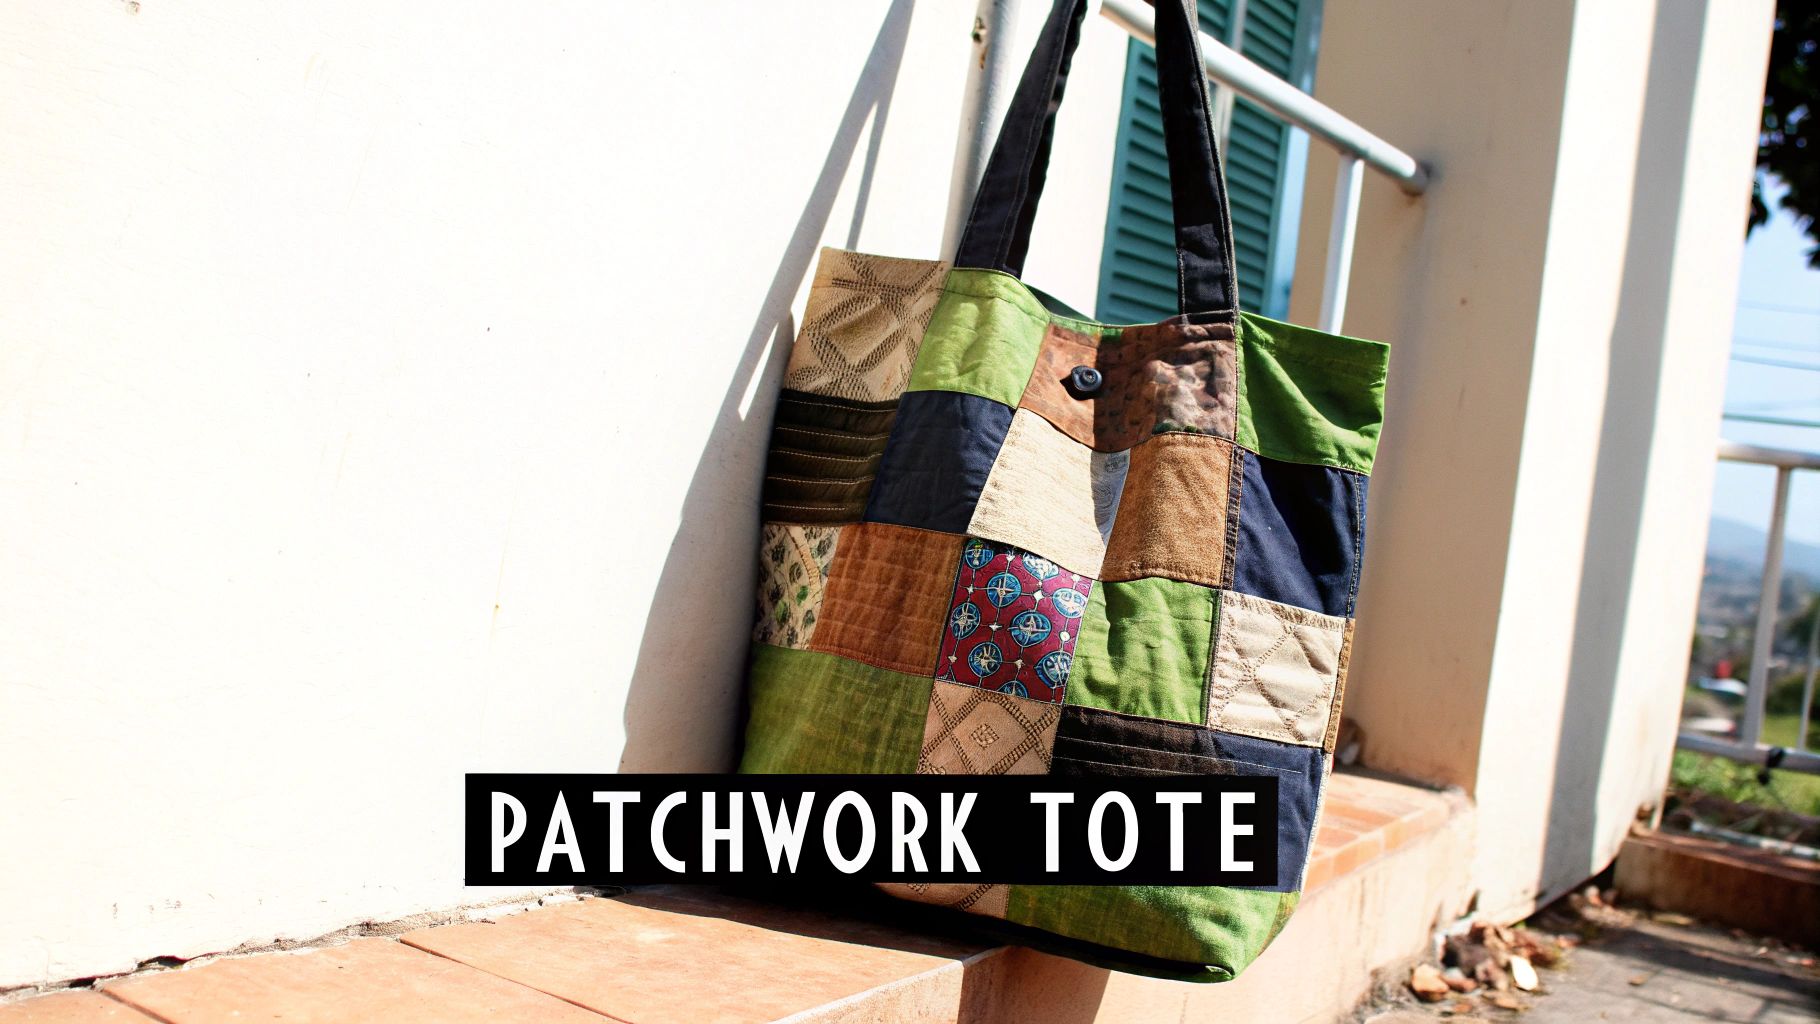
This method is ideal for crafters who love seeing their beautiful fabric scraps get a second life outside the home. A handmade patchwork bag is not just a useful item; it’s a personal statement piece and a walking gallery of your favorite past projects, making it a fantastic gift or a popular item to sell.
How to Get Started
The process begins by sewing your fabric scraps together to create larger panels, similar to making a quilt top. These panels are then stabilized with interfacing or batting to give the bag structure and durability. Once your panels are prepared, you can cut out your pattern pieces and construct the bag, adding handles, pockets, and linings as desired.
Pro Tip: For a professional finish and added strength, quilt your patchwork panels to a layer of sturdy batting before cutting out your bag pattern pieces. This adds beautiful texture and ensures your bag holds its shape over time.
Actionable Tips for Success
- Stabilize for Structure: A bag's body needs support. Fuse a quality interfacing or sew in a layer of firm batting to your patchwork panels. This prevents sagging and gives your tote a more professional look.
- Reinforce Key Stress Points: Handles and corners bear the most weight. Stitch over handle attachment points multiple times, using an "X" in a box pattern for maximum durability.
- Finish Your Seams: Unfinished internal seams can fray and weaken your bag. Enclose them with bias tape or use a zigzag or overlock stitch for a clean, long-lasting interior.
- Select Quality Materials: The durability of your bag also depends on the initial fabric quality. For guidance on choosing fabrics that will stand up to wear and tear, explore our resources to find the best fabric for quilting and other projects.
8. Fabric Scrap Crazy Quilts and Yarn-Embellished Pieces
One of the most artistic answers to "what to do with scraps of fabric" is creating a crazy quilt. This historical technique abandons traditional block structures and geometric precision, instead embracing irregularly shaped scraps arranged in an abstract, collage-like fashion. The true magic, however, lies in the embellishment, where decorative stitches, embroidery, beads, and yarn transform the seams into intricate works of art.
This approach is ideal for sewists who view their scrap pile as a painter's palette. A crazy quilt is less about utilitarian function and more about showcasing texture, color, and personal expression, turning fabric remnants from past projects into a stunning textile masterpiece.
How to Get Started
Crazy quilting involves arranging and appliquéing random scraps onto a foundation fabric, often a simple muslin or a piece of batting. Once the scraps cover the foundation, the seams are concealed and decorated with elaborate embroidery stitches, such as herringbone, feather, or chain stitches. The piece can then be further adorned with beads, buttons, ribbons, and even small charms.
Pro Tip: Use a foundation-piecing method for stability. Stitch your first scrap to a piece of thin batting, then continue adding scraps around it, stitching and flipping until the foundation is covered. This keeps irregular shapes from distorting.
Actionable Tips for Success
- Plan Your Layout First: Before sewing, arrange your scraps on the foundation fabric to get a feel for the color flow and composition. This helps create a balanced, visually pleasing design despite the "crazy" nature of the technique.
- Choose a Thinner Batting: Since crazy quilts often feature heavy embellishments, using a lightweight, low-loft batting like a thin cotton or cotton-poly blend will keep the final piece from becoming overly bulky and difficult to handle.
- Embellish with Intention: Use a variety of threads, from standard embroidery floss to metallic threads and silky yarns, to add depth and interest. Plan which stitches you'll use along each seam to create a cohesive yet diverse look.
- Incorporate Meaningful Elements: This technique is perfect for memory quilts. Include scraps from old clothing, bits of lace from a wedding dress, or buttons from a grandparent’s collection to embed personal stories directly into the fabric.
9. Fabric Scrap Placemats and Table Runners
Elevate your dining experience by transforming fabric scraps into stunning placemats and table runners. This practical project turns small, coordinated fabric pieces into functional art for your home, protecting surfaces while adding a personalized touch to your décor. It's a fantastic way to use those medium-sized scraps that are too big to toss but too small for larger projects.
This idea is perfect for sewists who want to create useful, everyday items that showcase their skills. A set of custom placemats or a unique table runner can brighten a room, celebrate a holiday, or become a cherished handmade gift. It’s an ideal answer to what to do with scraps of fabric when you want a quick and gratifying result.
How to Get Started
Creating a scrap placemat or table runner involves piecing together your fabric remnants to form the top layer. This top is then layered with batting and a backing fabric, quilted, and finished with binding around the edges. You can use simple patchwork, improv piecing, or even appliqué to create designs ranging from modern and minimalist to festive and elaborate.
Pro Tip: Create reversible placemats by using a different pieced design or a single complementary fabric for the backing. This gives you two distinct looks in one set, offering more versatility for your table settings.
Actionable Tips for Success
- Choose the Right Batting: A medium-weight cotton or cotton-blend batting provides the perfect structure and heat protection without being too bulky. It gives the placemat a quality feel and a flat, stable surface for dishes.
- Pre-wash for Stability: Always pre-wash your fabric scraps before sewing. This prevents uneven shrinkage and distortion after the first wash, ensuring your finished placemats and runners remain flat and beautiful.
- Create Coordinated Sets: Plan your project to make a set of four, six, or eight placemats. Grouping your scraps by color or theme beforehand ensures a cohesive and professional-looking collection for your dining table.
- Add a Professional Finish: Use coordinating fabric to create a bias or straight-grain binding. Neatly binding the edges not only encloses the raw seams but also gives your project a durable and polished frame.
10. Fabric Scrap Binding and Prairie Point Quilts
Instead of viewing finishing touches as separate from your main project, integrate your scraps directly into the structure and embellishment of your quilts. Creating scrappy binding and prairie points are brilliant techniques for what to do with scraps of fabric, turning leftover strips and squares into high-impact design elements. These methods not only use up remnants but add a professional, custom-made feel to your work.
This approach is perfect for quilters who love texture and want to add a unique, dimensional flair to their projects. Rather than a simple, single-fabric edge, scrappy binding creates a playful "frame," while prairie points add a delightful, tactile border or internal pattern that elevates the entire design.
How to Get Started
Scrappy binding involves sewing various fabric strips (typically 2.5 inches wide) end-to-end to create one long, continuous binding strip. Prairie points are small, folded fabric triangles that are inserted into the seam allowance around a quilt's edge before the binding is attached, or even incorporated within the quilt top itself. These techniques transform the finishing process from a chore into a creative opportunity.
Pro Tip: When making scrappy binding, arrange your fabric strips on a design wall or the floor first. This allows you to plan the color flow and ensure a visually pleasing, random-yet-cohesive look before you start sewing them together.
Actionable Tips for Success
- Consistent Width is Crucial: While the lengths of your scrap strips will vary, their width must be uniform. Use a rotary cutter and ruler to trim all binding pieces to the same width (e.g., 2.25" or 2.5") for a professional finish.
- Pre-Fold Your Points: Make the assembly process smoother by pressing all your prairie points before you start attaching them to the quilt. This batching step saves time and ensures each point is crisp and uniform.
- Secure Your Embellishments: Prairie points add bulk to the quilt's edge. When quilting, be sure to stitch them down securely, often by stitching "in the ditch" or quilting along the seam line where they are attached to prevent them from flopping.
- Choose a Supportive Batting: An edge treatment with extra dimension needs a stable foundation. Use a quality batting that holds its shape well and won't thin out at the edges, ensuring your prairie points look sharp and your binding lies flat. For a firm yet soft foundation that supports these details, you might explore options like those discussed in choosing the best batting for your project.
10 Fabric Scrap Projects Compared
| Item | 🔄 Implementation Complexity | ⚡ Speed / Efficiency | 📊 Expected Outcomes | 💡 Ideal Use Cases | ⭐ Key Advantages |
|---|---|---|---|---|---|
| Patchwork Quilts from Fabric Scraps | High — precise piecing, extensive quilting | Slow — time‑intensive assembly | Heirloom‑quality full quilts with strong visual impact | Large quilts, heirlooms, extensive scrap‑use projects | Maximizes fabric use; unlimited patterns; cost‑effective |
| Fabric Scrap Bunting and Garland Decorations | Low — simple cutting and seam attachment | Fast — quick to assemble from tiny scraps | Decorative, reusable accents with limited structure | Parties, seasonal decor, small‑scrap use | Uses smallest scraps; beginner‑friendly; customizable |
| Fabric Scrap Pot Holders and Trivets | Medium — requires heat‑resistant construction | Moderate — short projects but careful assembly | Functional heat protection when proper batting used | Kitchen accessories, gifts, practical scrap use | Practical and durable; washable; good scrap utilization |
| Fabric Scrap Coasters and Table Linens | Low–Medium — precise cutting and secure binding | Fast — quick turnaround for sets | Functional table protection; neat finished look | Beginner projects, gift sets, scrap‑busting | Economical; quick to make; ideal for beginners |
| Appliqué Wall Hangings and Art Quilts | High — design planning + advanced techniques | Slow — detailed appliqué and quilting | High artistic impact; display or gallery pieces | Art quilts, statement decor, creative expression | Highly personalized; uses odd‑shaped scraps; gallery‑quality |
| Stuffed Toys and Plushies from Fabric Scraps | Low — simple sewing but safety‑sensitive | Fast — quick small‑scale sewing | Soft, personalized toys (limited batting relevance) | Children’s toys, pet toys, quick gifts | Uses tiny scraps; minimal materials; very accessible |
| Fabric Scrap Patchwork Bags and Totes | Medium — structural assembly, reinforced seams | Moderate — more construction steps for durability | Durable, usable bags with stable shape when batting used | Market totes, pouches, eco‑friendly accessories | Functional and reusable; unique upcycled designs |
| Fabric Scrap Crazy Quilts and Yarn‑Embellished Pieces | High — sewing + extensive embroidery/beading | Slow — embroidery‑heavy and detail‑oriented | Richly textured, highly decorative art pieces | Historical/arty quilts, memory pieces, textile art | Accepts any scrap shape; extremely expressive; no rigid planning |
| Fabric Scrap Placemats and Table Runners | Medium — larger scale piecing and binding | Moderate — more fabric/time than coasters | Functional coordinated table linens, washable | Dining sets, seasonal table decor, reversible designs | Practical for sets; durable; good scrap consumption |
| Fabric Scrap Binding and Prairie Point Quilts | Medium–High — careful edge work and planning | Moderate — extra steps for points/binding | Decorative dimensional edges and efficient scrap use | Finishing quilts, adding texture, scrappy designs | Uses smallest scraps; adds professional 3‑D detail |
Turn Your Scraps into Success
Your journey through the world of fabric scraps has revealed a powerful truth: these aren't leftovers, they are the building blocks of your next creative breakthrough. We've explored how seemingly insignificant pieces can be transformed into stunning patchwork quilts, charming garlands, and functional household treasures like pot holders and coasters. Each tiny remnant holds the potential for a new story, a new product, or a new skill mastered.
The question of what to do with scraps of fabric is no longer a source of clutter-induced anxiety. Instead, it’s an invitation to innovate. By embracing techniques like appliqué for art quilts, crumb piecing for unique bags, or crafting whimsical stuffed toys, you are doing more than just cleaning your sewing room. You are engaging in an act of sustainable, resourceful artistry that honors every inch of the fabric you love.
From Scraps to Strategy: Key Takeaways
The difference between a hobbyist’s scrap pile and a professional’s curated inventory is strategy. The ideas presented in this guide, from batching projects like coasters to creating high-value items like art quilts, are designed to shift your mindset. See your scraps not as a problem to be solved, but as a resource to be leveraged.
- Functionality Sells: Projects with a clear purpose, such as placemats, pot holders, and tote bags, are consistently popular. They combine beauty with utility, making them ideal for gifts, craft fairs, or your own online shop.
- Artistry Inspires: Don’t underestimate the power of purely decorative pieces. Appliqué wall hangings, crazy quilts embellished with yarn, and miniature art quilts serve as powerful expressions of your unique creative voice.
- Quality is Non-Negotiable: The "scrap" label should never mean "subpar." The secret to elevating any scrap project is pairing it with high-quality foundational materials. A premium batting provides the structure, loft, and durability that transforms a simple patchwork into a polished, professional-grade product.
A Pro Tip to Remember: Your smallest scraps can become your biggest assets. The key is to invest in quality batting and thread, ensuring your finished items have the longevity and professional finish that buyers and gift recipients will appreciate.
Your Actionable Next Steps
Feeling inspired? It’s time to turn that inspiration into action. Don't let your scrap bin overflow for another week. Choose one project from this list that excites you and commit to starting it.
- Organize Your Scraps: Begin by sorting your scraps by color, size, or fabric type. This simple step makes it infinitely easier to visualize possibilities and grab what you need.
- Select Your First Project: Are you in the mood for a quick and satisfying win? Make a set of mug rugs. Want a longer, more meditative project? Start piecing a crumb quilt block.
- Gather Your Foundational Supplies: Before you sew a single stitch, ensure you have the right support materials. This means sharp needles, quality thread, and most importantly, the appropriate batting for your chosen project. For pot holders, you'll need a heat-resistant batting; for a wall hanging, a low-loft fusible batting is ideal.
Mastering what to do with scraps of fabric is a transformative skill for any quilter, crafter, or sewing entrepreneur. It's about seeing potential where others see waste. It’s about building a sustainable practice that minimizes fabric waste while maximizing creativity and profitability. Your scrap pile is a treasure chest waiting to be unlocked. With the right techniques and the best materials, you have everything you need to turn those colorful fragments into tangible success.
Elevate your scrap projects from homemade to professional with the right foundation. At Quilt Batting, we provide the premium Hobbs and Pellon batting that gives your creations structure, durability, and a polished finish. Explore our selection of batting by the roll at Quilt Batting and give your fabric scraps the high-quality support they deserve.